

Virtualization is mostly used for experimentation purposes since it can support another operating system. While you are running a virtual machine of Windows 10 or another operating system, it will use the resources of your main hardware. In the end, it is secure and aside from that, you can test any apps and operating system without having to purchase the main hardware. If you are in the virtualization environment, you must enable or install an application that supports the virtual machine. There are many virtual machine software however the official virtual machine of Microsoft is hyper V. In this post, I have also covered an alternative method called VMware workstation player that you can learn to create Windows 10 virtual machine easily.
Enable Virtualization
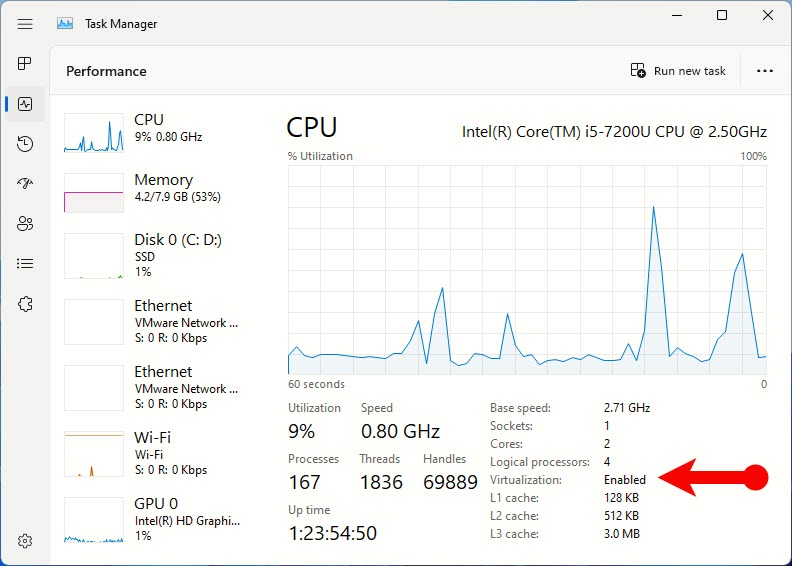
It is important to enable the virtualization from the BIOS before starting to create and install Windows 10 on a virtual machine. Although if the virtualization is already enabled, you can open the task manager (Right-click on the start menu> Choose Task Manager), go to the performance tab, and check the status.
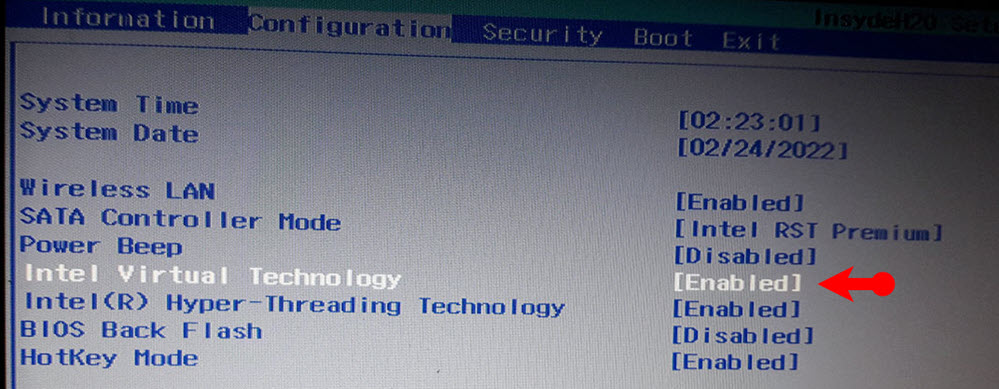
In case the virtualization is not enabled from BIOS, you have to boot your computer into the BIOS and enable it from there. In simple terms, you have to restart your computer, press the BIOS key then go to the configuration tab, find virtualization and enable it, then save the changes.
1. Create Windows 10 Virtual Machine using Hyper-V
Hyper-V is the official virtualization software provided by Microsoft and By default, this feature is not in enabled so, you must enable it from the Windows feature. After the Hyper-V is enabled, you will have the ability to create a windows 10 virtual machine anytime that you want.
Steps to Create Windows 10 Virtual Machine in Hyper-V:
- Launch a browser and search for download windows 10 ISO, and get it from the Microsoft website.
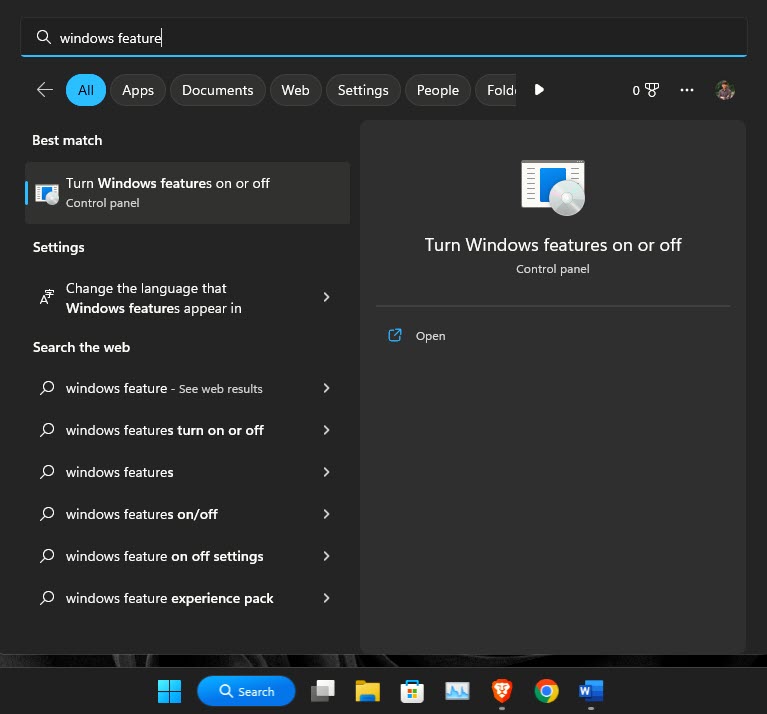
- Following that, click on the search icon in the taskbar and search for the Windows feature.
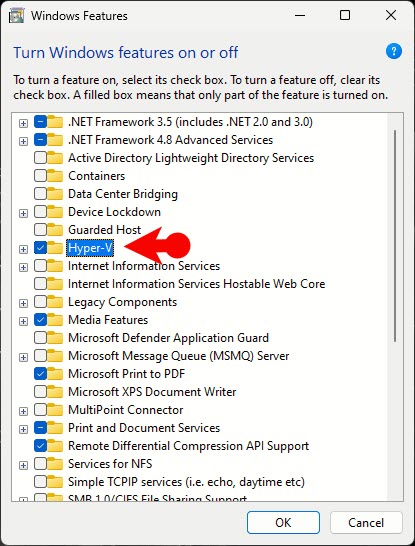
- In the windows feature look for hyper V check its box and click OK
- Wait a moment until the windows feature looks for the required things to enable the hyper V plus 11
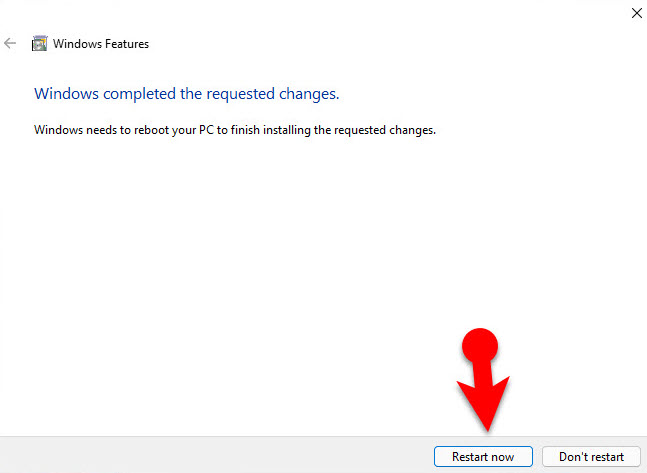
- Once the changes are done, the Windows feature requires restarting the computer to complete the tasks of enabling hyper V in Windows 11. So, restart it.
- Once your computer booted normally into windows 11, log in with your credentials and again click on the search icon this time search for hyper V manager and launch it.
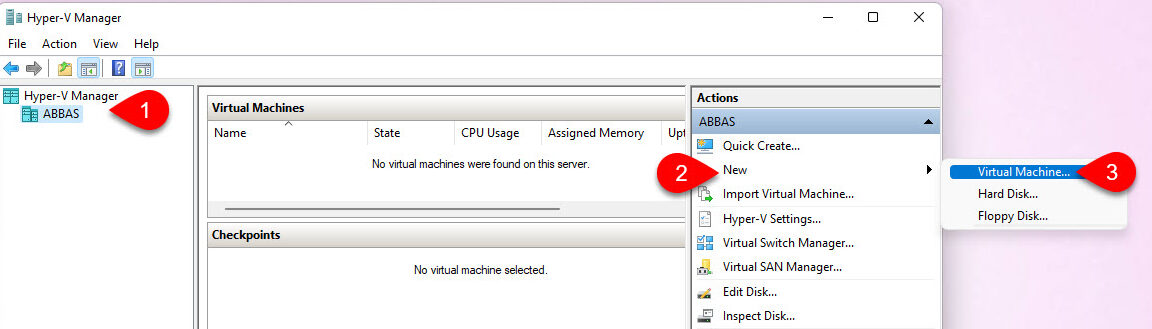
- Under the hyper V manager, connect it to your current user account. Then under the actions panel click on new and choose virtual machine.
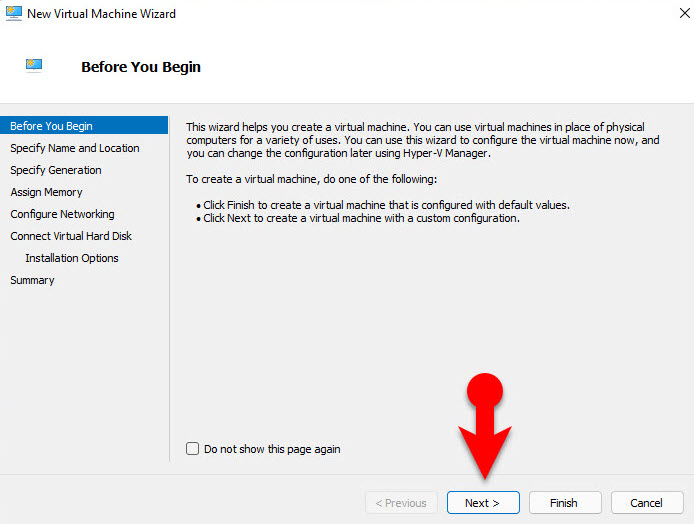
- Click next.
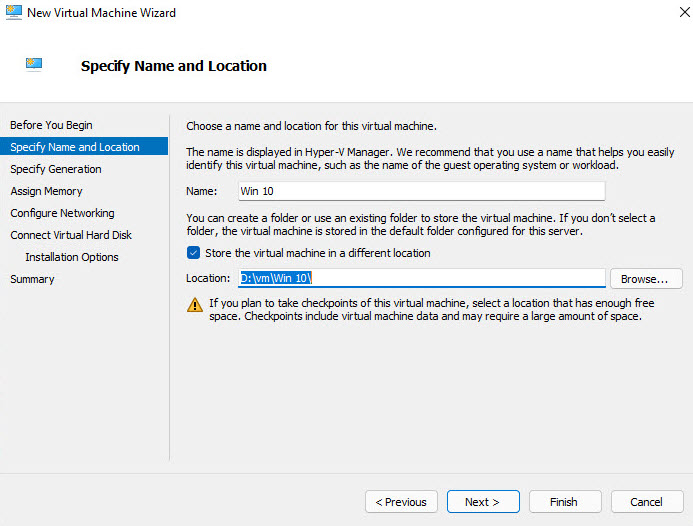
- In this step, you have to name the virtual machine Windows 10 and save it in a different place if you want.
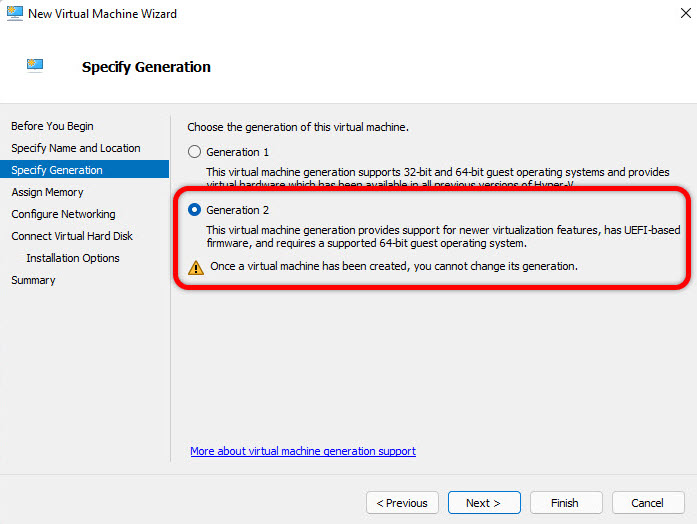
- You have to specify a generation for the virtual machine, I would recommend using generation 2, which means it is only supporting a 64-bit operating system. Generation one supports both 32 and 64-bit operating systems.
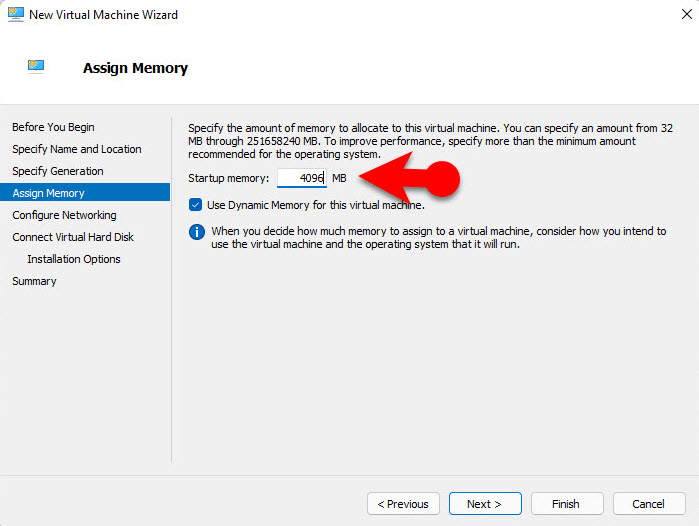
- Anyway, you have to assign 4GB of RAM for the Windows 10 virtual machine. You have to enter the amount in MB which means 4GB equals 4096 MB.
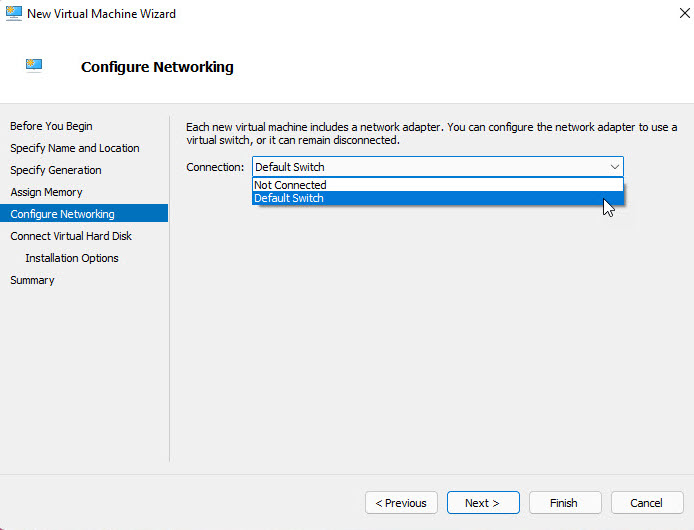
- You have to configure the Internet connection by selecting the default switch.
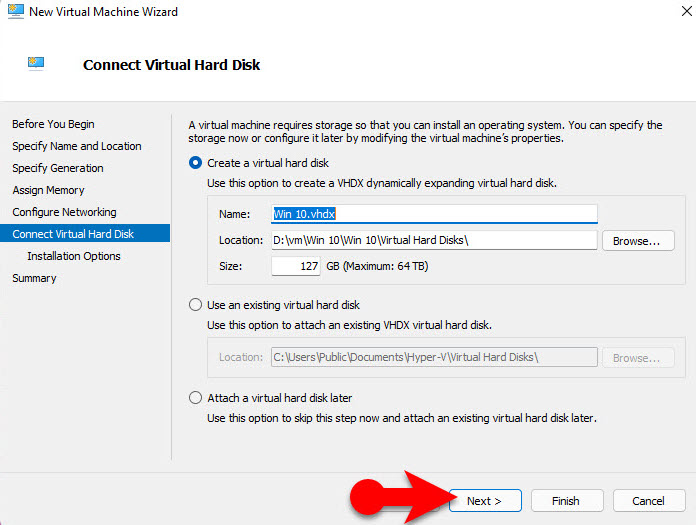
- In this step, you have to mention the storage size for Windows 10. For instance, the default storage that hyper V is recommending is 127GB while the maximum storage that hyper V support is 64 terabyte.
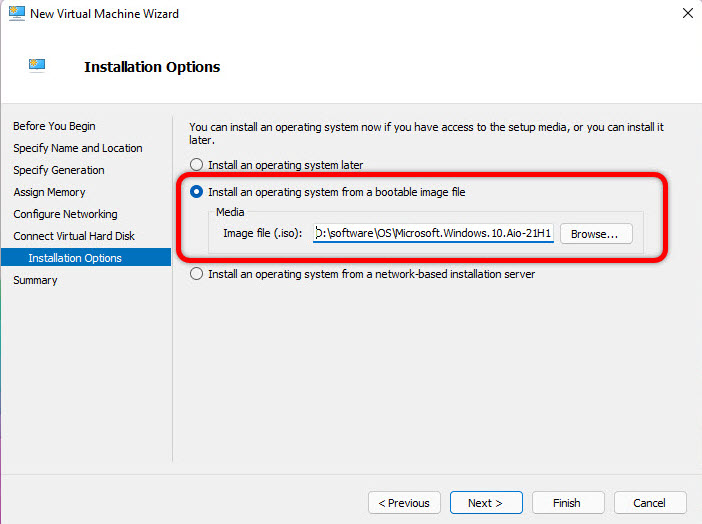
- You need to attach the Windows 10 ISO to the virtual machine. So choose the second option which is called “install an operating system from a bootable image file” then click browse and locate the Windows 10 ISO.
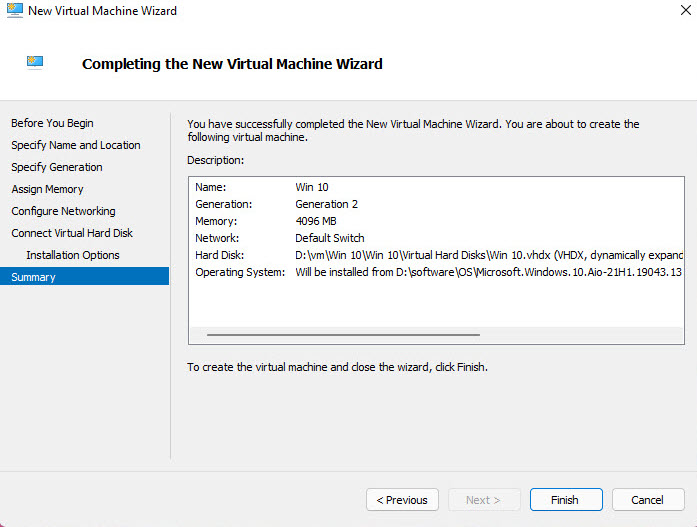
- It is the final step here. You can review all the settings that you have implemented until now on the virtual machine, if everything is good to go, click finish.
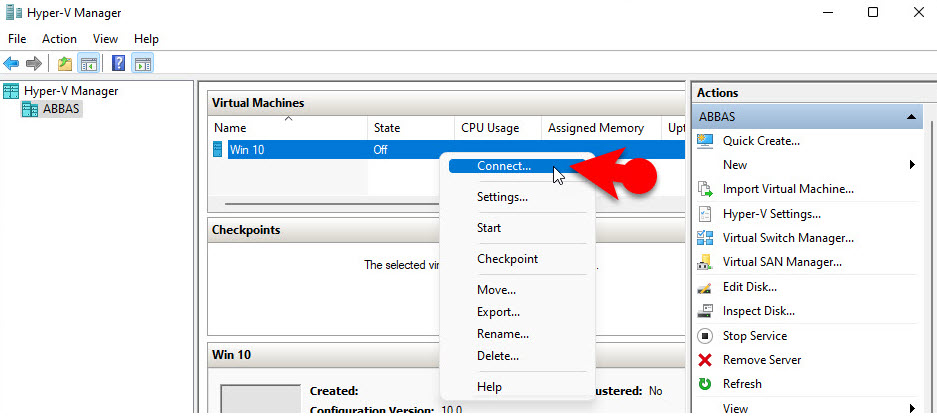
- The next step is to power on the Windows 10 virtual machine in hyper V so, right click on the virtual machine and choose to connect.
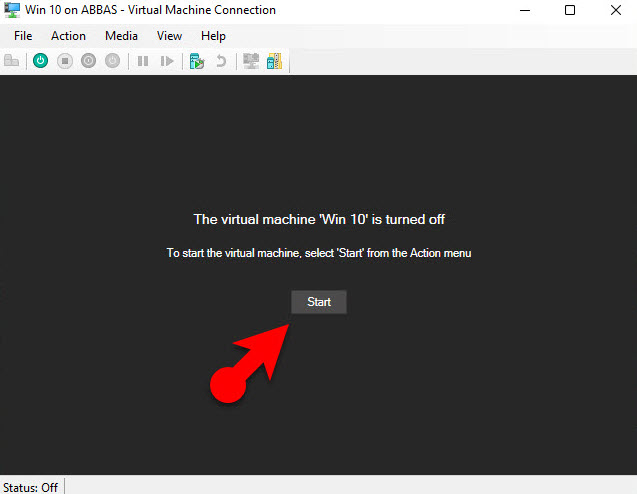
- In the new panel, you have to click on start and easily start installing Windows 10 in hyper V virtual.

2. Create Windows 10 Virtual Machine using VMware
VMware is a very giant company and among its services, there is a visualization application called VMware workstation, which comes in free and pro versions. you can test any type of operating system in your windows 11 directly including Windows 10.
Steps to Create Windows 10 Virtual Machine using VMware:
- Open a browser and search for VMware workstation players.
- Open one of the links and download the latest version of the VMware workstation player.
- You have to install the VMware orchestration player once it is downward.
- Launch the VMware workstation player.
- On the home page of the work VMware workstation Player choose to create a new virtual machine
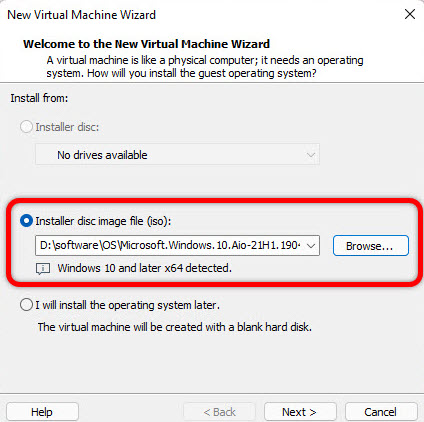
- Choose the installer disk image file(iso), then click on browse and locate the Windows 10 ISO image.
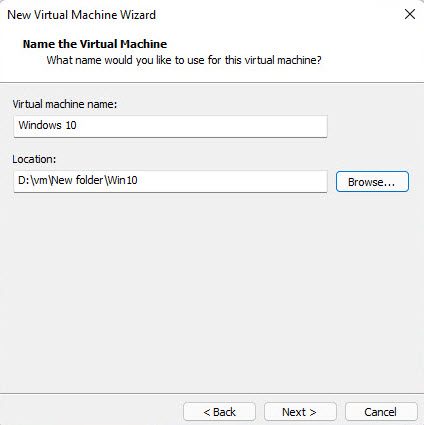
- Name the virtual machine and save it anywhere that you want
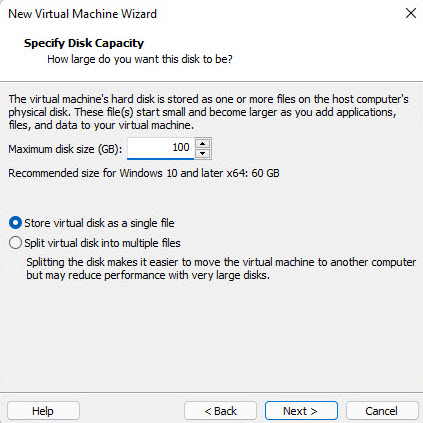
- Give 100 GB of storage for the Windows 10 virtual machine
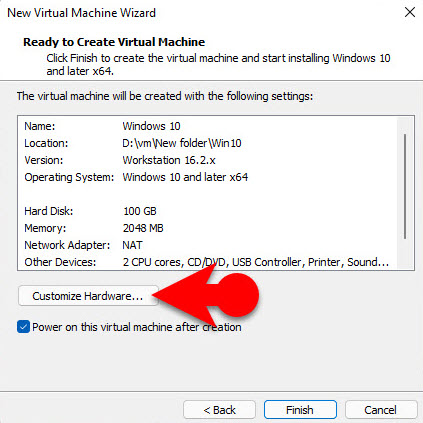
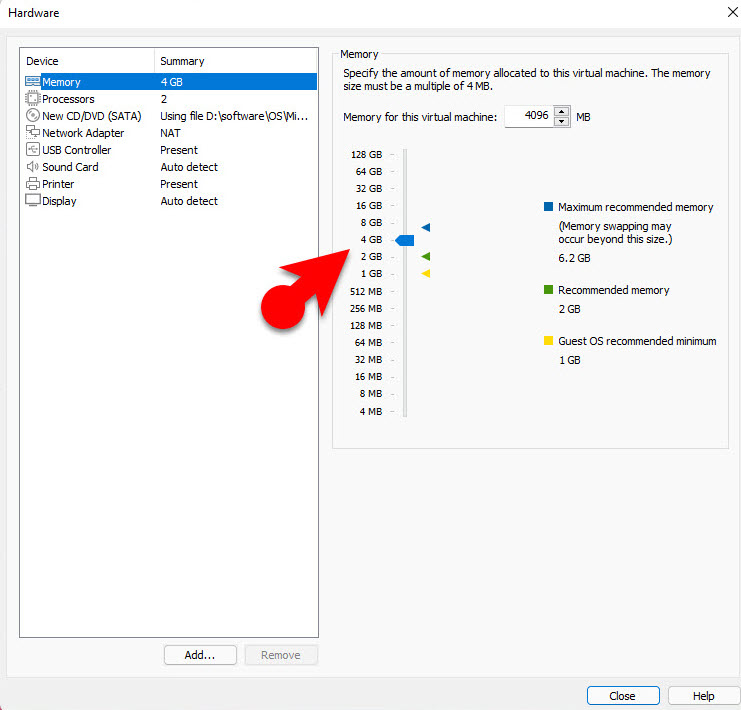
- On the final window click on customize hardware
- Go to the memory tab and increase the RAM to 4GB, close the window and click finish.
- Click on the play icon and start installing Windows 10 on the VMware workstation player in Windows 11.

Conclusion:
The first step to create a Windows 10 virtual machine in hyper V or VMware is to enable the virtualization. If it is enabled, go ahead and install the virtual machine software then create a virtual machine and install Windows 10. However, if it is not enabled you need to pay a visit to the BIOS and enable it from the configuration tab.