
Android Pie is the newest version of Android From Google which has major updates with it. Unfortunately, every device can’t support Android P, so if you can’t test them on your android mobile then certainly you have to test that on your computer. Actually, there are many ways where you can use it on PC. Such as the Android Studio and Virtual Machine like VirtualBox, VMware Workstation Pro, and Hyper-V. That’s why today I have decided to show you How to Install Android P on VMware on Windows 10, I hope you will like it. But before getting started you have to download the required files.
required Files:
- Download VMware Workstation Pro or VMware Player
- Download Android P ISO
How to Install Android P on VMware on Windows 10?
Step 1. Download and Install VMware workstation Pro or VMware Player
VMware Workstation Player is a free version of VMware Workstation Pro, where you use it for personal purposes. But if your budget is good you have to try the VMware Workstation Pro.
Once you have downloaded the VMware Workstation Player or Pro you have to Install it on your system. Installing is so much easy, but if you don’t know How to Install VMware Workstation Pro follow the below procedures.
- Double-click on the setup.
- On the welcome screen click next.
- Accept to the terms and conditions and click next.
- When you reached the custom setup page, don’t do anything, simply select next and move to the next step.
- After you reached the User experience settings, decide your self whether you need them or No. In this case, I will uncheck all the boxes because I don’t want to update the VMware and nor the community of VMware.
- On the shortcuts page click next.
- Now you are ready to Install the Vmware Workstation Pro, so click Install.
- When the Installation is finished, license or click finish closing the VMware Workstation Wizard.
Step 2. Create a New Virtual Machine for Android P
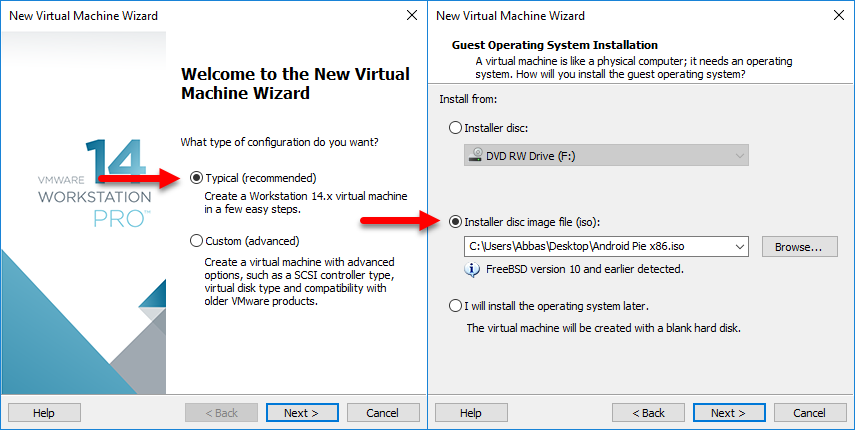
- When the Virtual Machine is installed on the system, simply select create a New Virtual Machine.
- After that on the New Virtual Machine Wizard select typical(Recommended) and click next.
- Then Select I will Install Disc image and locate the Android P ISO then click next.
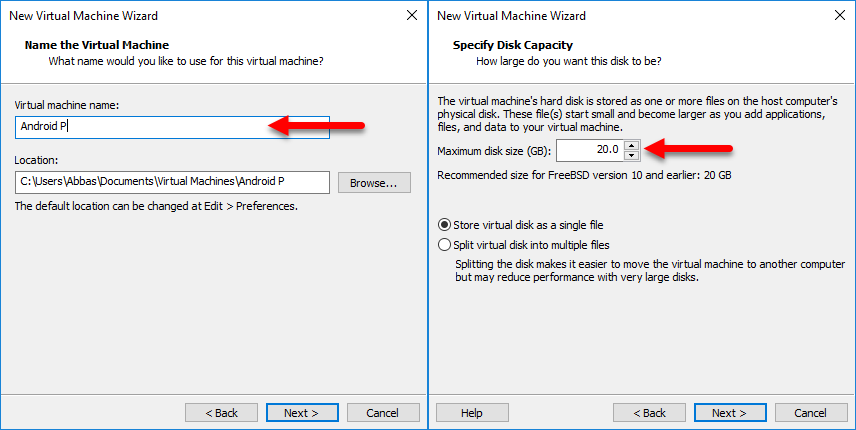
- After that, you have to name the Virtual Machine and save it in a location which has at least 10 GB Free storage.
- Now specify the amount of storage of Android P.
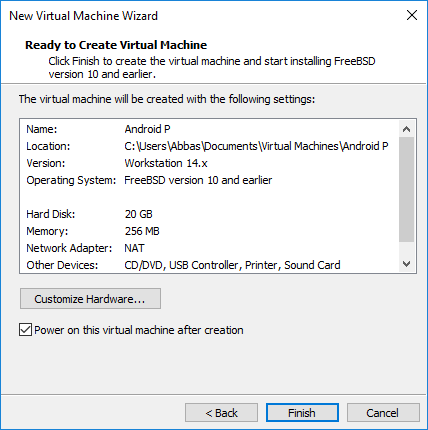
When you specify with all the above settings, you are now on the last step of creating a VM for Android P on VMware. So if you want to increase Amount of RAM and other stuff select customize and bring the changes as you wish. But when you are done click finish.
Step 3. Install Android P on Virtual Machine
Once the Virtual Machine is created, it is time to run the installation Wizard, so, simply click on Power on the Virtual Machine.
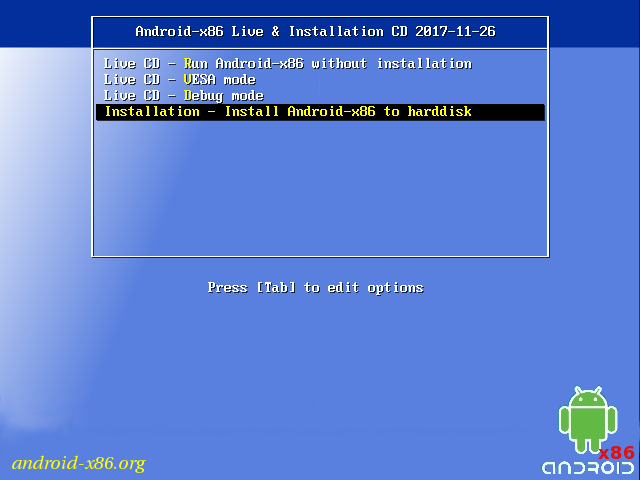
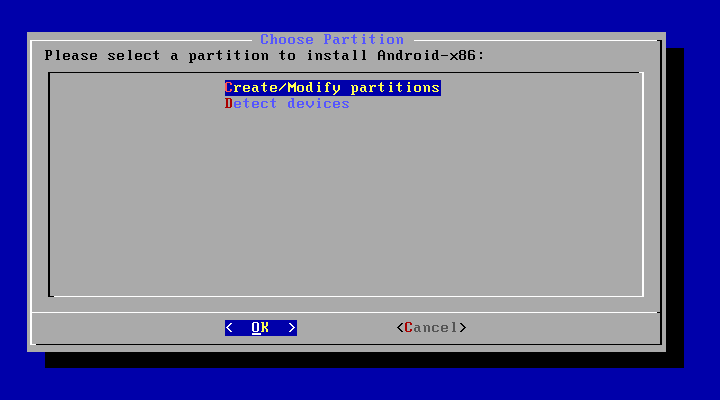
Once you select the Install Android x86 to hard disk, some codes will come and go away, just don’t press anything on the keyboard. After that, you have to create a new Partition on your hard disk where you need to Install Android P on it. To Create a New a Partition simply selects Create/Modify Partition and press enter on the keyboard.
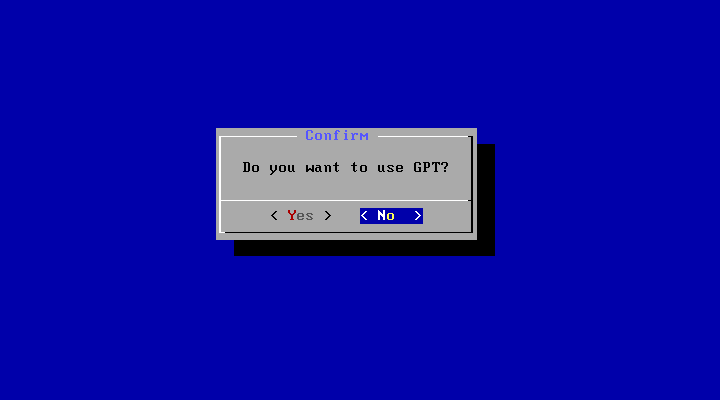
Depending on your system’s partition you have to select the same partition for Android P. For Example If your system is running in Windows 10 with GPT Partition then you have to select GPT if not certainly you have to select the MBR. In this case, I will go with MBR settings because of my Operating system in MBR Partition.
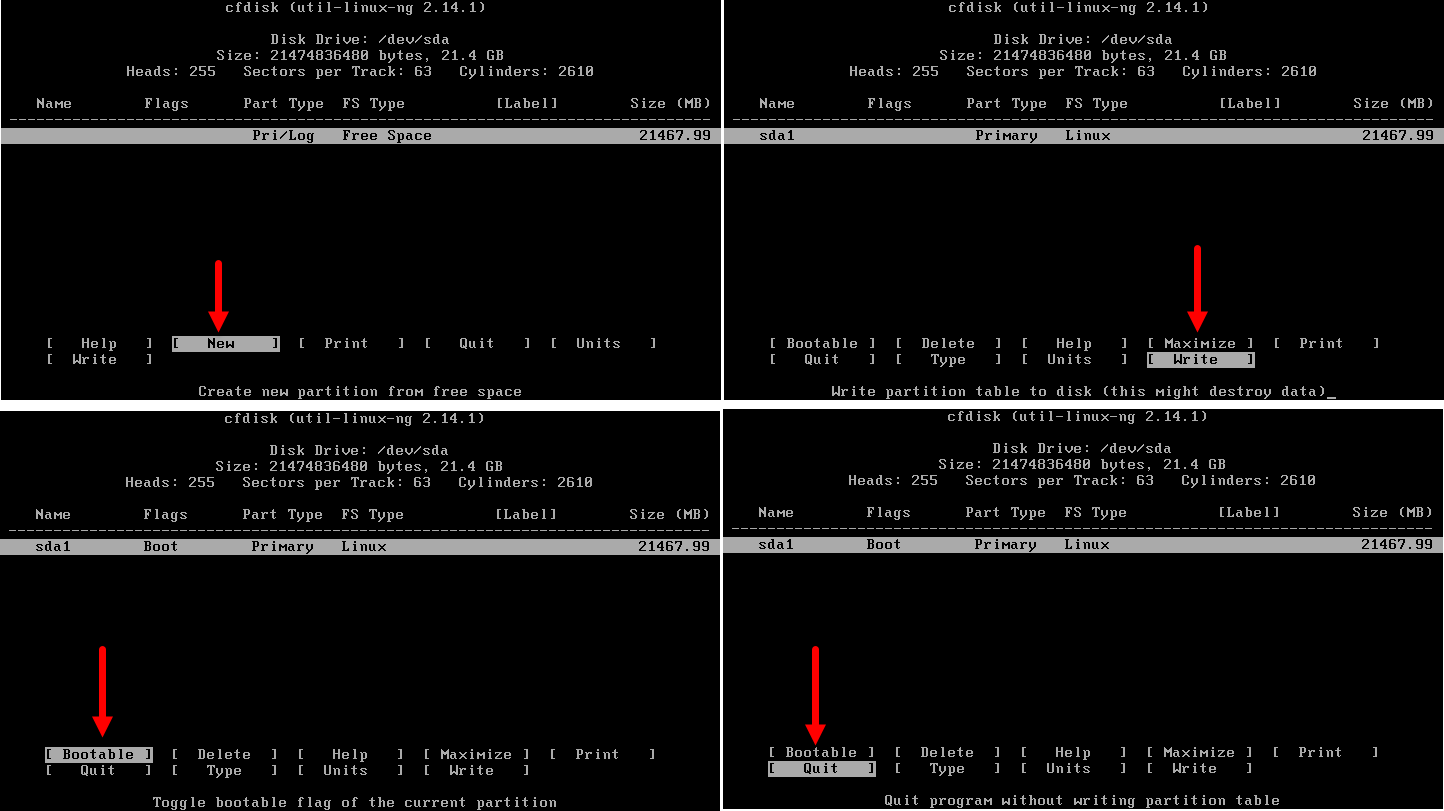
Here we need to configure the Partition of 8 GB Storage which we created earlier. Once you passed the GPT Window, you will be directed to a dark window, where you have to configure the partition. Also, keep in mind, you have to use Arrows and enter buttons to navigate around and confirming a command.
- First You have to New select to Create a New Drive.
- Then Partition must be primary for the Drive which you selected just now.
- After That, You have to press enter on the keyboard to configure the amount of storage for the drive.
- Once the Drive is created, you need to boot that by selecting Bootable. When the drive is bootable under the flags boot will be written.
- Once the drive is bootable, you have to format that as Linux Partition. To do That Select write, then type yes and hit enter on the keyboard.
- When the drive is formatted, select Quit to exit the partition process.
Once the partition is created, you need to configure some other settings and then you will be done with How to Install Android P on VirtualBox on Windows 10.
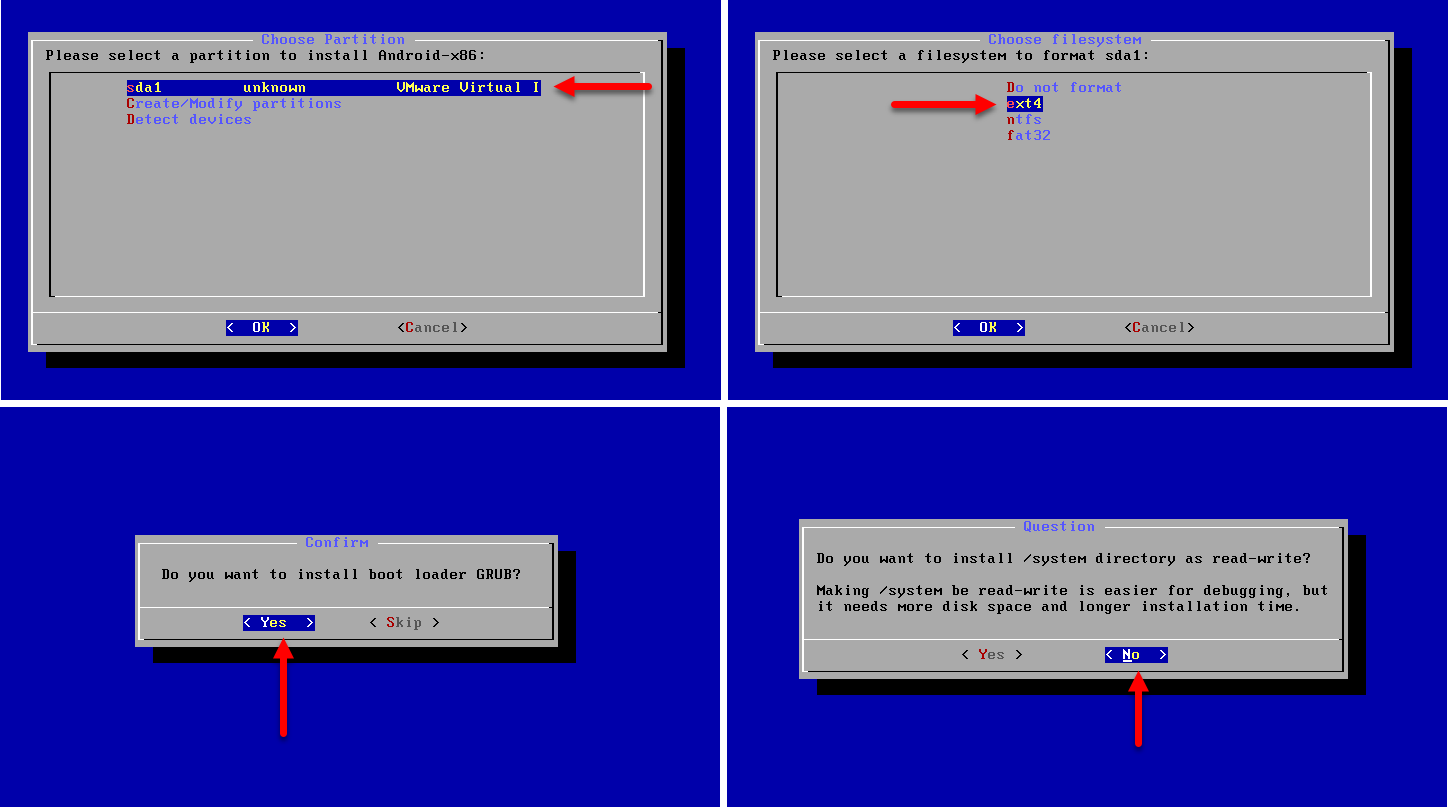
- After you quit the partition window, you will be directed into a blue window, where you have to select the sda1. sda1 is the same drive which you created in step 7.
- After that, you have to format once again for a file system using ext4.
- Once you select the ext4, in this step it will ask you once again, are you sure to format the partition sda1. You have to select yes and move on to the next step.
- Here you need to install Bootloader for Android P, so simply select yes to Install boot loader GRUB.
- When you reached the panel which asks you Do You want to Install/ system directory as read-write, you have to select No.
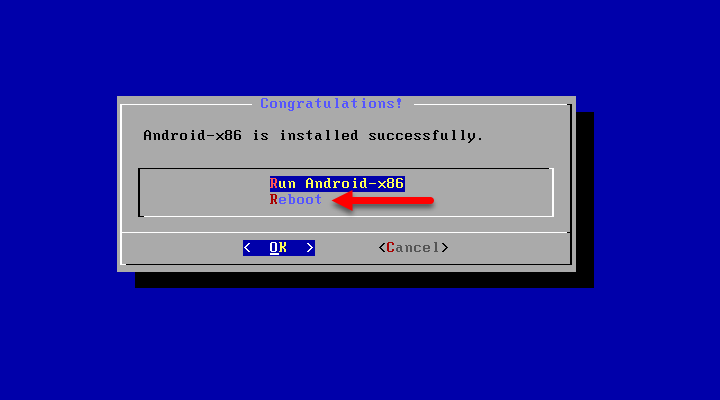
After that select reboot to restart the android P on VMware Workstation Pro.
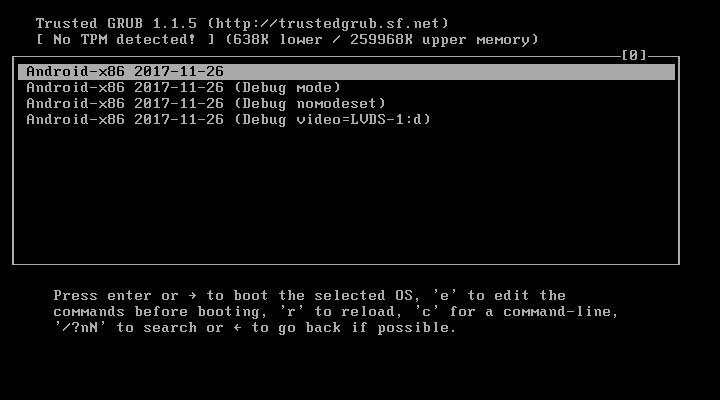
Once the Android P is rebooted, you will a list of menus in black background, simply select the first one and press enter.
4 comments
This guide was helpful but not 100%. Android would not start in Workstation,rarather I got blackscreen with android-x86_64-8.1 dev/sda and blinking cursor. That’s all.
How I overcame it: in boot screen, hit the keyboard key “e”. Then change “quite” to “nomodeset xforcevesa”.
After that Android would run.
Thanks buddy, worked like a charm! <3
Thank you! It worked for me too…
Best method and keep it up dear