
Yes, the macOS 10.15 Catalina was released earlier this year but I’m still stuck with installing macOS 10.14 Mojave on VMware on with AMD Processors. Well, I promised those users and behind it took some time to figure out why AMD Processors are troublesome for installing. All the errors occur because of the VMWare version and the Virtualization technology. However whatever the deal must be, right now you can install and test macOS 10.14 Mojave on computers with AMD Processors. When I said AMD Processors, it means it covers the AMD Rayzan systems too. Get into the steps below to install macOS Mojave on VMware with AMD processors.
Install macOS Mojave on VMware with AMD Processors
Installing macOS 10.14 Mojave was impossible on computers with AMD Processors, however it solved. Since the AMD and Intel processors differ with only some basics pieces of stuff, AMD processors require a bit of more attention compared to Intel.
What do I mean by Attention?
When the Virtual Machine is created on VMware, for the configuration we are adding a small piece of code. This code will bypass and move forward to the installation mode of Mojave on Windows. The SMC is code for Intel processors are so small but for AMD users that codes increase dramatically.
Step 1. Install the Required Files
installing VMware and others are the main priority of this concept to be accomplished. Start the Installation with WinRAR or 7-Zip, then Install VMware Player/ VMware Workstation Pro. If you are using an older version of VMware, the Unblocker is needed to unlock the Apple services on Windows. If you are using VMware version 14 and higher, there is no need for installation of Unblocker.
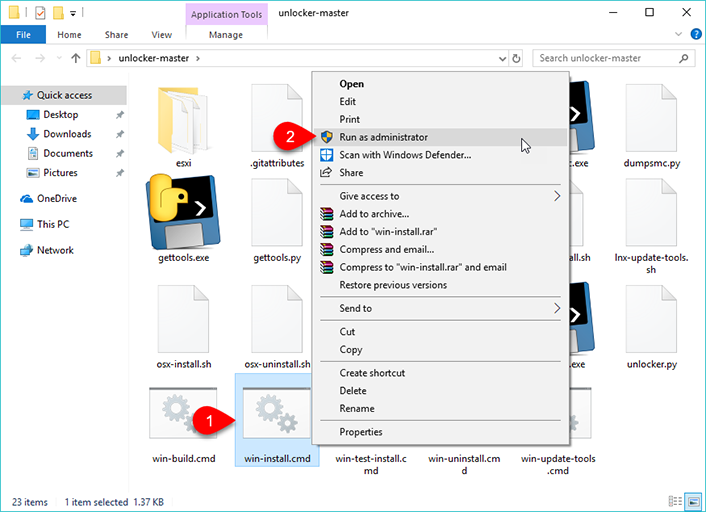
Extract the Unblocker, find their the Win-Install.exe, Right-click and run it as Administrator.
Step 2. Extract the macOS 10.14 Mojave
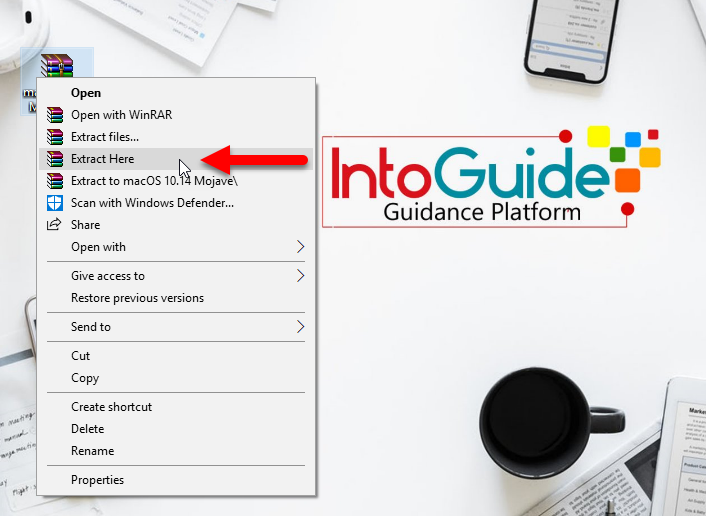
With the WinRAR or 7-Zip, you can easily perform the extraction of macOS 10.14 Mojave. However, the extraction will take some time because it’s the size.
Step 3. Create a Virtual Machine
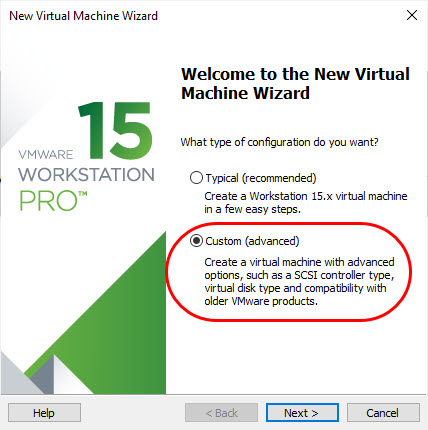
On the homepage of the VMware, create a New Virtual Machine must be clicked.
On the welcome window of New VM Wizard, use the custom options.
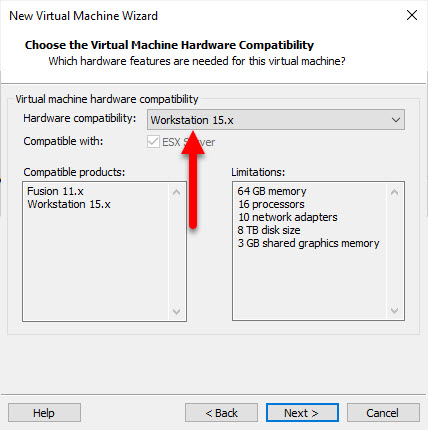
Select the VMware Hardware compatibility, I will leave it as default. However, for users who have the AMD Processors, I recommend using the Workstation 10.x.
Why?
Further, in this post, you will find the answer.
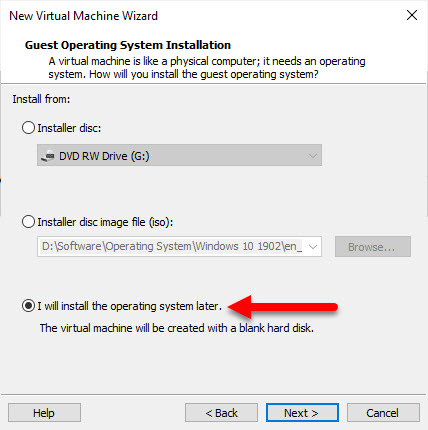
Select I will install the Guest Operating system later.
The Guest Operating system must be Apple Mac OS X with Mac OS 10.14 version.

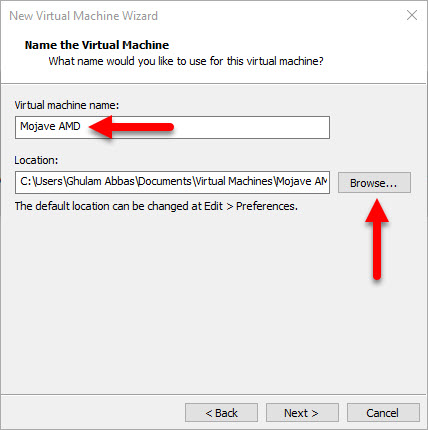
Give a name for the VM and save in a location where you can find the VM easily. Because later you are going to bring changes over the configuration using the VMX file.
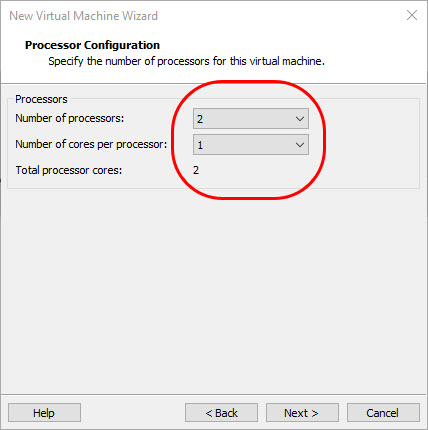
For Processor configuration, the two processors are enough.
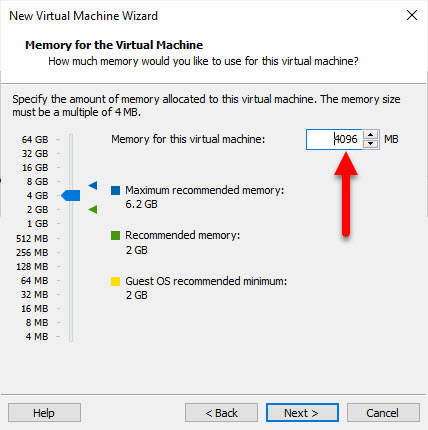
Configure yourself the amount of RAM but keep in mind the least of RAM for macOS Mojave is 4 gigs of RAM.
Leave the Network Configuration NAT.
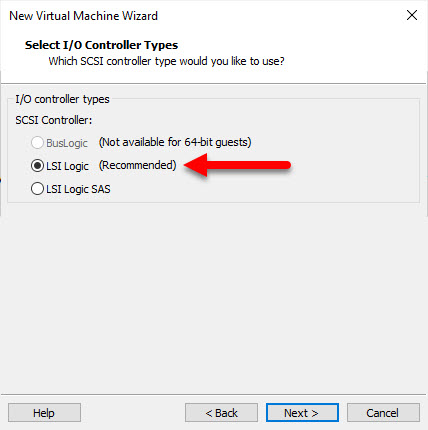
Also, leave the Controller type to default too.
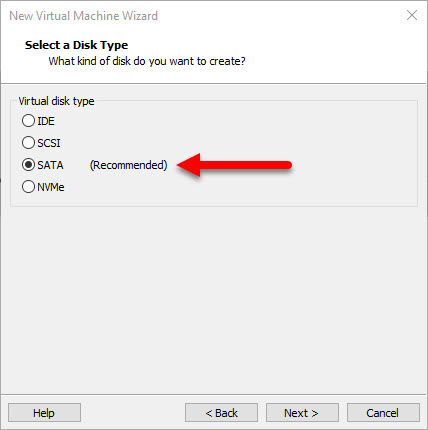
The HardDisk type must be SATA.
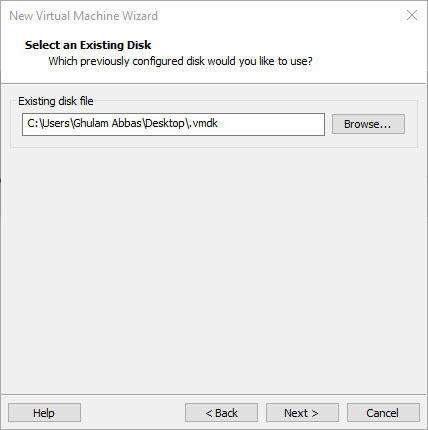
Select use an existing Virtual Disk.
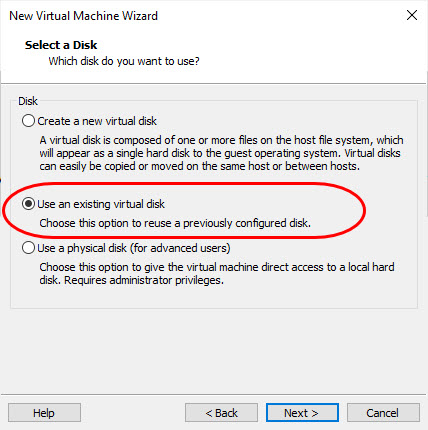
Click browse and load the macOS 10.14 Mojave which was extracted before.
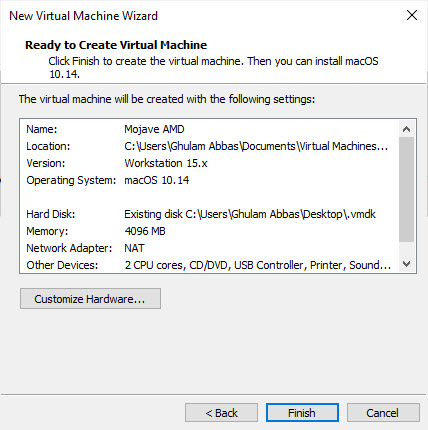
Now review all the settings of the VIrtual machine and click Finish.
Step 4. Reconfigure the Virtual Machine settings using Codes
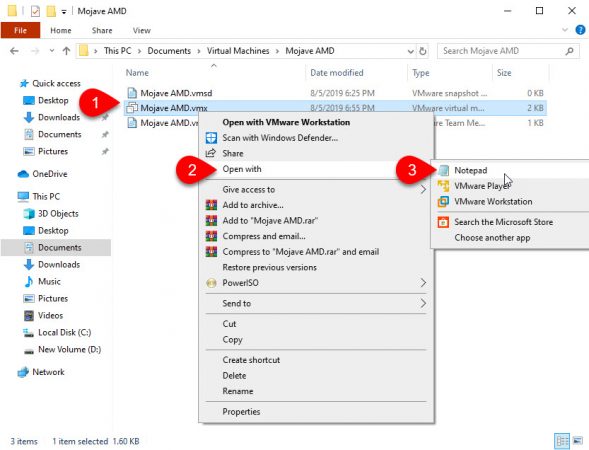
To reconfigure the settings of the created Virtual Machine, open the location where the created VM is saved. Find there a file which has the vmx extension with it, right-click and open it with the Notepad.
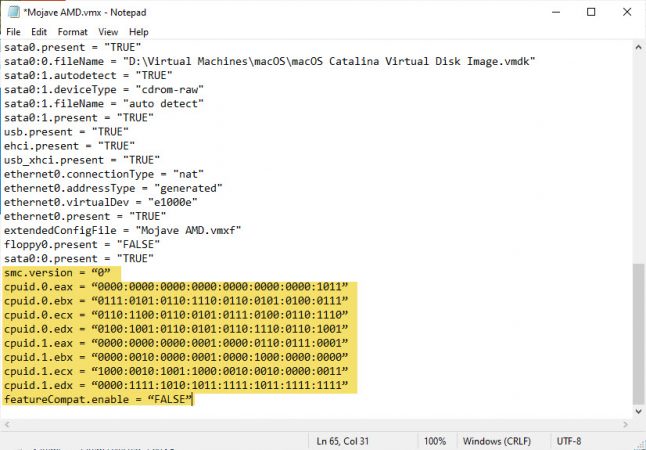
Copy the below code and paste it inside the VMX file.
smc.version = “0”
cpuid.0.eax = “0000:0000:0000:0000:0000:0000:0000:1011”
cpuid.0.ebx = “0111:0101:0110:1110:0110:0101:0100:0111”
cpuid.0.ecx = “0110:1100:0110:0101:0111:0100:0110:1110”
cpuid.0.edx = “0100:1001:0110:0101:0110:1110:0110:1001”
cpuid.1.eax = “0000:0000:0000:0001:0000:0110:0111:0001”
cpuid.1.ebx = “0000:0010:0000:0001:0000:1000:0000:0000”
cpuid.1.ecx = “1000:0010:1001:1000:0010:0010:0000:0011”
cpuid.1.edx = “0000:1111:1010:1011:1111:1011:1111:1111”
featureCompat.enable = “FALSE”
Once you saved the changes with the VMX file, started to move to installation, you may face the virtual machine requires AVX2 but AVX is not present error.
Step 5. Install macOS Mojave on VMware on AMD Processor
OK, on the homepage of the created VM to power on the Virtual Machine and start the installation.

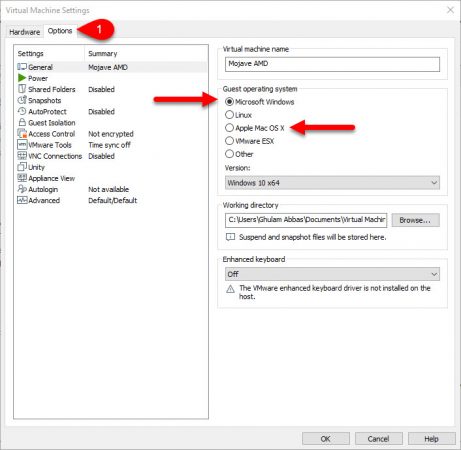
if you stuck on the Apple logo, power off the Virtual Machine> then open the settings of the VM. Move to the Options tab, and change the guest operating system from Microsoft Windows to Apple Mac OS X. In case the Apple Mac OS X is selected already, change it to Microsoft Windows and start the installations.
- Power on the VM.
- Hang tight for Some seconds until the apple logo leaves.
- Select the country where you live.
- choose your Keyboard layout.
- Select, don’t move any information to this PC.
- Choose to sign in with Apple ID or Not.
- Agree to the Terms and conditions.
- Make an Account for the macOS Mojave 10.14.
- Choose a look for the macOS 10.4 Mojave.
- Continue on the Express Set up.
- Hang tight for Some seconds until your Mac is set up for use.
That’s all for this post
22 comments
Change this lines… or input it!!!
cpuid.1.edx = “0000:0111:1000:1011:1111:1011:1111:1111”
featureCompat.enable = “TRUE”
after that… you can use many processor as you can… and increase memory size…
Unable to change virtual machine power state: Failed to start the virtual machine.
That completely not working.
It’s perfect, I managed to install Big Sur by following your instructions.
Thank you!!!
Can you explain why NAT is required, I’d like to use DHCP.
After install Mojave at VM 15.1, how to install VM tools?
for OS Catalina use VMWare 14, same instructions. I tried on amdA12 and run. Sorry for bad english
Failed to start virtual machine. I am getting this can you please help
After modifying vmw file I am getting “Failed to start the virtual machine”
Hi, i am try to install in my AMD Ryzen 7, but when the installer show the country, i can’ t move the mouse, can you help me?
Hi, Install the VirtuslBox Extension Pack, then enable the USB 3.0 from the settings of create VM for macOS.
Hi, try to change usb setting from 1.1 to 2.0 (in vm settings).
Hi Ghulam,
I’m using VMWare Workstation 15 player. But it does not show Apple Mac OS X when I choose the Operating system.
I’m tried to install Unblocker but I get this error: drive.google.com/file/d/1Hb8jeK70JsMy0jI8mThUJ9YYIVKvXYpe/view
Thanks.
I change to VMWare player version 14. It stuck at 5:25 in this video https://youtu.be/sDl0UuLcGHs?t=325
After Apple logo it not show select contry options
What should I do now?
Thanks.
Hi, create a new VM, if it is possible redownload the macOS Mojave and try again. Most of the restarting from scratch will solve the error.
Hi, since VMware Workstation 15 is configured with the Apple services by default, there is no need to Install the Unblocker. Try redownloading the VMware Workstation Pro 15 from another site to solve the error.
Does this unlocker 3.0 work with VMware Workstation 15.5? Its not unlocking for shows darwin.iso not found.
For VMware version 15, there is no need to install Unblocker and the Vmware 15, by default supports the darwin.
Hi ghulam I tried to virtualize mojave but my virtual machine is very slow I only have 2 gb of RAM tho could that be the problem or is it that my apu (that’s right apu not cpu ) a6 2.4 ghz it’s just too slow to run it ?
Hi Ghulam;
Whenever i boot to my vm after applying the step 4 i get this message ” the firmware encountered a an unexpected ”
exception. the virtual machine cannot boot.
and at the bottom a message appears Value ” FALSE ” featureCompat.enable” is not a valid boolean value
Using value “False”
Please send me a screenshot.
Hi Ghulam,
I get the following message when I get to the hard disk installation – “The selected virtual disk is incompatible with this Workstation 10.x virtual machine. Adding this disk would make this virtual machine incompatible with older VMware products.” TBH, I don’t care about older VMWare products, I’d like it to work with this one 🙂
Follow the below instructions to fix the error.
How to Fix The Selected Virtual Disk incompatible with this Workstation?
instead of 10, you have to write down 14, or 15, for better understanding follow the link, then you will know where to put 15 or 14.