

Ubuntu is part of the Linux distribution which is mostly used in enterprise businesses, IoT, Desktops,s and the cloud. Ubuntu is an open-source operating system which is based on Debian and it was introduced in 2004. As a windows user, I wanted to test how the Ubuntu operating system works. Well, during my research I found three ways that you can easily install Ubuntu on Windows 11. Each of these methods has its use, for instance, if you want to use the Linux application as a Windows native app then you should install WSL. However, if you want to test it in the graphical interface then the best option is to use the virtual machine. Because this way it is not going to harm your computer and you will certainly not lose any data. at the same time if you are doing more robust work than dual boot Windows and Ubuntu on multiple or a single Hard drive.
1. Install Ubuntu on Windows 11 with WSL
Windows Subsystem for Linux AKA WSL has been introduced recently by Microsoft. My God, using the WSL you can install Ubuntu or any other Linux distro just with a single command. The other news is that you can also use the Linux application as a Windows native app.
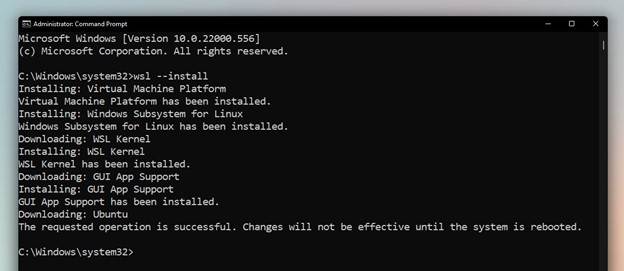
- Launch the Terminal as Administrator
- In the Terminal you must execute this command: wsl –install
- After installation of Ubuntu on Windows 11 using the WSL, restart your computer.
- Automatically Ubuntu will launch, however it is not launched Automatically search for Ubuntu and configure it manually.
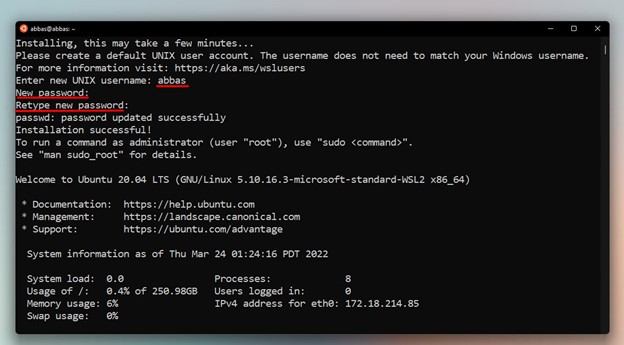
- By configuration, I mean, creating a username and password for ubuntu.
Note: If you want to use the Ubuntu apps as Windows 11 Native applications, find that package name and execute this command. Sudo apt-get install PackageName -y, For instance, install the Linux text editor on Windows 11 using this command. Sudo apt-get install gedit -y
2. Install Ubuntu on Windows 11 using Virtual Machine
There are many virtual machine applications available that you can use to install Ubuntu and test it directly into your windows 11 computer. For instance, there is VirtualBox, There is VMware workstation pro, and VMware Workstation player. And in this step, you are going to learn how to install Ubuntu on Windows 11 using the VMware workstation player.
Step 1. Download VMware Player and Ubuntu ISO Image
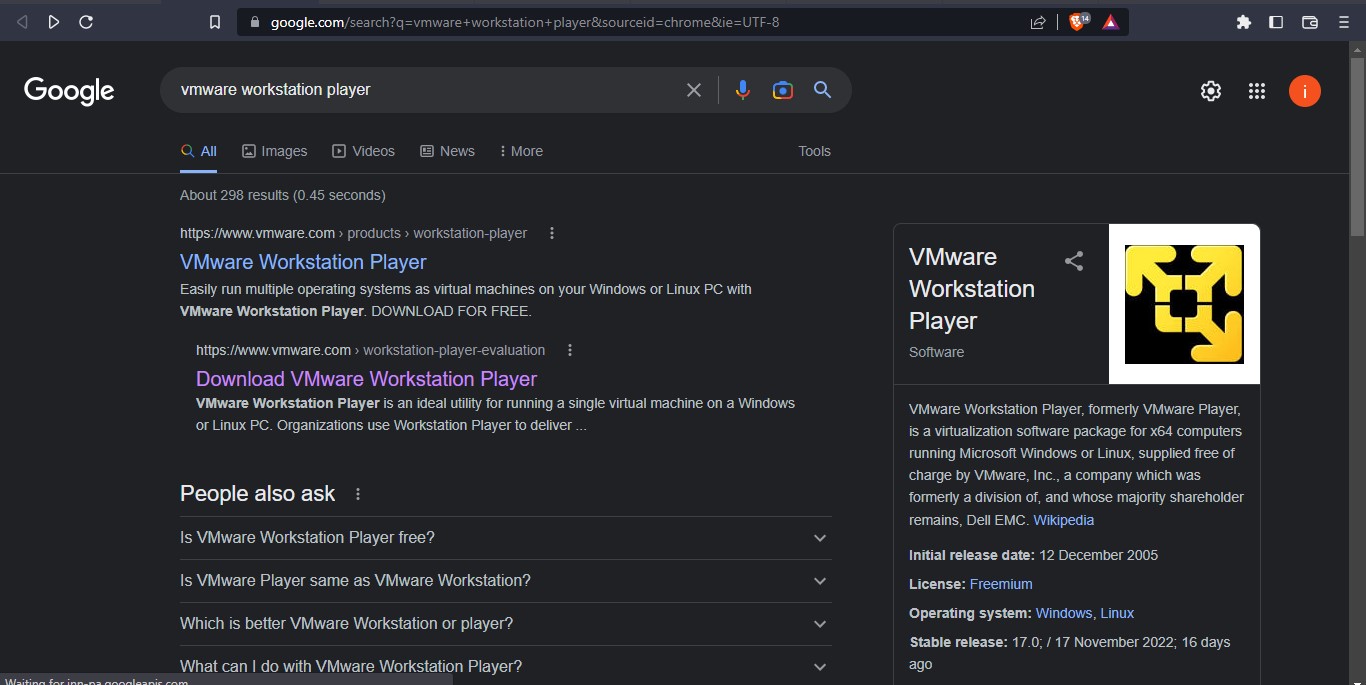
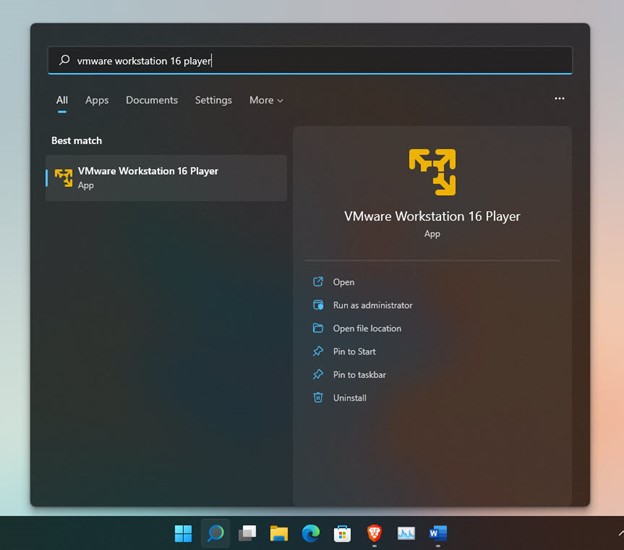
- Launch your favorite browser and search for the VMware workstation player
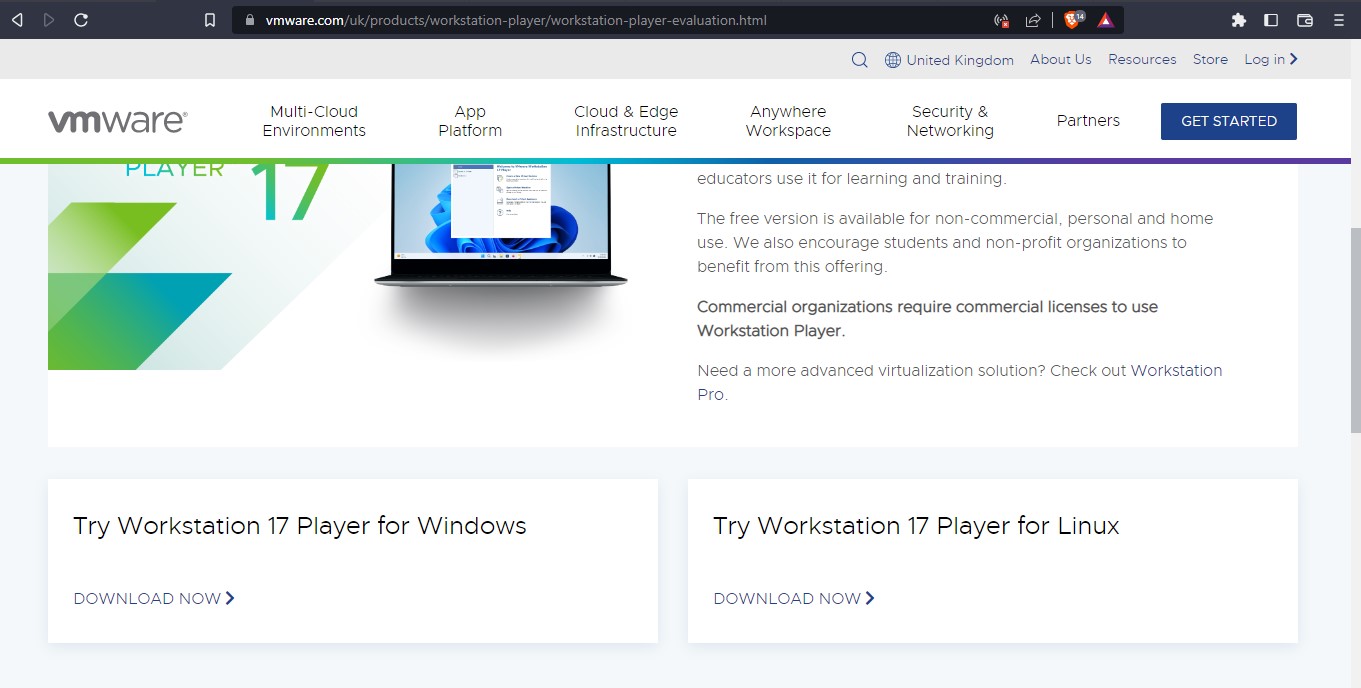
- Open one of the links and download the VMware Workstation player 17.
- Following that you have to install the VMware Workstation player 17 on your Windows 11 machine. The installation process is simple, Just launch the setup and then click next to the install section and click finish. (The Installation Process is simple, that’s why I have not covered it Step-by-step).
- Again, open your favorite and search for Ubuntu, then download the latest version of this operating system.
Step 2. Create an Ubuntu Virtual machine
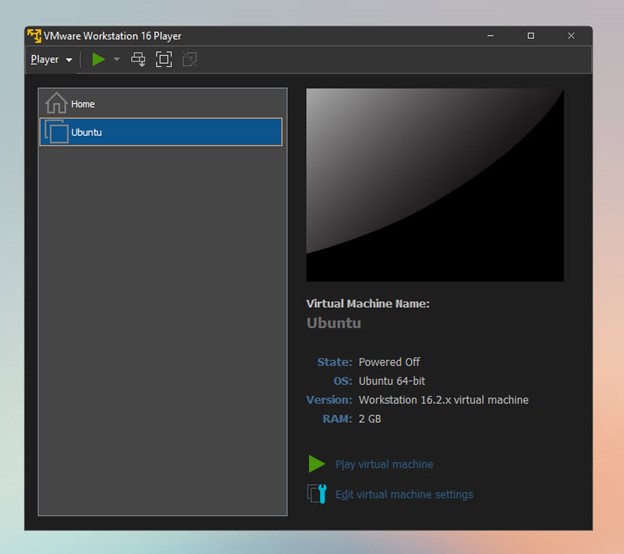
- Launch the VMware workstation player after the installation.
- Easily choose to create a new virtual machine.
- For this step you need to attach the ISO of Ubuntu to the virtual machine, However for now you have to choose “I will install the Operating system later” and move and move on by clicking on next.
- Choose Linux as the guest operating system and Ubuntu as its version.
- Name your virtual machine whatever you want. Here you can also save it in any other place that you are interested. By default, it will save it into the documents directory Under drive C.
- Specify a specific amount of storage for the Ubuntu of the virtual machine but make sure it must not be less than 20GB.
- Simply click finish.
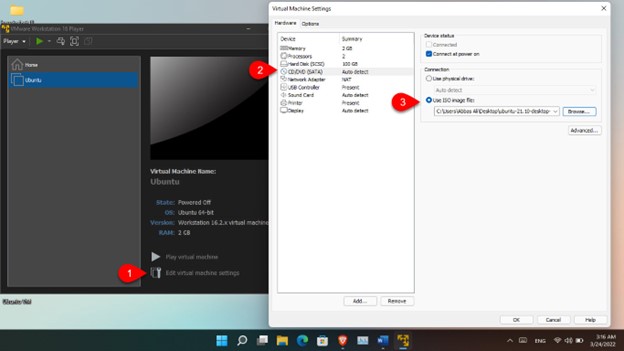
- For now, the virtual machine has been created but we have not added the ISO of Ubuntu to the virtual machine. For that, you have to click on Edit virtual machine settings, go to CD/DVD (SATA) choose to use ISO image File, Click browse and locate the ISO of Ubuntu. Once everything is done click OK.
Step 3. Install Ubuntu on VMware Workstation Player 17 in Windows 11
- Select the Ubuntu Virtual Machine and click on the play icon from the menu bar.
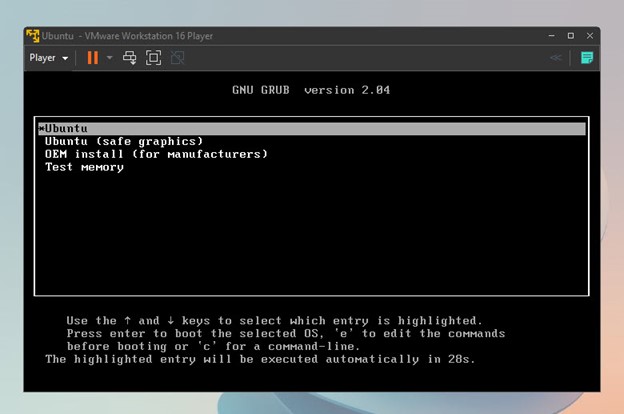
- The first window that you will face is the GRUB bootloader window where you have to simply go with the default option or you wait 30 seconds it will move to that option automatically.
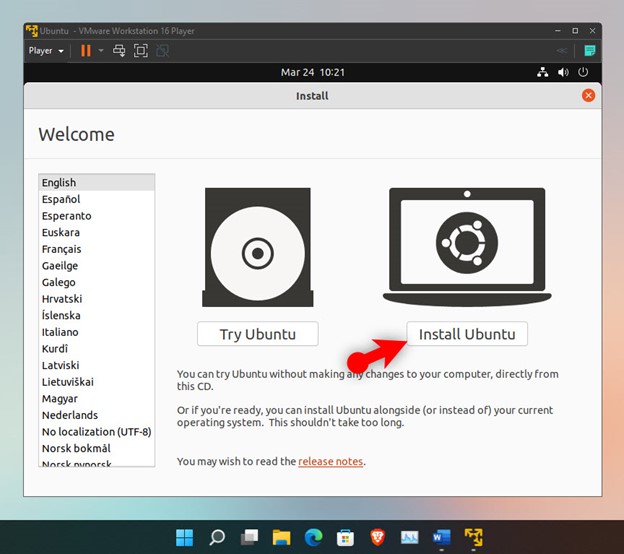
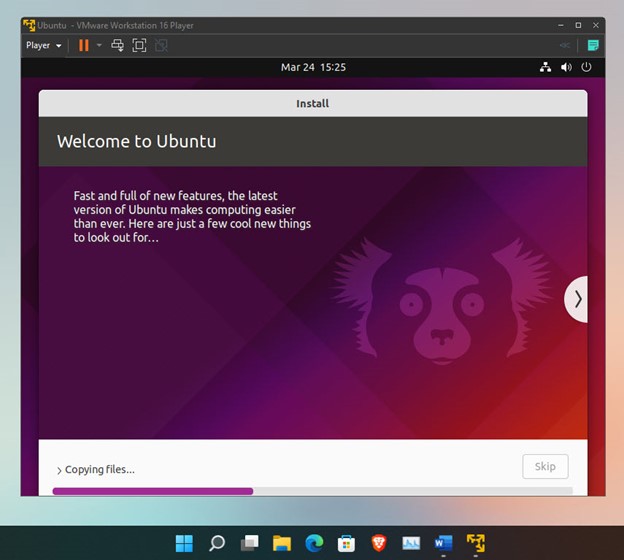
- Wait a moment and you will be on the installation page of Ubuntu, simply choose to install Ubuntu.
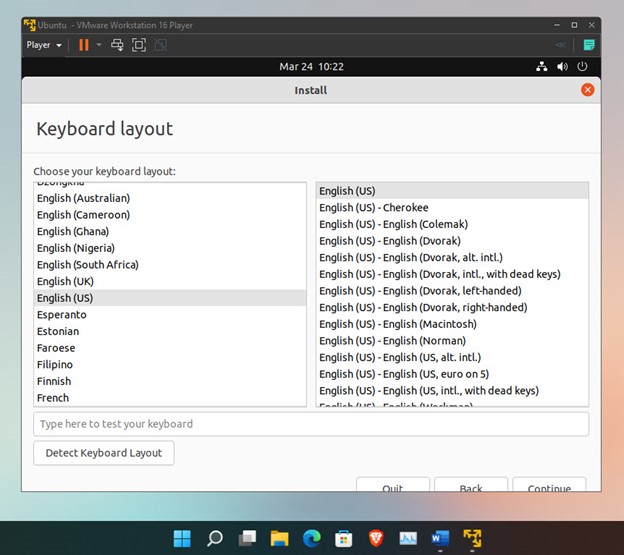
- Simply click continue on the keyboard layout window.
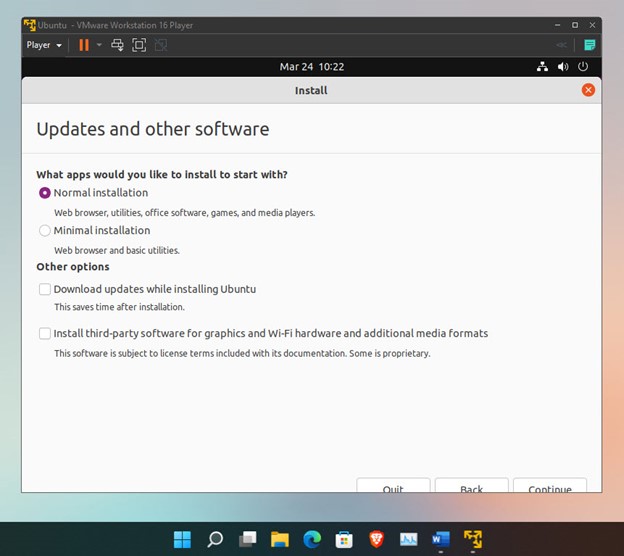
- Choose normal installation.
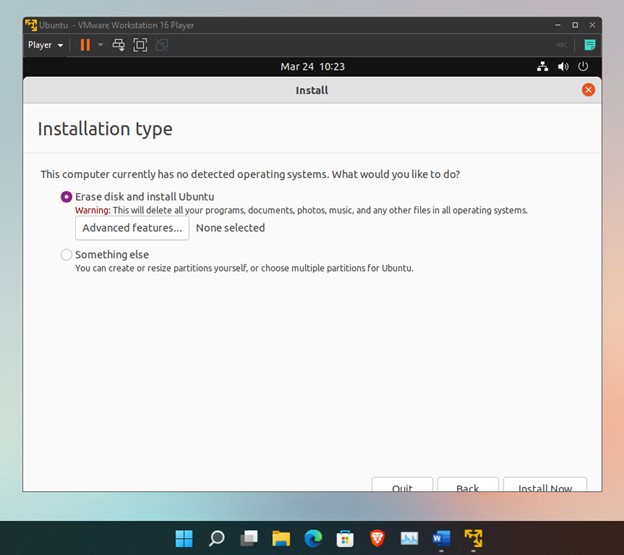
- On the partition window, click install now.
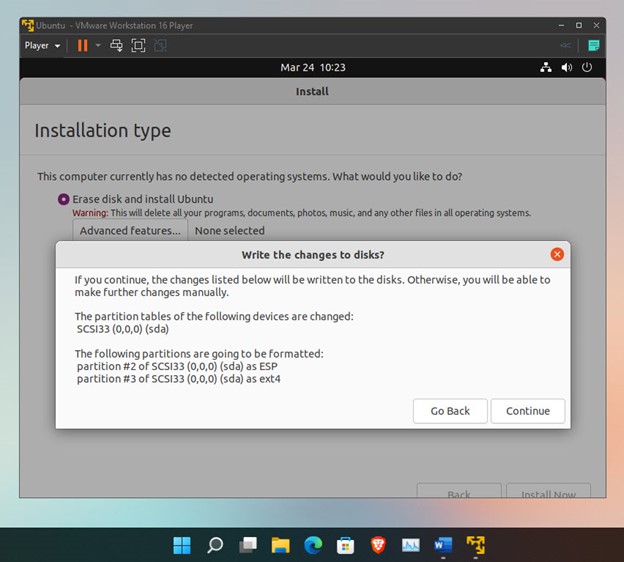
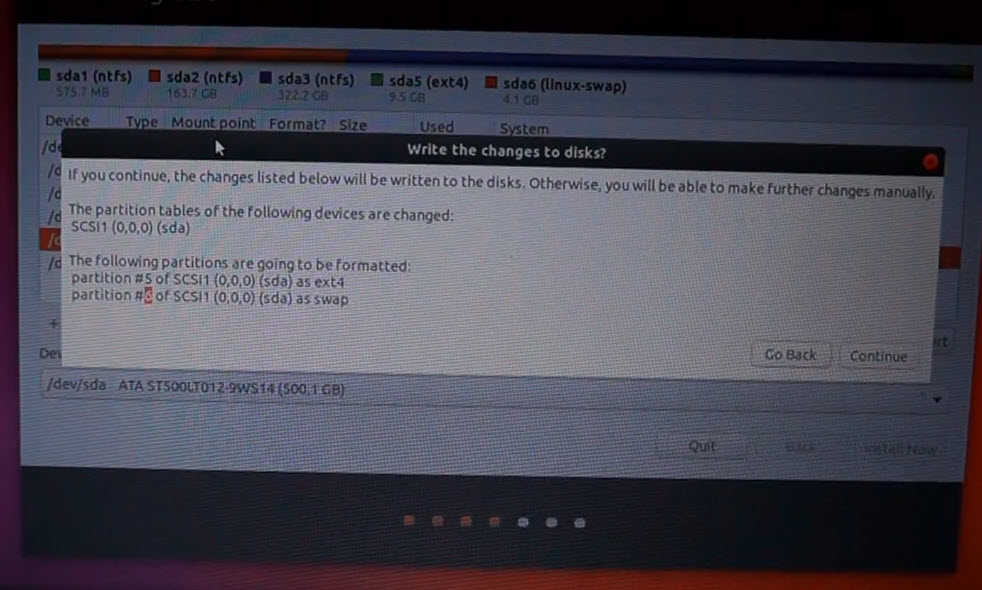
- And a new window will appear asking that “Write the changes to the disks” simply continue.
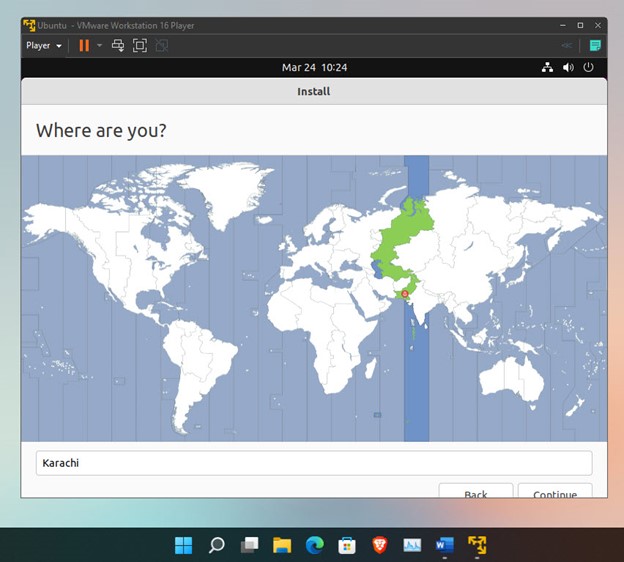
- Choose your location and click continue.
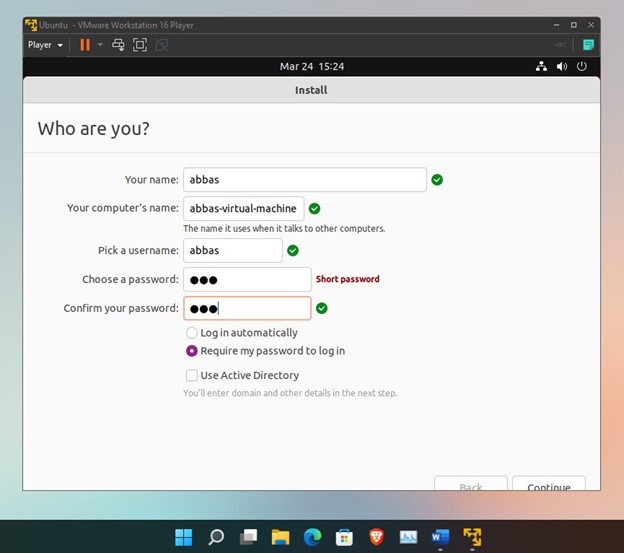
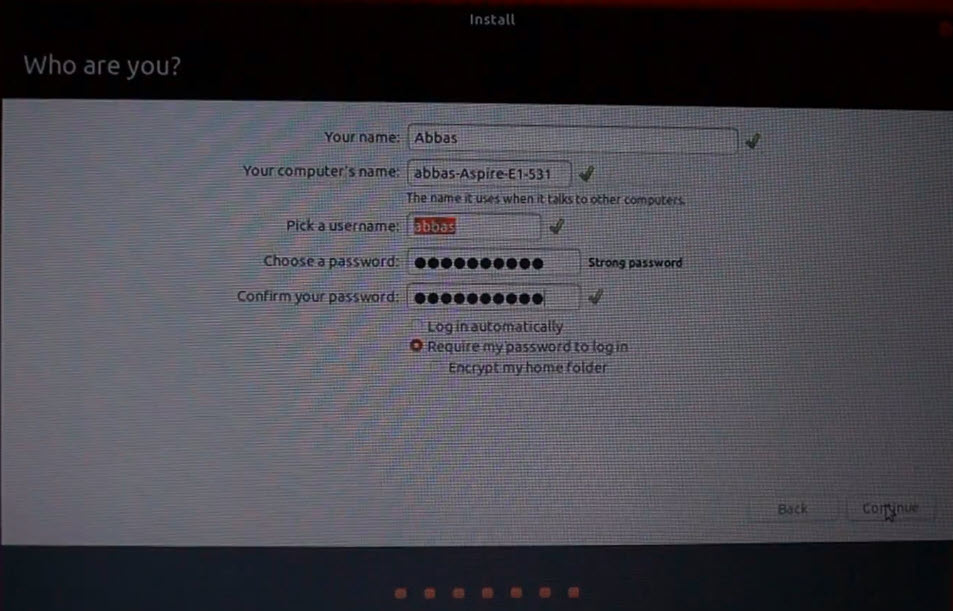
- Add a username and a password to the Ubuntu Virtual machine.
- For now, you have to wait until the installation of Ubuntu on the VMware workstation player 17 completes. Once it is complete, the system will restart But before restarting, you need to remove the ISO of Ubuntu. For that click on the reverse triangle icon in Infront of Player> Removeable devices> CD/DVD (SATA)> Disconnect. Now Press enter to restart the Ubuntu Virtual machine.
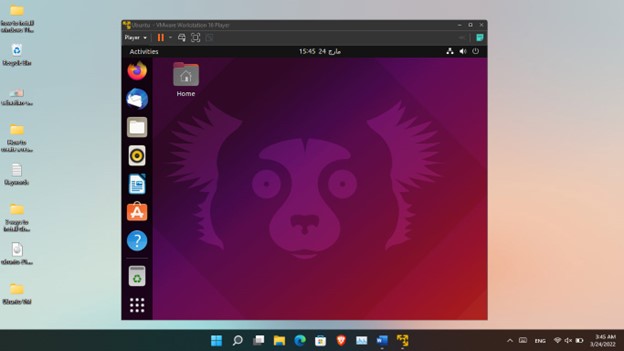
- Log in by entering your password in their Ubuntu.
3. Dual Boot Windows 11 and Ubuntu
Dual boot is another option that you can use to install Ubuntu and test it directly into the main hardware. But during the installation of Ubuntu, if you are not careful with the partition, you may wipe out your entire drive.
Step 1. Create a Bootable Ubuntu USB Drive
- Purchase an 8 GB USB flash drive
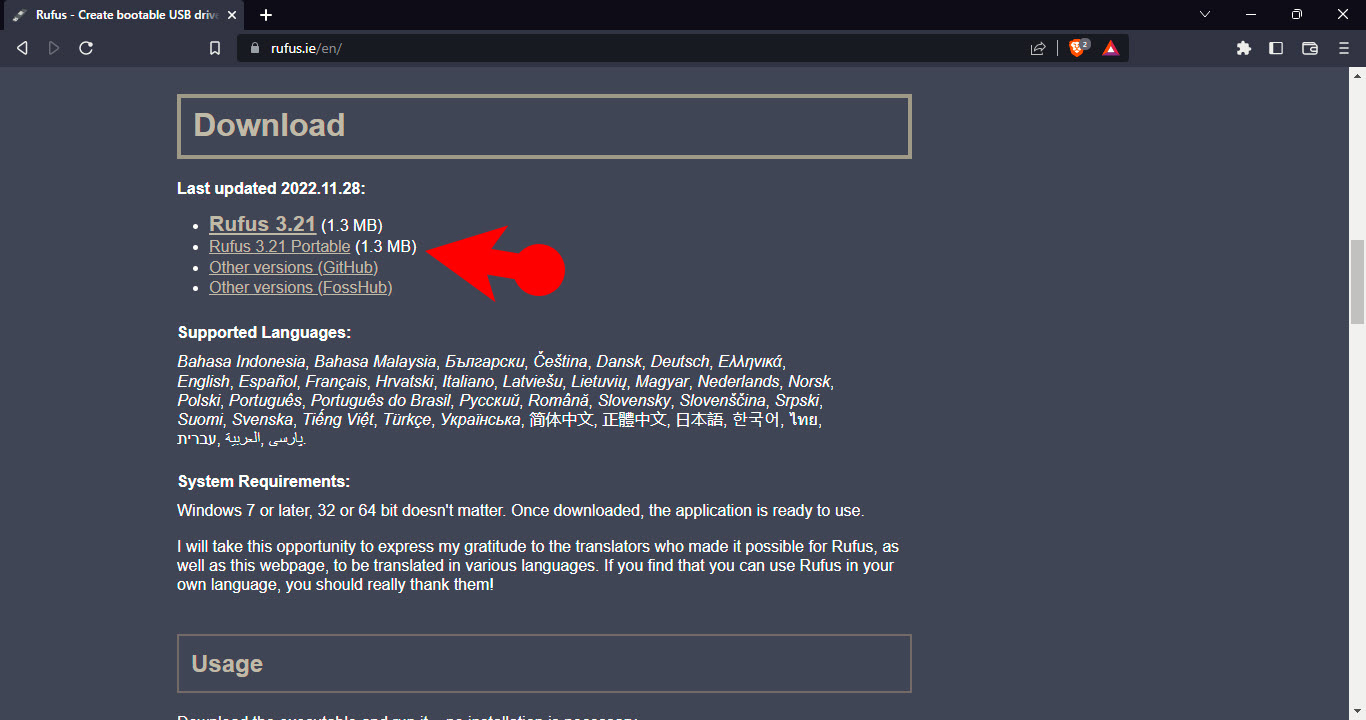
- Open your favorite browser and search for open Rufus.ie and download the portable version. Also if you do not have the Ubuntu ISO image download it too.
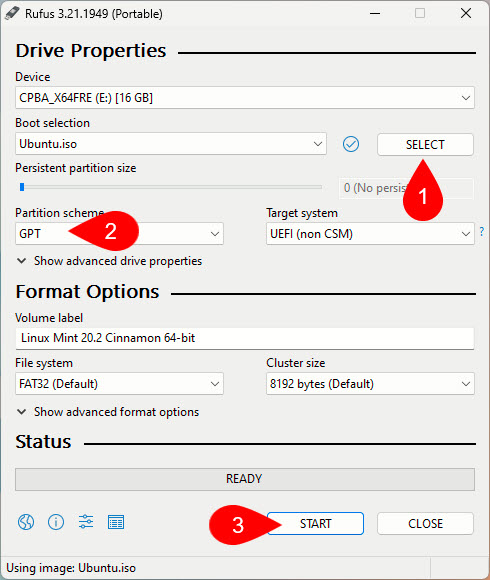
- launch Rufus and attached the USB to the computer
- click on select and locate the Ubuntu ISO image
- Don’t do anything with other options just make sure that the partition scheme should be GPT since Windows 11 does not support MBR.
- Click on start and wait until the ISO files are copied within the USB, once everything is done click OK and close the Rufus.
Step 2. Extract Storage For Ubuntu
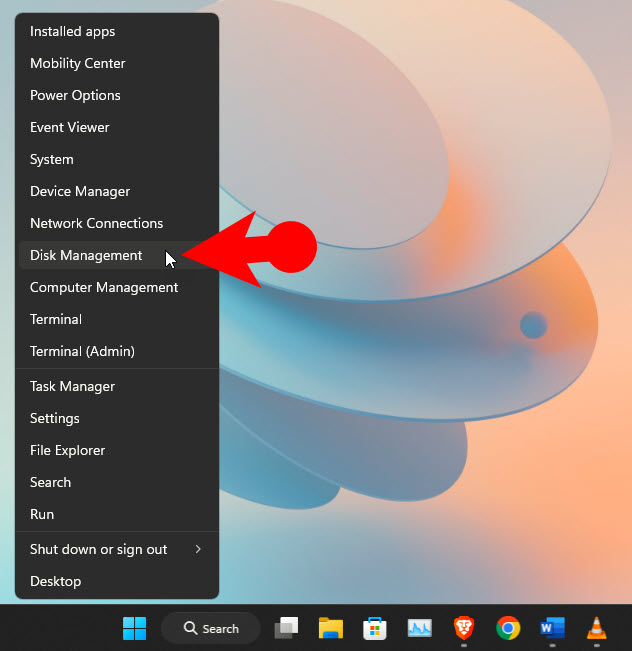
- Right-click on the start menu and choose disk management.
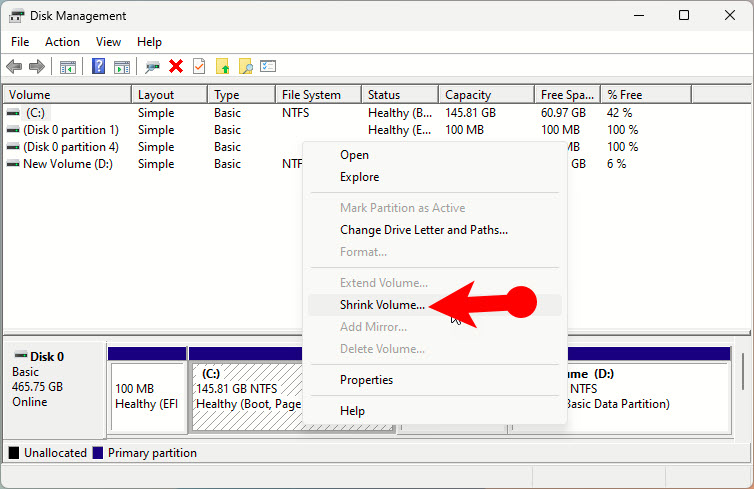
- Choosing any drive that has storage to offer at least 20GB will be OK. Right-click on it and choose shrink volume.
- You will see a specific amount of storage has been extracted in black color, Let it be there.
if you have attached another external drive just for Ubuntu for dual boot boot, don’t follow step #2.
Step 3. Install Ubuntu Alongside Windows 11
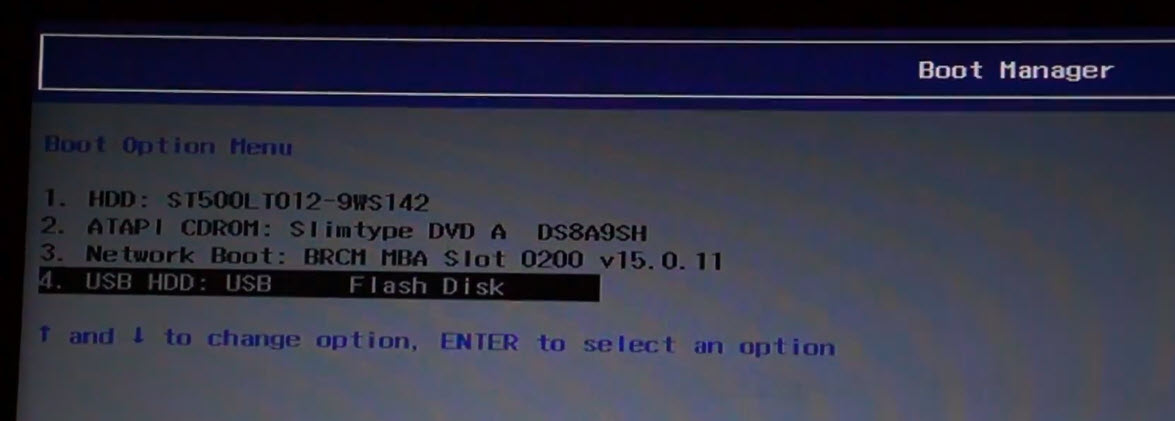
- Attach the bootable Ubuntu USB flash drive to the computer then open the start menu> click on the power button and hold and hold shift and click on restart then choose USB flash drive. (You can shut down the computer, then power on and press the boot key, either way, will work).
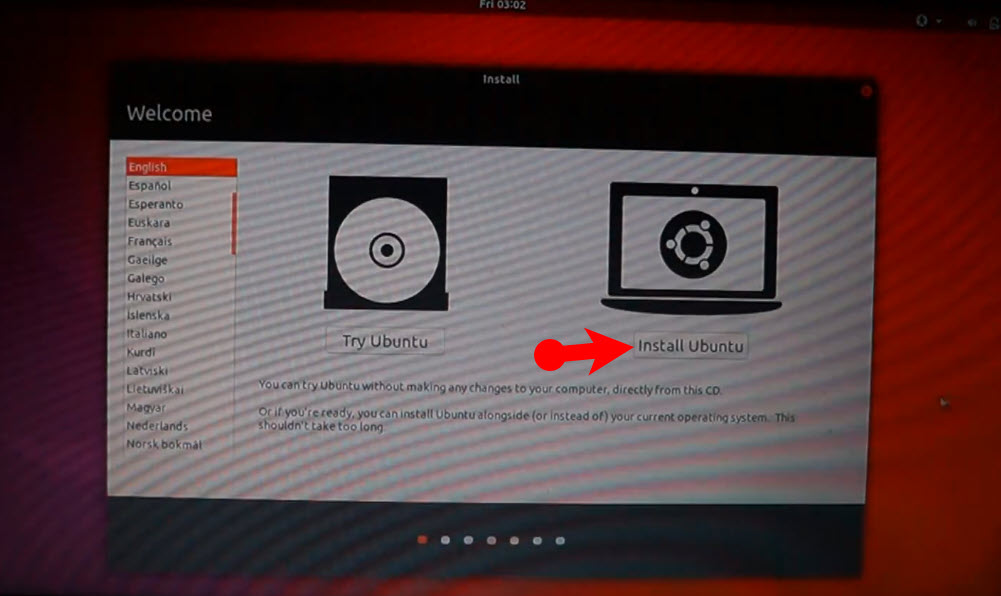
- You have to wait and soon enough you will be on the Ubuntu installation page, There you have to click install now.
- Connect your computer to WiFi.
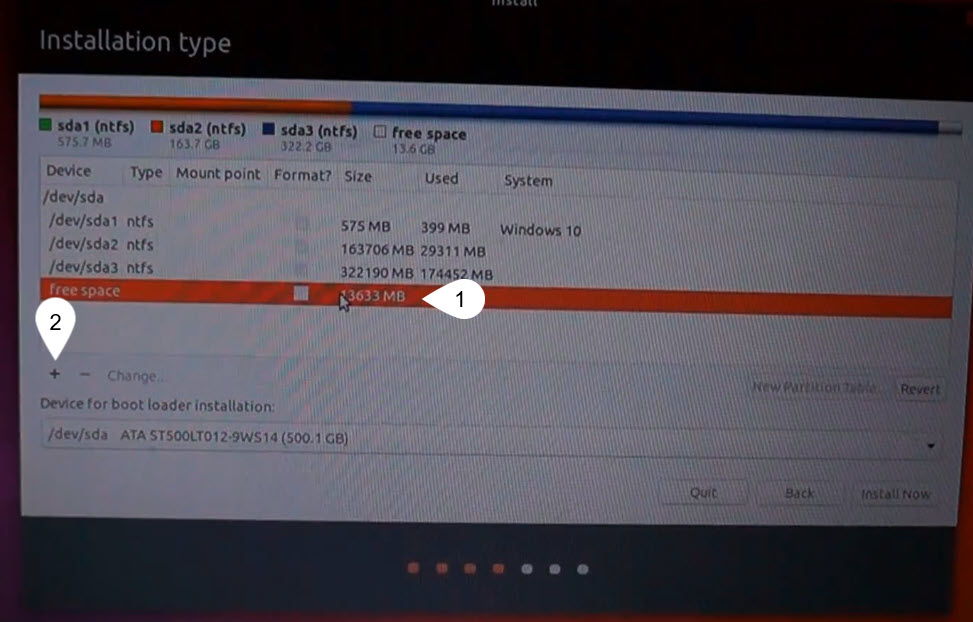
- on the partition window you have to choose something else or else you will remove everything from your hard drive including Windows 11.
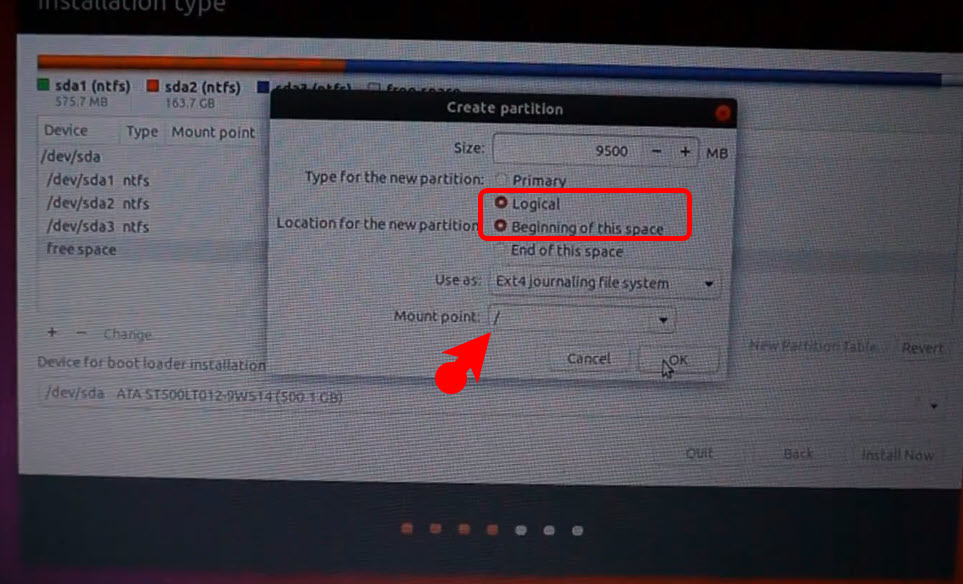
- We need to create 2 drives, one drive will be for Ubuntu and the other must be for SWAP files. For a SWAP drive, a maximum of 2 GB is fine. Anyway choose the free space that you extracted in step 2, click on the + icon then Enter the amount of storage and spare 2 GB for the SWAP drive. Also, make sure the boxes “Logical” and “Beginning of this Space” are checked. Another thing, Choose / in front of Mount Point. Once everything is done, click ok.
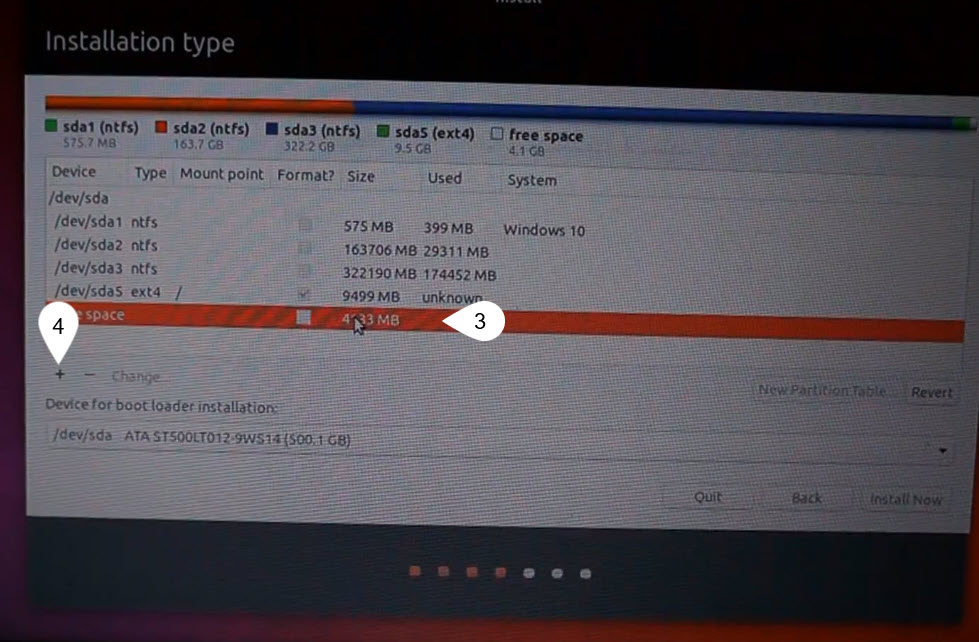
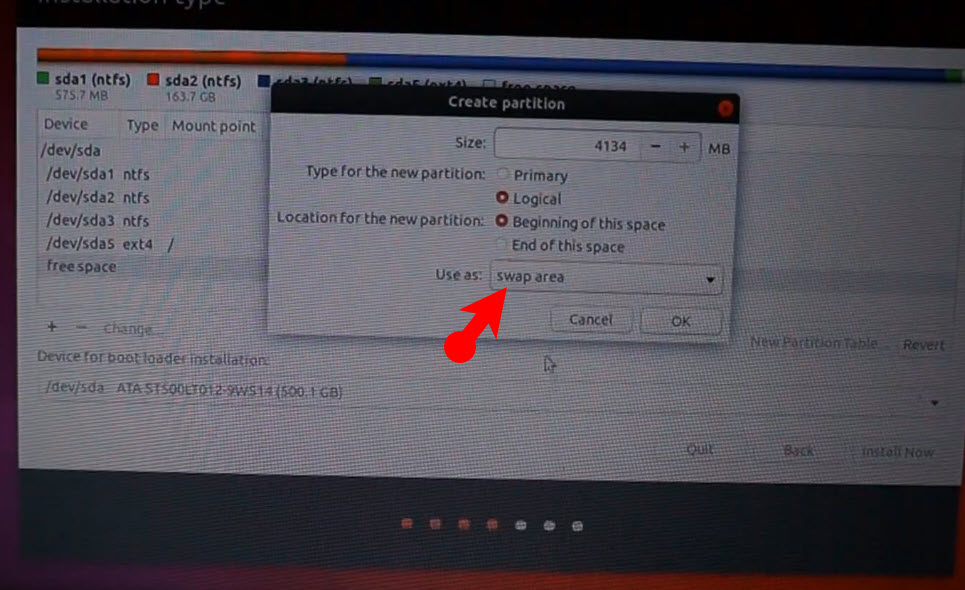
- For the Free storage which is remaining, select it and click on the + icon, then find use as and choose SWAP Area. After clicking ok and wait for it until the drive is created.
- Select the first partition and click Install Now.
- “Write Changes to Disks” will appear, click continue.
- The other steps are easily selecting your country, Choosing the keyboard layout, Creating an account, then waiting for the installation to complete.
- Finally, once the installation is completed, remove the USB and choose Restart Now.
- Once the system restarts, using Choose Ubuntu using the arrow keys and press enter.
- Now login and enjoy using Ubuntu alongside Windows 11.
Conclusion:
You can test anything once you install Ubuntu on Windows 11 computer, it doesn’t matter if it is installed using WSL, Virtual Machine, or dual boot. These are the techniques that I know How to Install and test Ubuntu in Windows 11 and windows 10, what techniques do you know, let me know in the comments.