
XAMPP is an open source and free cross-platform web server Developed by Apache Friends. where users can use it to test their plugins, themes and other things. Today you will learn How to Install and Configure Xampp on Windows 10. Then you will Learn How to Create a Local web server & Install it WordPress. And once you installed XAMPP if you faced The uploaded file exceeds the upload_max_filesize error. You will learn How to fix it. But Before Gettings with Installing and Configuring XAMPP on Windows 10, you have to download the Required files.
Install and Configure Xampp on Windows 10
- Double-click on the setup, then select Yes when the User Account Control Popup.
- A warning Window will open, select Ok and move to the next step.
- On the welcome Screen select Next.
- Select all the components, and click next.
- Select a Location where the Xampp Files should be Extracted. By Default, it will create a new folder by name of Xampp on the Root Directory.
- On the Bitnami Page again click next.
- Now You are ready to Install Xampp, click next and wait until the installation Completes.
- After that, you may be facing a Pop window firewall which asks you to allow access to Xampp on Private Network. Select Allow and Work the installation will be finished.
- When the Installation Finished, click Finish and then the Xampp Control Panel will open.
- First You have to select a Language, then it will take you to the Xampp Control Panel.
Once the XAMPP Control Panel opens, you have to check, is XAMPP working as a local Server or No? The Very first thing which you need to do, enable the Apache and MySQL from Xampp Control Panel.
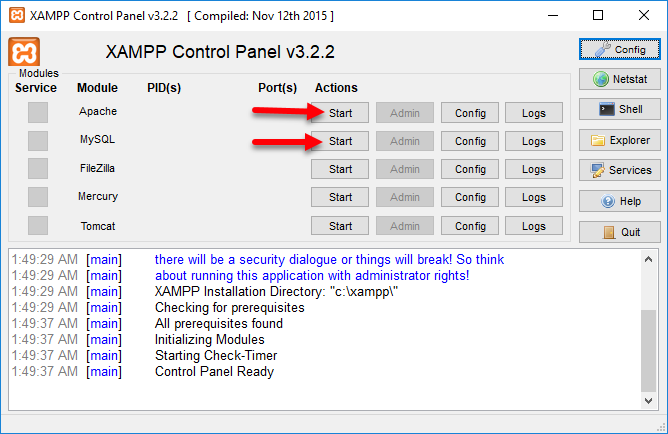
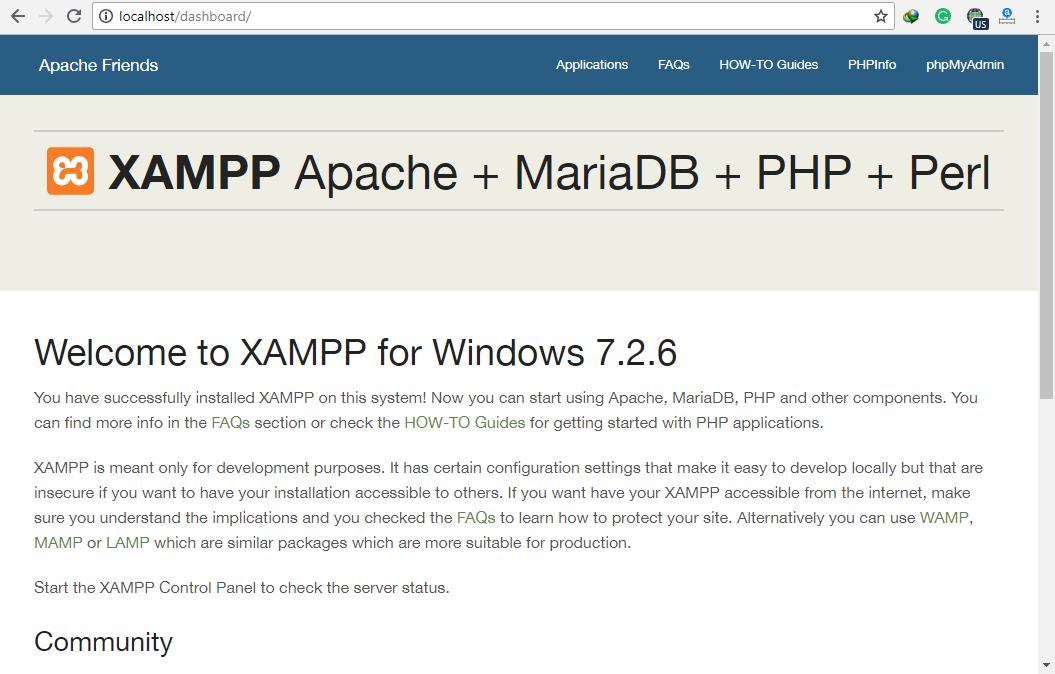
Once the Services are started, open your favorite browser and search there for localhost. If you are directed to the XAMPP Dashboard, then your installation and configuration are totally right. If it didn’t take you to the dashboard, you have to update the Ports of Apache and MySQL.
Create Local Website Using XAMPP on Windows 10
Creating Local website is not too much hard, all you have to do is, Install XAMPP and Download a Platform in which you are interested to work with. The easiest platform where you can work is WordPress. WordPress is a free online Platform where bloggers can easily blog and make with their blogging.
If you have signed up for WordPress in WordPress.com, then you have the idea How it works. But while working there you don’t have all the functionality of WordPress like Installing Plugins, Adding Ads, uploading themes and many more. But If you have installed & configured XAMPP on Windows 10, you can create a local website with functionality. Install and Configure Xampp on Windows 10
At the same time, you can build more than 1000 local websites on any platforms like Drupal, Joomla, Mautic, OrangeHRM, Magento and many more. Also if you are interested in e-commerce, you can the Magneto platform.
How to Create WordPress Local Site on Windows 10?
Step 1. Copy WordPress to htdocs Folder
If you are interested in How to Create WordPress Local Site here in windows 10 for testing purposes of themes, learning WordPress and more follow the below steps.
- First, Open WordPress.com and download WordPress.
- After Downloading WordPress, Extract it anywhere you want.
- After extraction, copy or Cut the Extracted WordPress.
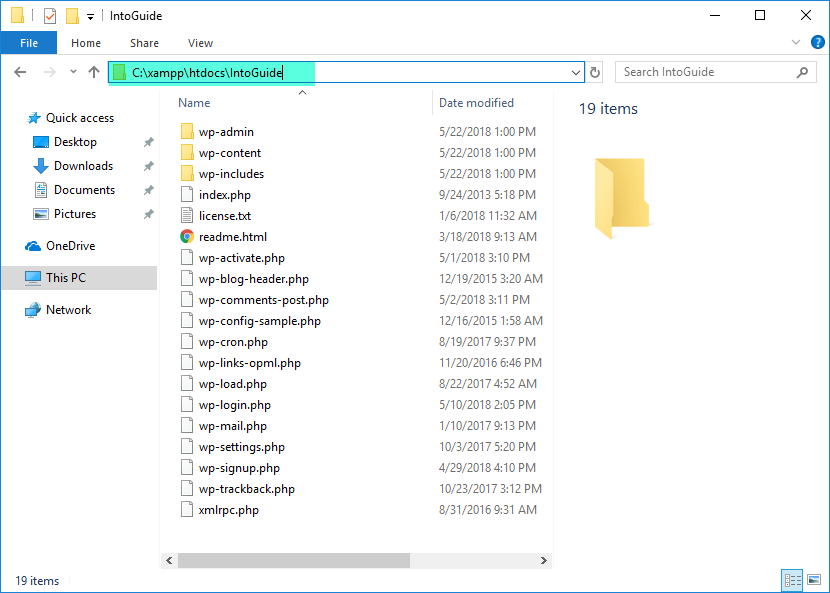
Once you extracted & Copied WordPress, Open Drive C> XAMPP> htdocs, Create a Folder and Paste there the WordPress. The Folder which you are putting in WordPress will be the name of your site while Installing WordPress, so chose a name.
Step 2. Install WordPress
Once you are done with WordPress on htdocs directory, It is time to Install WordPress.
- Open your favorite browser, and search there for localhost/IntoGuide
Instead of IntoGuide, you have to insert the name of the directory where you have copied the WordPress. Once you hit enter, it will take you to the installation page of WordPress.

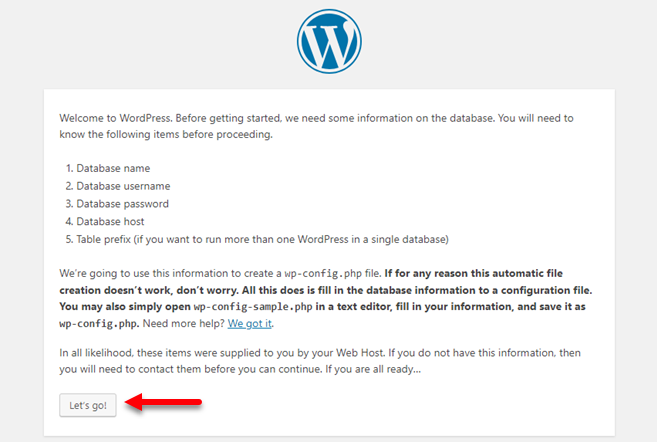
First, select a Language, then you will be taken to welcome WordPress page, their select let’s go. In the below screenshot you can see that, In order to Install WordPress, You the following stuffs:
- Database Name
- Database Username
- Database Password
- Database host
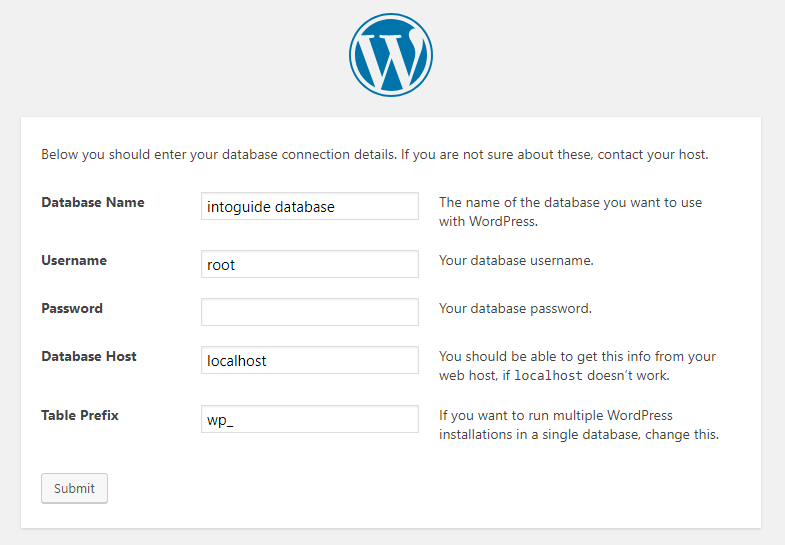
After selecting Let’s go, you will be on the Database page where you have to enter the database name, username, password and host. We don’t have any of them, so we have to create a database.
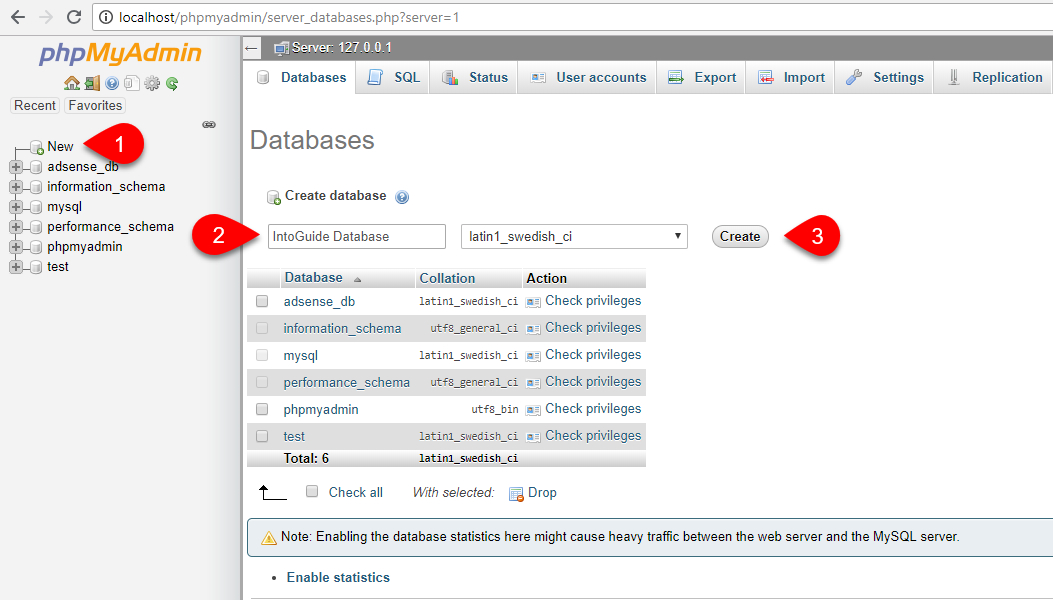
- To create a database, Open the browser and search there for localhost/phpmyadmin
- From the left side select New, and give a name for the Database.
Once you created the database, Close the Phpmyadmin Panel don’t do anything with the rest of things like the table.
Now come back to the Installation page of WordPress, type name of the database. Then for username type root and leave empty the password box. When you are done click submit.
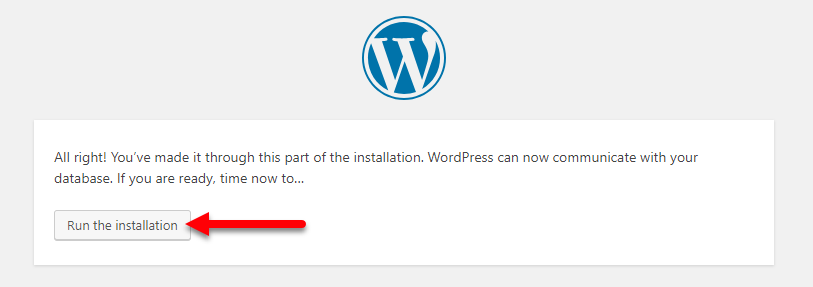
Now you have to run the Installation wizard of WordPress.
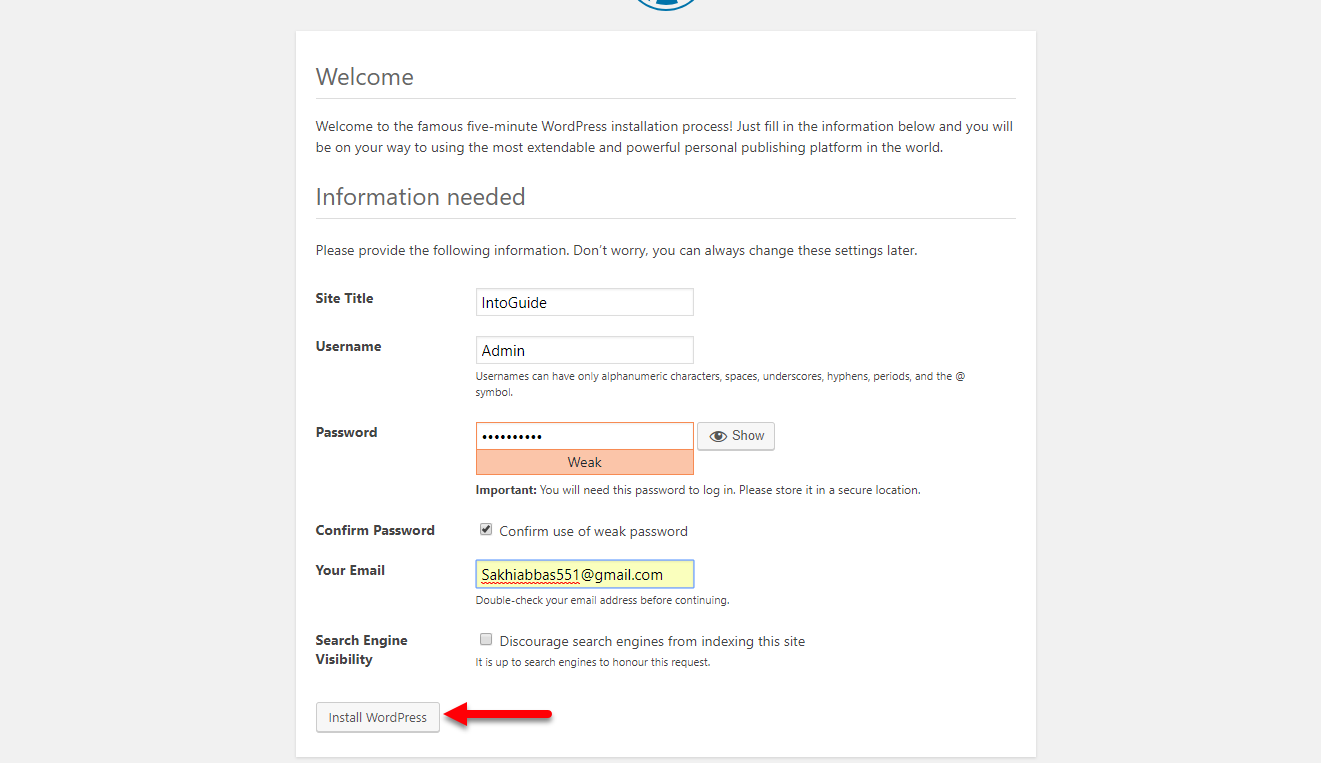
After that, type your site name, username & Password by which you have to log in and email address. When you added these information click Install, to install WordPress on your local server.
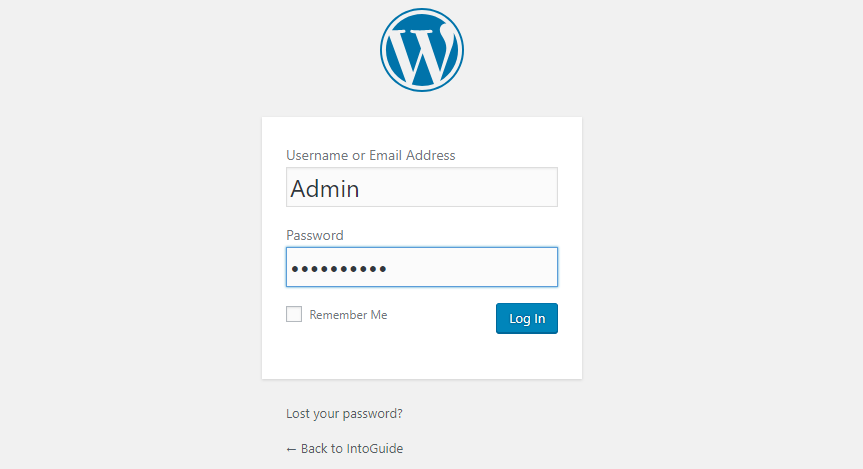
After Installation, select login, then enter your username and password to log in to your site.
Install and Configure Xampp on Windows 10
Fix ‘The uploaded file exceeds the upload_max_filesize’ error
Whenever you are trying to upload files more then 2 MB, You will face The uploaded file exceeds the upload_max_filesize’ error.
Because the default configuration of XAMPP for WordPress upload is 2 MB. If you want to fix this error, follow the below procedures.
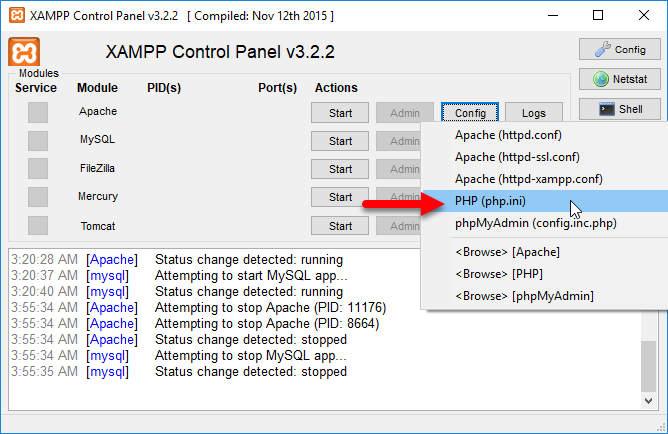
From XAMPP Control Panel, stop the Apache and MySQL Services, then click on the config from apache. From the drop-down menu select PHP (php.ini)
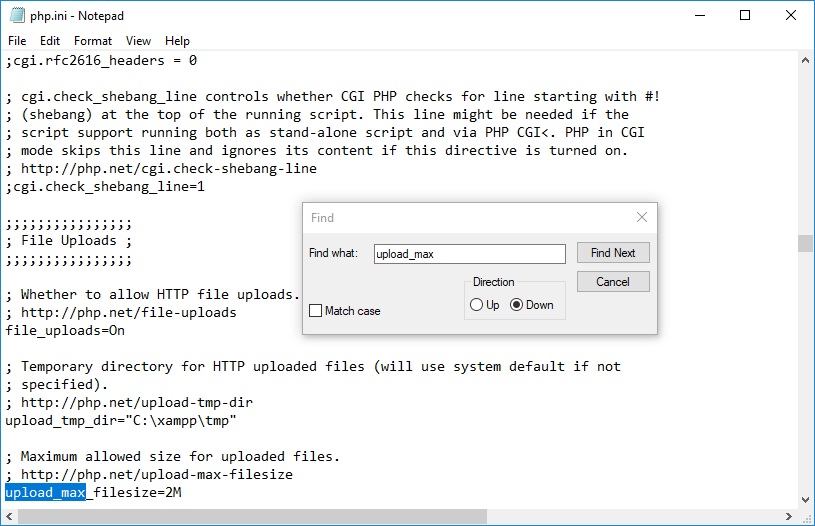
Once the php.ini is opened in the text document, we need to increase the amount of upload. So, edit >Find and type there the upload_max and click find next. When it finds the upload_max_filesize=2M, increase the 2MB to 200 MB or higher, it’s your decision. Once you are done save the changes.
After bringing changes, start the Apache MySQL, AFter that upload files more then 2 MB, it won’t face any error.
How to Fix Warning: POST Content-Length of 14155802 bytes exceeds the limit of 8388608 bytes in Unknown on line 0
This Error Occours because of the post_max_size which is set by default to 8M. Again you have to open the php.ini, search for post_max_size, then increase the amount of it.

Conclusion
I hope you have learned How to Install and Configure Xampp on Windows 10 without any problem. If you faced any error while Installation of WordPress or XAMPP, please let us know on the comment. If you think this post is worthy of sharing, please share it with your friends.
1 comment