
macOS Catalina is the latest version of Apple’s computer operating system that brings attractive features and has been unveiled during WWDC 2019. Long before the announcement of the date of the Apple Worldwide Developers Conference (WWDC 2019), a large number of media outlets expressed their expectations of this great conference, and in almost all of them, Mac OS played an important role. Finally, after high expectations, Apple unveiled the latest version of macOS Catalina.
The end of iTunes, as we’ve been hearing a lot of controversial news lately, has finally come true with the introduction of Mac OS X Catalina. In the new macOS, instead of iTunes, we’re seeing new and standalone apps for music, podcasts, and TV programs called Podcasts, Apple Music, and Apple TV. Apple pointed to the end of the app hours before WWDC started this year by deleting all the iTunes posts on various social networks.
In the standalone Podcasts app, we find a machine-based search that is capable of finding spoken sentences in podcasts. Besides, we have the new TV app that is very similar to the Apple TV app on iOS and claims to support 4K HDR content with HDR 10 standard along with Dolby Vision and Dolby Atmos. The laptop sync section has also been moved to the Finder file management app this time around.
Mac OS Catalina is the first version of Apple’s desktop operating system that no longer supports 32-bit applications. Ac OS Mojave was the latest version to support 32-bit apps.
Another important new feature of macOS that we have heard about for a long time is the possibility of using the iPad as a secondary laptop display. MacBook users will be able to convert their iPad into a secondary display along with Mac OS Catalina. Apple has named the feature “Sidecar”.
Apple has also introduced a new feature called Voice Control for Mac OS and IOS that allows users to simply control the entire operating system by giving voice commands – a feature that, though should wait for a little, but at least At first glance, it looks very interesting. With this feature, you can simply edit texts, open different apps, navigate across the interface, select different items, share images, and more.
Besides, Apple has announced the launch of a new app called Find My; Find My integrates Find My iPhone and Find My Friends apps together. The app, along with the above, also can track offline devices so that Apple devices can transmit a specific signal via Bluetooth. This signal is transmitted by other devices; the received signal is encrypted and completely anonymous, returned to the original user and transmitted.
Macs with T2 chips are equipped with the new Mac OS Activation Lock to provide greater security. Better yet, by enabling this feature, if anyone steals your MacBook, they may not be able to use it at all. In addition to all this, Apple has announced the redesign of Photos and Reminders in the new Mac version.
According to Apple’s official announcement, the Screen Time feature (formerly on iOS) will be coming to Mac, which means users will be able to see graphs of their activity in various apps as well as restrictions imposed by some of the apps on Screen Time which can be Applied or sync to their Apple devices.
The most important new feature of the macOS comes with support for iPad apps. The iPad app running Mac has long been known as the Marzipan codename, but Apple has officially named it Catalyst. Developers can port their apps to the Mac via Mac via Catalyst. Developers will be able to use Xcode to bring iPad apps to Mac OS Catalina.
Twitter is one of the first companies to use Catalyst to launch its official iOS app for Mac. Atlassian also announced that it plans to port its popular Jira iPad app to Mac OS Catalina. It is unclear at this time how many developers will be willing to use the Catalyst project, but what we do know is that Apple strongly encourages all developers to bring their iPad-specific apps to Mac.
Once upon a time, I dreamed to test Apple’s operating system and bring it under the Windows Server and apply policies on it. Later techsviewer founded a method on Github to install macOS on VMware. Then the journey began, first the DMG than the VMDK (VMware Virtual Disk File) and now it is time for an ISO. Yes!!! you heard me right, I am going to guide to How to Install macOS Catalina on VMware with an ISO File. So, enough of this crap let’s dig in to start the installation.
Steps to Install macOS Catalina on VMware on Windows PC
Step 1. Download Required software
There are ways and methods to install macOS Catalina on VMware on Windows PC. If you follow IntoGuide, In previous scenarios, we mentioned and performed methods to install macOS Catalina with VMDK on Windows. Performing the installation with macOS Catalina VMDK takes time, it lacks so much while working [User were complaining about the performance]. At the end after an investigation, we found a method on Github where they performed a task to create a macOS ISO file. We tried it and it worked, the point is, the provided download links are not stable [It’s against apple’s policy, so they may remove it]. It’s better for you to know How to create a macOS Catalina ISO file. Even if you are running macOS Catalina or older versions on VMware or Virtualbox, it can work there too.
What you need is to download the macOS Catalina dmg file from the App store or it doesn’t matter if it is downloaded from other websites. Launch the terminal and type the following commands on Terminal as mentioned in the below post.
2. Download Vmware:
Vmware is a big company that provides cloud and virtualization software for computer geeks. In 2014 I was curious How people are getting a screenshot of the windows logon. I never was a good photographer, so it ended up in my mind How users are taking screenshots. I asked a Facebook page {Technig.com}, and they answered it is called VMware.
Since then I got what is virtualization and how to perform the steps on various operating systems. So, if you want to perform a clean installation of macOS Catalina on Windows, download the VMware software. In the meantime, VMware isn’t the only company that provides the virtualization software.
Oracle is an open-source company that provides the Virtualbox. other companies provide like QEMU, Microsoft’s Hyper-V, Parallel Desktop {Only for mac}, VMware fusion, and Apple Boot Camp.
So, there is plenty of Virtualization software where you can test any operating system you want.
Step 2. Install VMware and Create a New Virtual Machine
As far as I know, windows is the easiest operating system {Even the Windows Server is easy} in the world. And besides there are so companies which provided many software for windows. A user on YouTube was complaining about the mac, that not many companies have created software for mac. My point is, download VMware and install it on your PC, there is no need to provide the step by step guide.
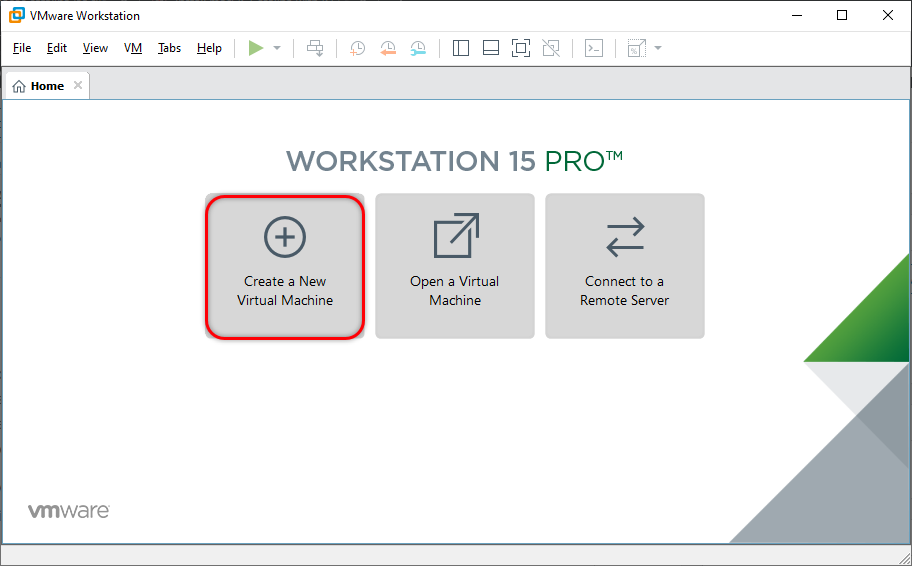
After installing the VMware on windows, launch the software, on the Homepage of the VMware choose the create a Virtual Machine.
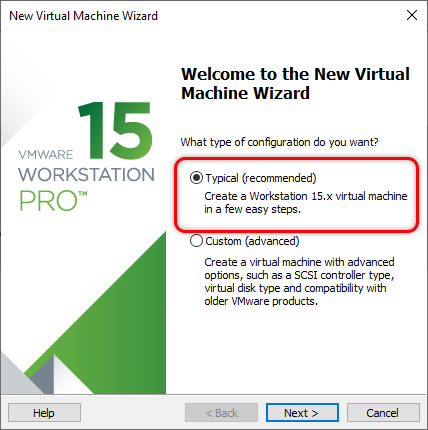
On the New, Virtual Machine Wizard Windows Choose typical and click next.
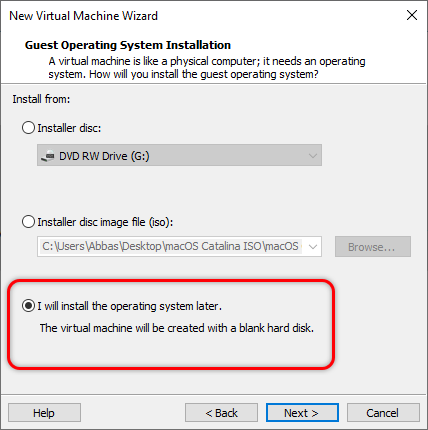
Choose I will the operating system later and hit enter.
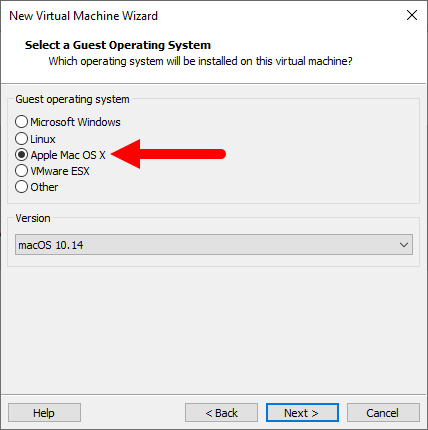
For guest operating system choose Apple Mac OS X and move on.
Provide a name for the Virtual Machine.
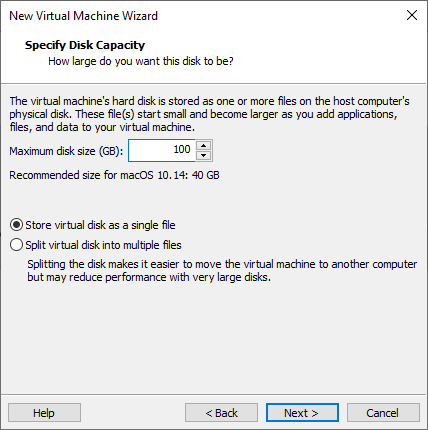
Enter the amount storage for your operating system as you need, however the reruired storage for the macOS is 40 GB. I need 100 GB of storage, I will increase that, then choose the Store Virtual Drive as single file and click next.
Finally, click finish.

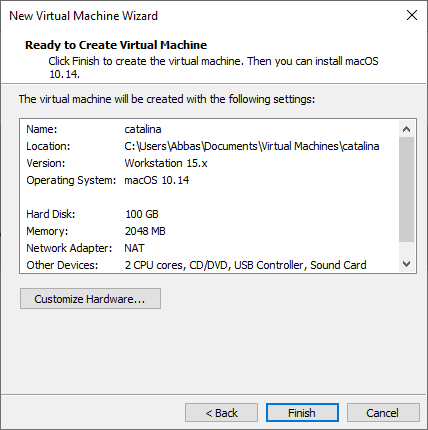
Congratulations for creating a Virtual Machine for macOS Catalina on VMware.
Step 3. Configure Virtual Machine Settings for macOS Catalina
These the very important section where you have apply the same steps in order to install macOS Catalina on VMware.
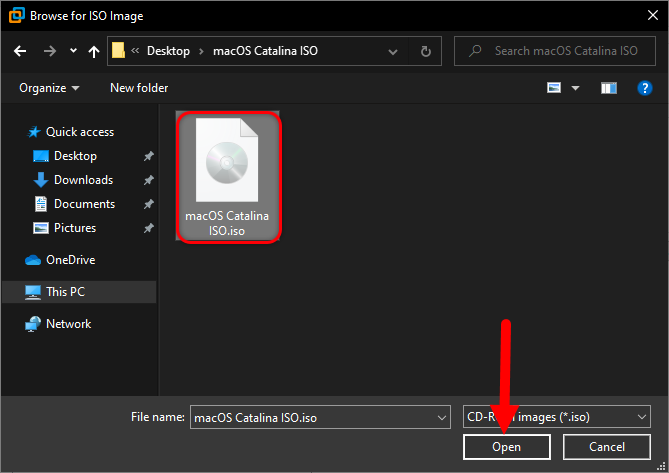
Step 1. Add macOS Catalina ISO
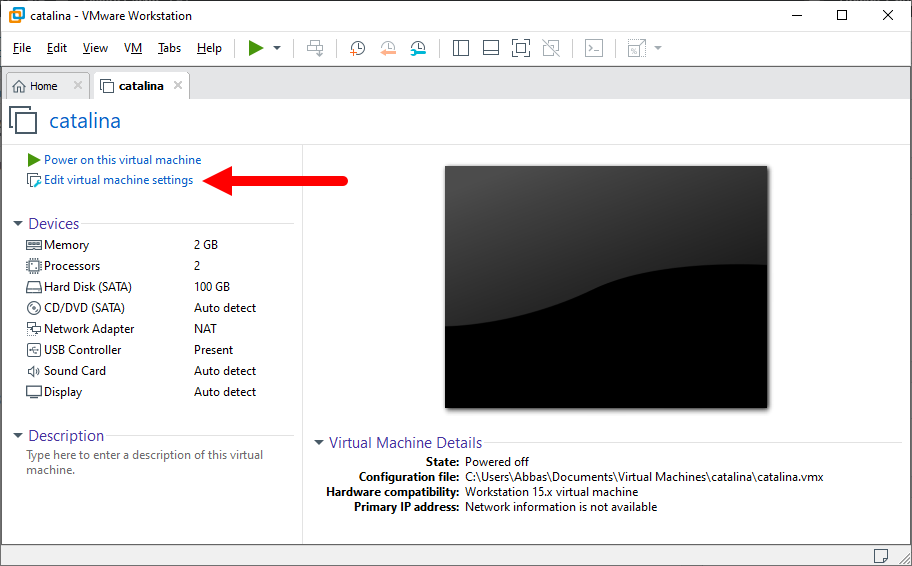
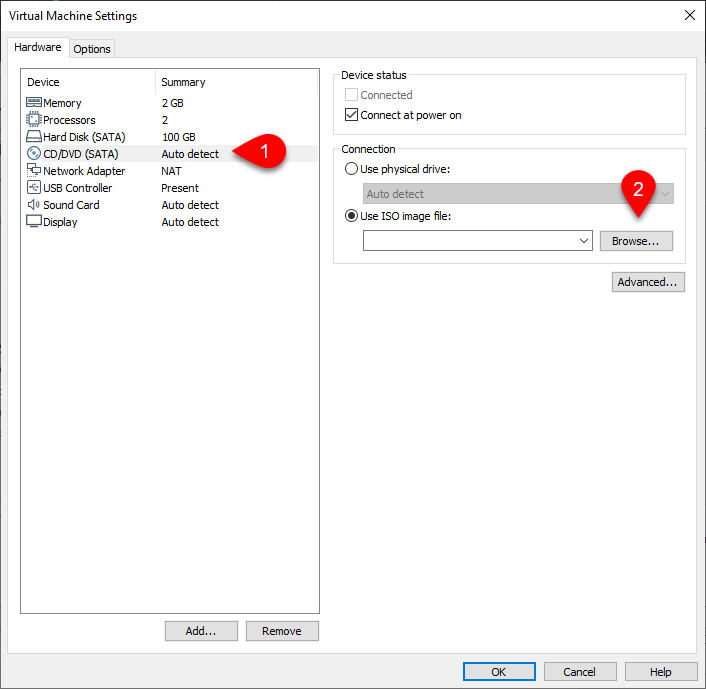
After creating the Virtual machine you have to add the macOS Catalina ISO file, to do that, on the Homepage click edit virtual machine settings.
Go to CD/DVD [Sata], click on browse and locate the macOS Catalina ISO file.

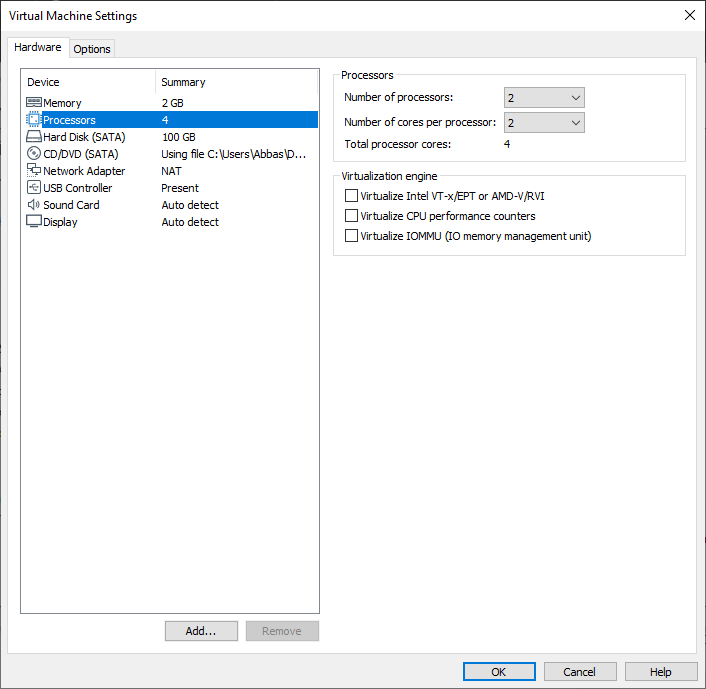
Step 2. Increase Number of Cores and Processors
The macOS requires two processors by default which is already selected in VMware, if it is not selected you have increase it’s number. One more thing, it’s better to increase the number of cores too.
To increase the processor and cores go to the processor tab and increase their numbers.
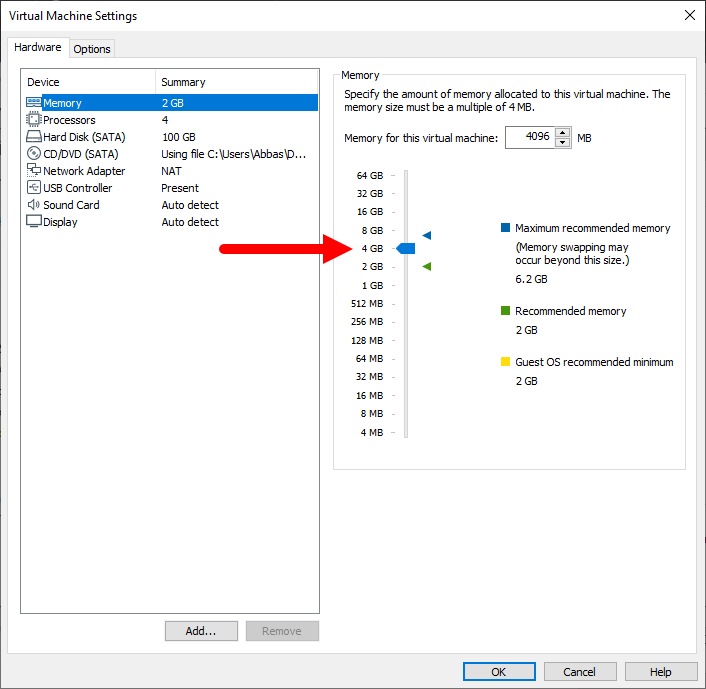
Step 3. Increase the amount of RAM
Apple’s operating systems after the mac OS X El-Capitan requires at least 4GB of RAM, you have to increase the amount. I will increase the amount of RAM to 4GB and depending on your system you can increase even further.
Step 4. Enable USB 3.0
The last step to configure is usb, because with usb 1 during the installation it will stuck but with USB 3.0, the mouse will work. So, go the USB tab and choose USB 3.0.
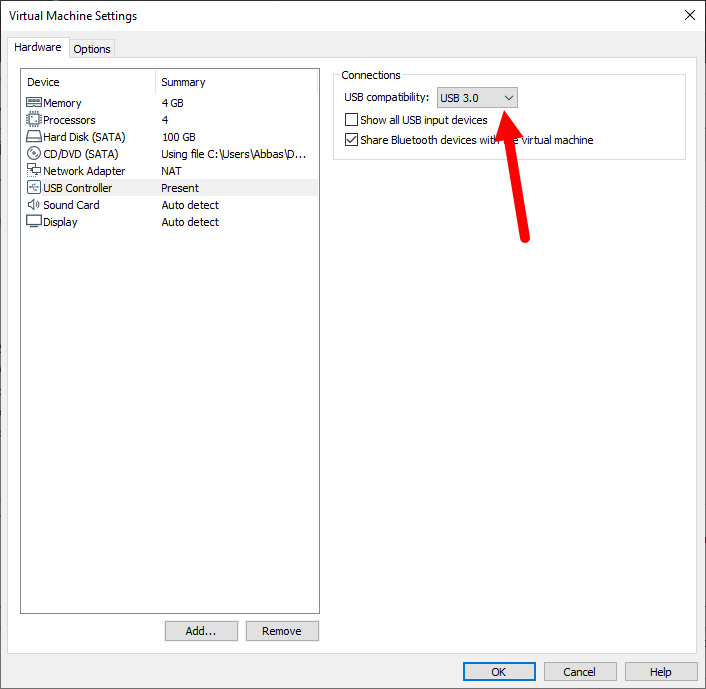
After enabling those changes on the Virtual machine, click OK to apply changes.
Step 5. Add a simple code Configuration file
In order to boot the macOS Catalina on VMware, in the configuration a simple code must be added. The codes looks like smc.version = 0 or ther zero should inside the inverted commas. Depending on your system, whichever works try it [smc.version = “0”].
SMC stands for Add System Management Controller [Appel].
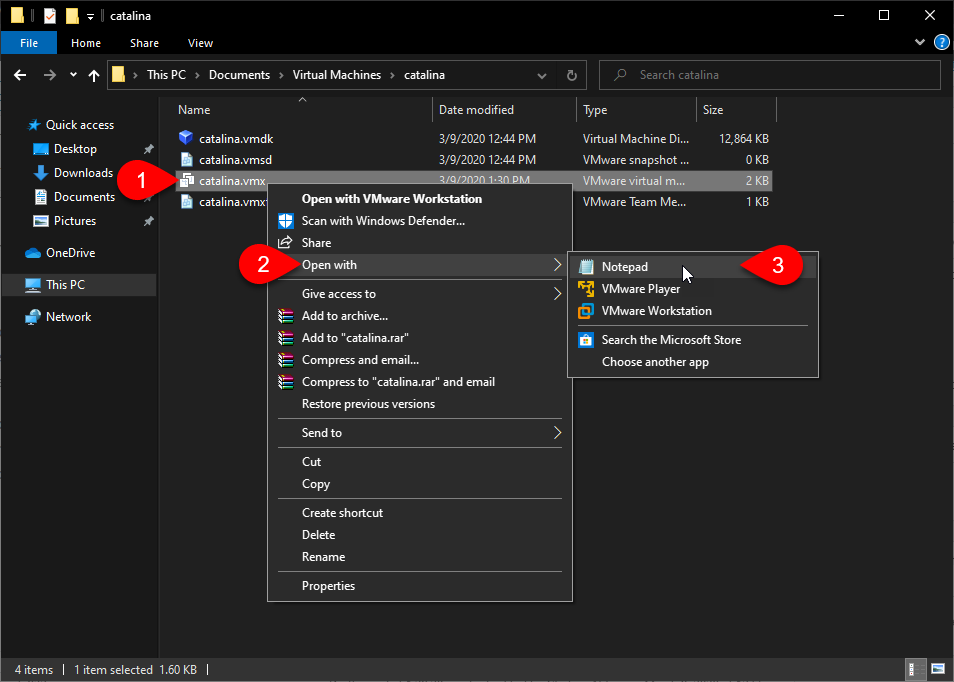
To add this code, open the location where you have saved the Virtual machine. Find the file with .vmx extension and right click on it and open with notepad. Scroll to the end of the configuration codes and add one of the code.
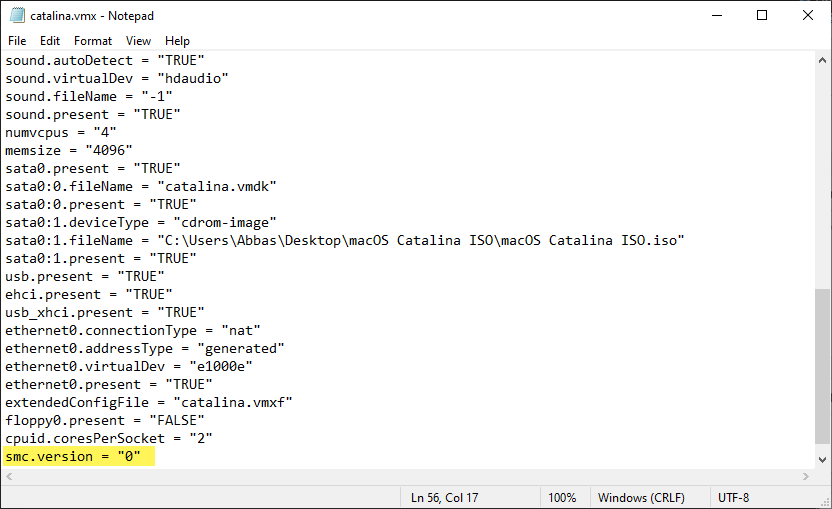
After adding the codes save changes and go to the next step.
Step 4. Install macOS Catalina on VMware on Windows PC
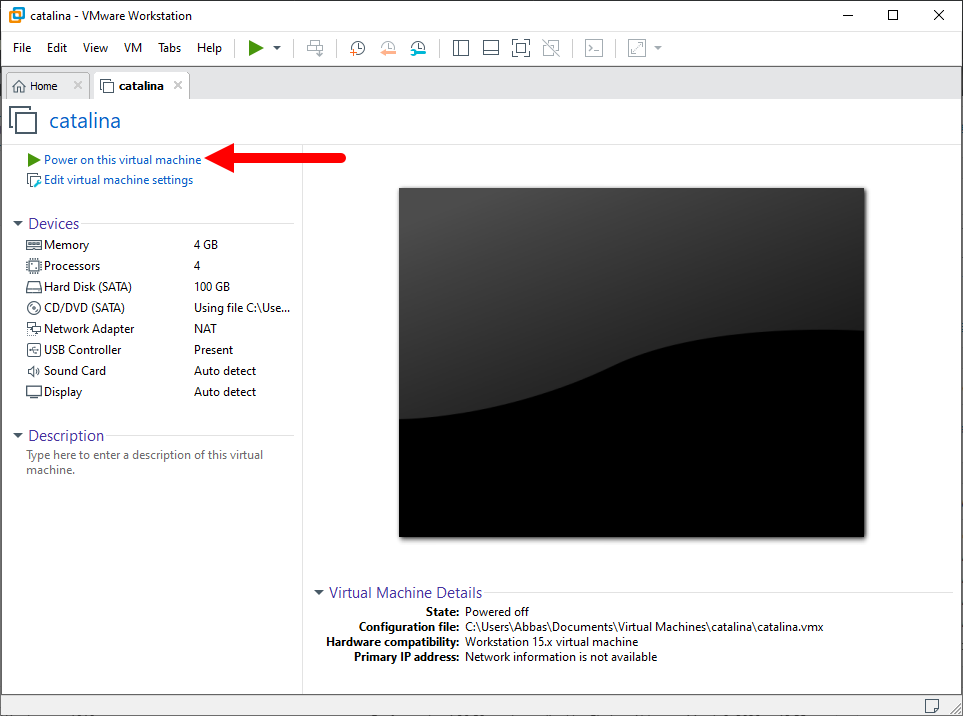
The Final step is to install macOS Catalina on VMware using an ISO file. on the Homepage of the VMware choose power the Virtual machine.
If you encountered the window with just the apple logo, power off the virtual machine and change guest operating system to Windows. If you don’t know How follow the below steps.
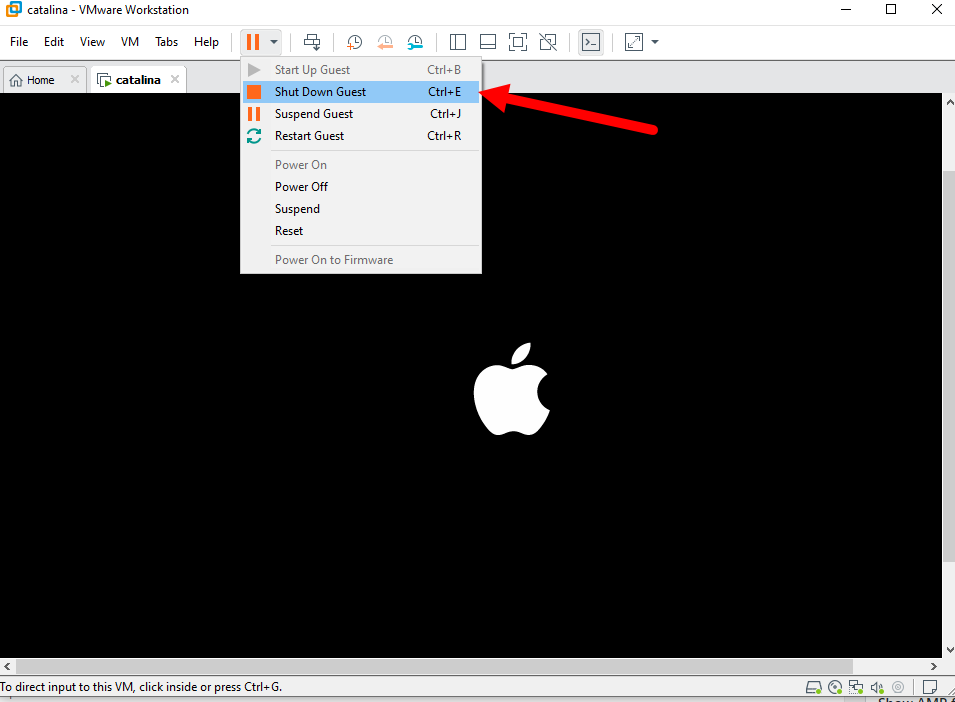

After shutting down the system, edit the Virtual machine settings, go to options tab and choose Microsoft windows.
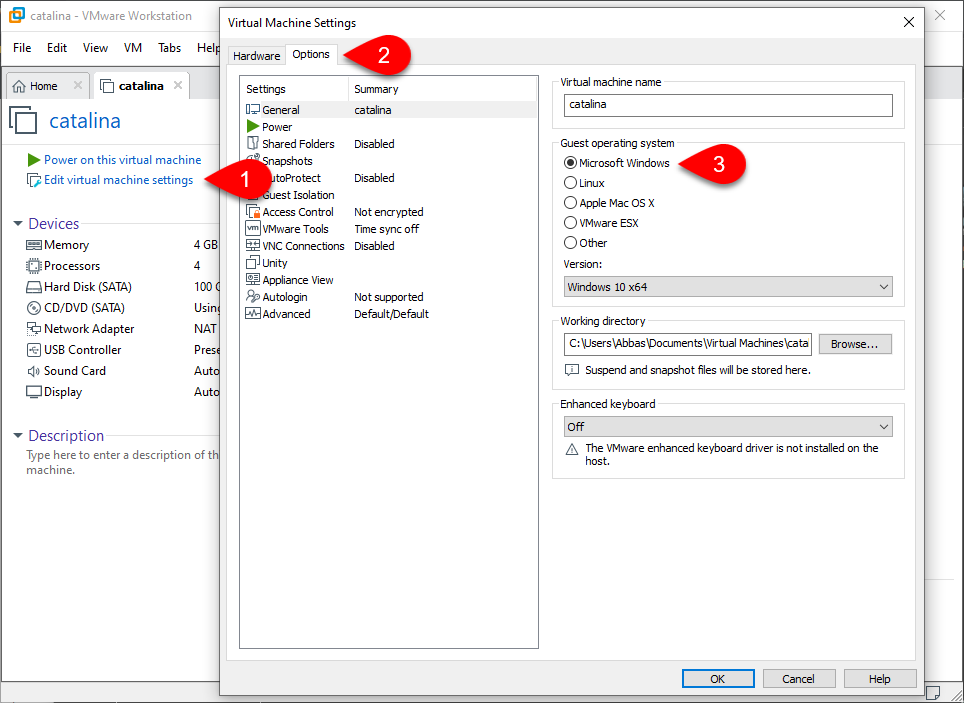
Click OK to bring changes, again power on the VM, if you faced the error again, follow the steps and change from windows to apple mac os x.
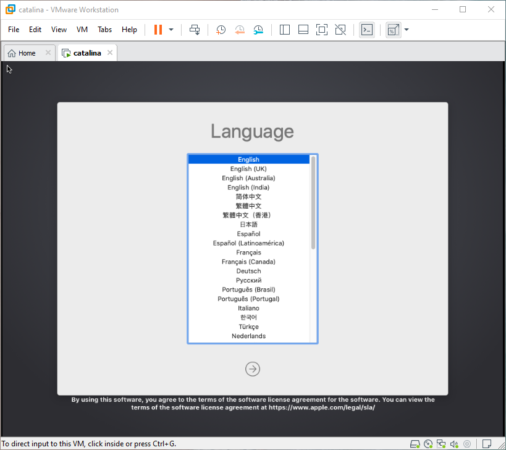
On the welcome window, it asks to choose a language, choose english and click continue.
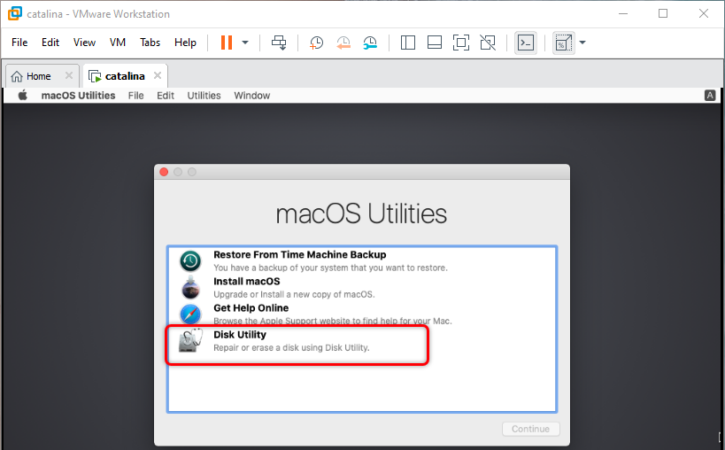
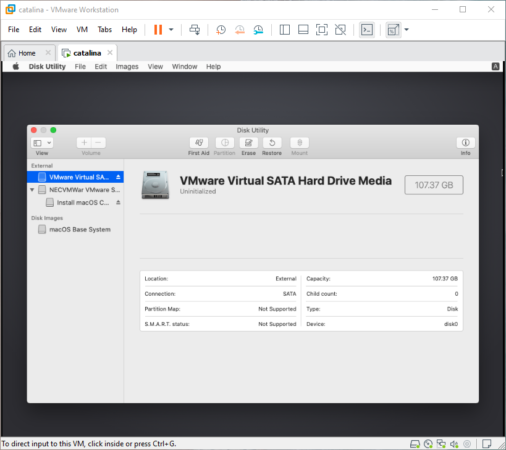
At the macOS Utilities window, choose Disk Utility and click continue.
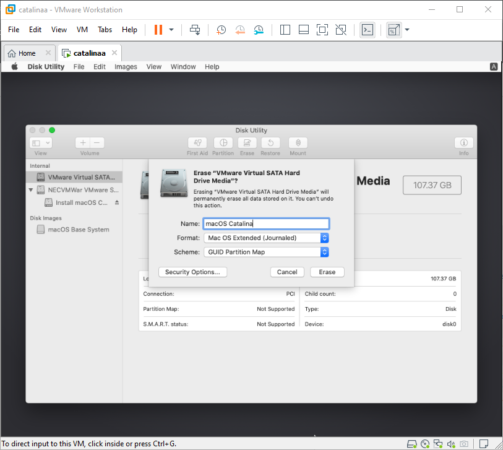
Choose the Virtual Machine Hard drive, click erase and choose the default settings to format the drive.
- Name: macOS Catalina
- Format: Mac OS Extended(Journaled)
- Scheme: GUID Partition Map
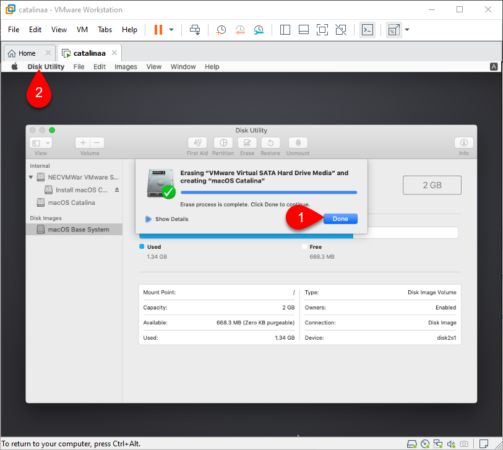
After performing the partition, go to the Disk Utility on the menus and choose quit.
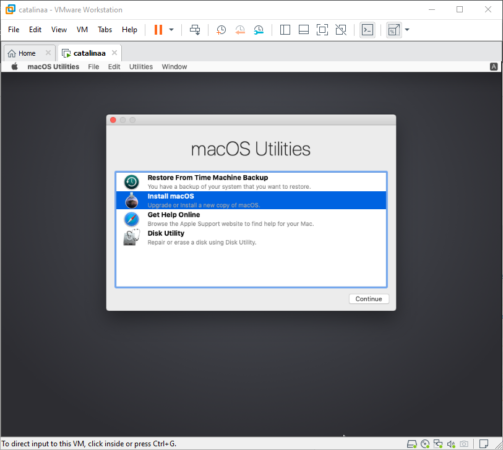
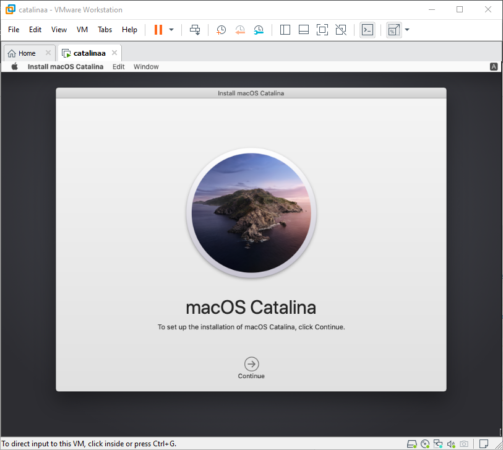
Once again you are in the macOS Utilities window, this time choose install macOS and click continue.
To Install macOS Catalina Click Continue.
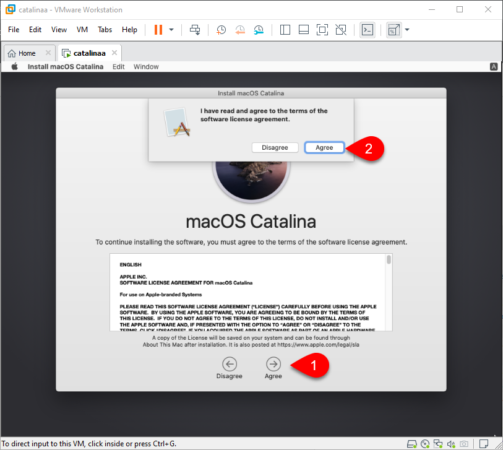
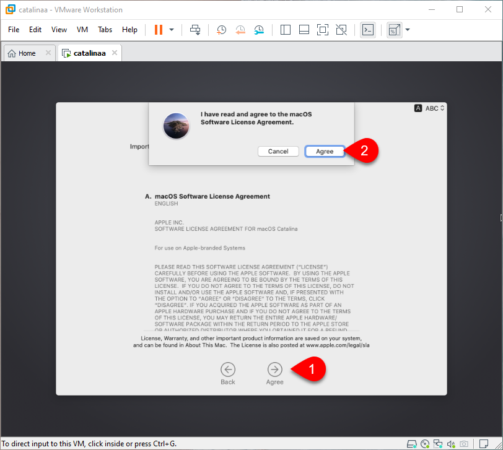
You have to agree to the software terms and conditions and click continue.
On the Windows I have read and agreed to software terms and conditions windows choose agree.
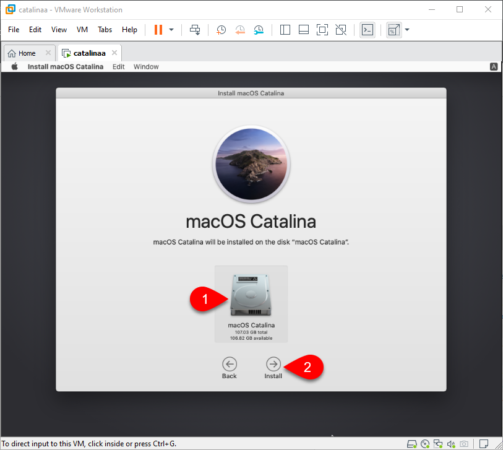
Choose the Hard Disk which was partitioned a moment ago, and click install.
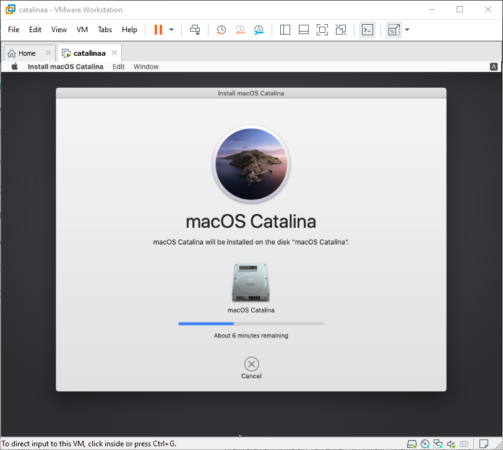
And now wait until macOS Catalina should be installed on Virtual Machine on VMware.
After the installation is completed it will restart by itself, then it will on the apple for several minutes. Once the apple is passed, it’s going to restart again.

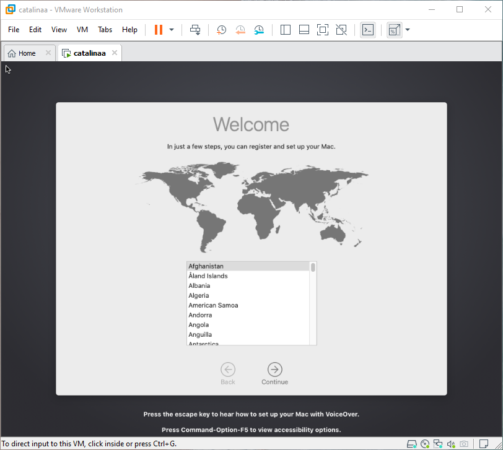
After the restart you will on the window, where you are performing the actual installation of macOS Catalina. The first which will occur to you is welcome window, where you are selecting your region. I recommend to choose your own region, because based on your region, apple will provide the input keyboard too.
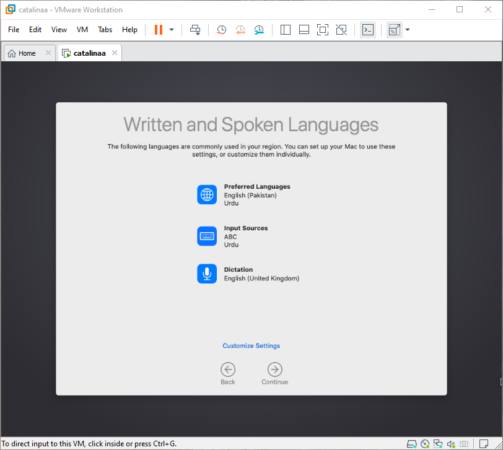
On the written and spoken window, the keyboard languages will appear, their click continue.
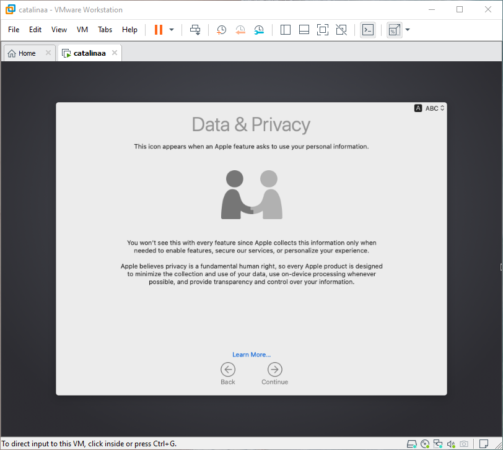
Continue with data and privacy.
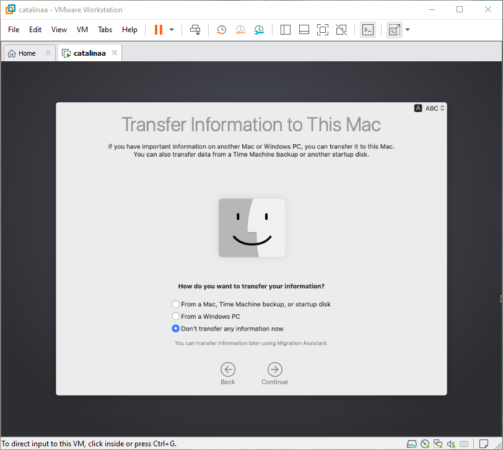
Choose don’t transfer any information to this PC and hit continue.
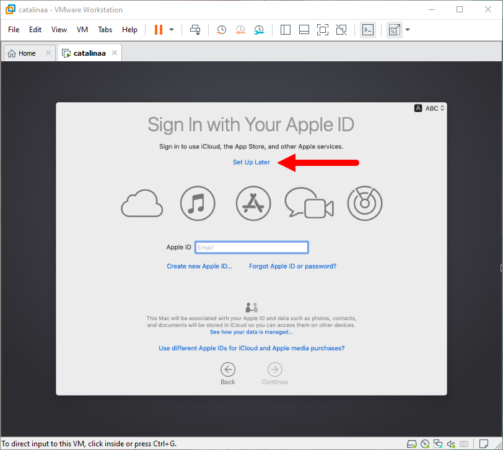
Choose to sign in with an Apple ID or a local account, in my case I will go with the local account.
For your confirmation, macOS asks again, so, choose skip.
This click on continue to agree with the terms and conditions of Apple.
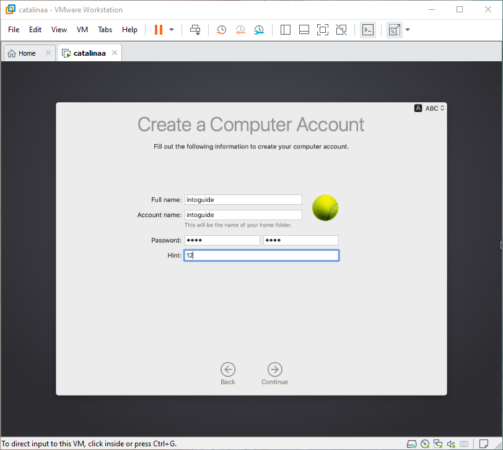
Create a User account, type your name, password and a password hint and hit continue.
Click continue on the express set up window.
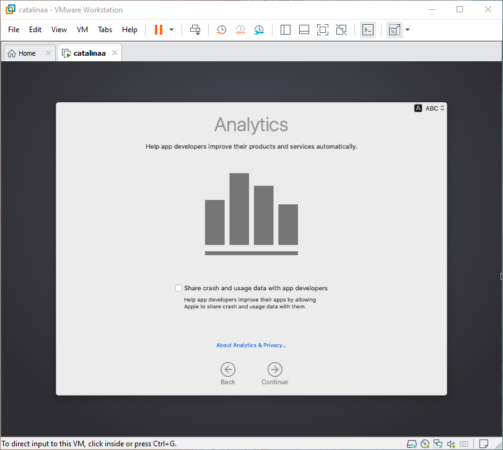
Also click continue with Analytics.
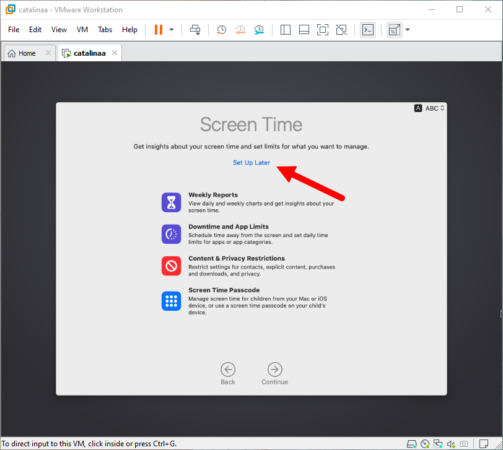
If you want to monitor the usage apps through hours, weeks, months and more, set up Screen Time, if not choose set up later.
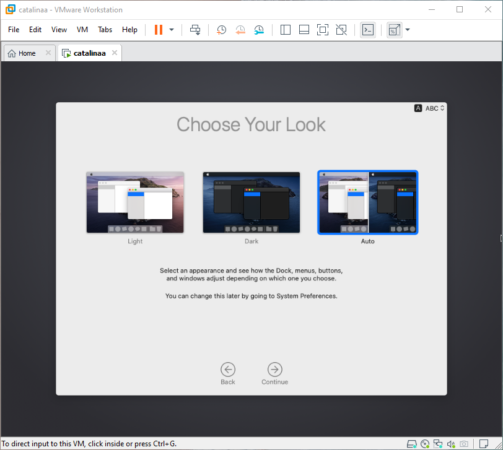
Choose a Look for your macOS Catalina on VMware.
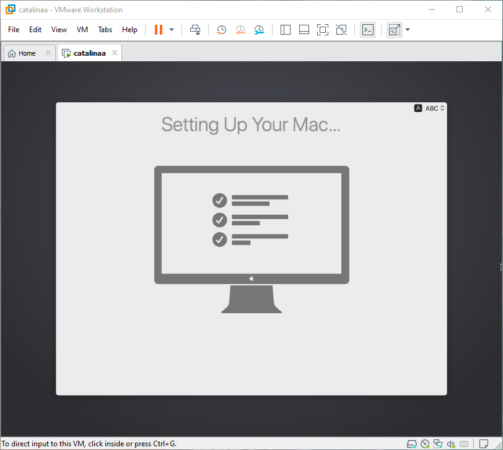
Wait a moment until the window is set up for the first use.
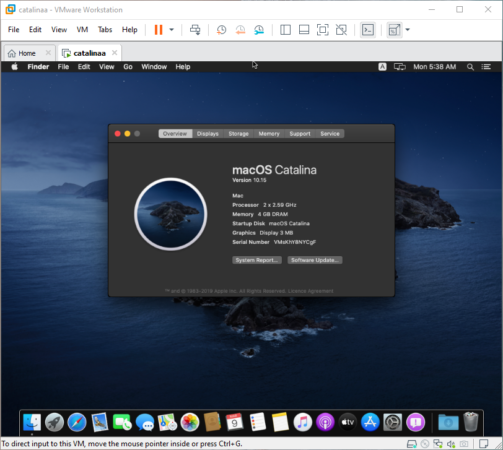
To check if it is the macOS Catalina, click on Apple logo at the left corner and choose about mac.


And Congratulations For Installing macOS Catalina on VMware on Windows with an ISO File.
Install VMware Tools on macOS Catalina on Windows PC
An important segment with virtual machines are the file sharing, draging, graphics, display and more. In simple words, you can refer to the VMware Tools as the drivers of the operating system on a Virtual machine. Luckily, configuring the kexts in Virtual machine is so much easy compare to configuring Kext on Hackintosh.
Mostly, I am using the macOS Catalina for creating bootable USB for mac, Windows, Linux. I am using it to bring under a domain on Windows Server, in simple words dragging files from actual PC to Virtual Machine is very important, if that is enabled, transferring files will be kind of hard. That’s why I have to configure drivers by installing the VMware Tools.
Procedures to Install VMware tools on Windows PC:
The very step is to eject the macOS Catalina ISO File , which is located at the Desktop. Right click on it and choose Eject.
Go to the VM menu and choose Install VMware Tools, after that the VMware Tools will appear on your desktop.
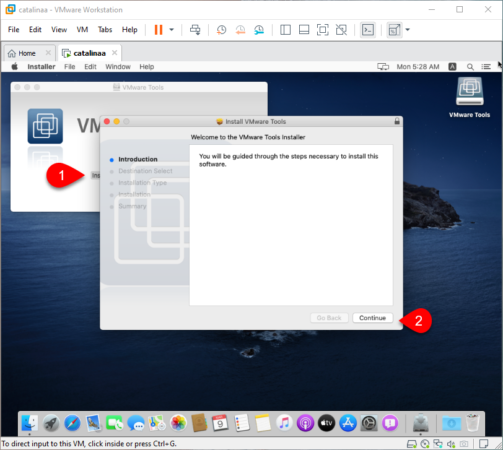
Double Click on the Install VMware Tools and Installer of the VMware will launch, their click continue.
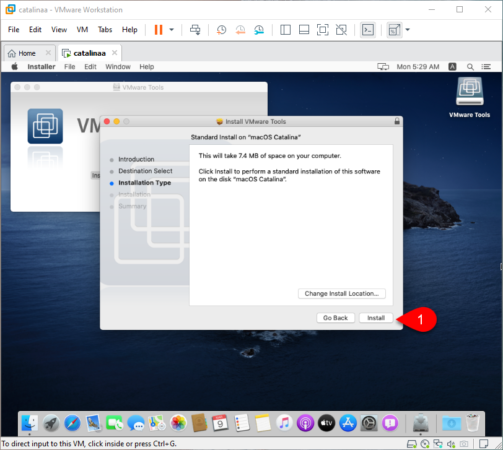
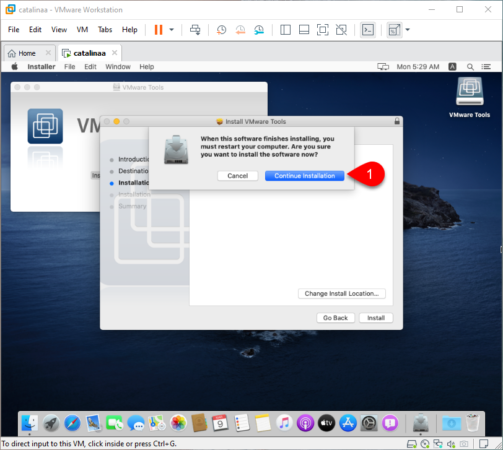
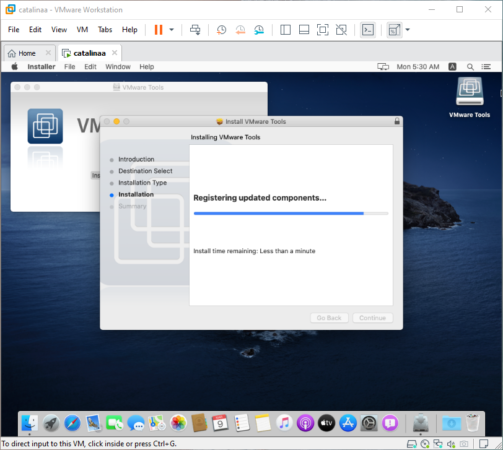
For the next step which is modifying the location of the Tools to be install, simply click install, then confirm the installation by continue installation.
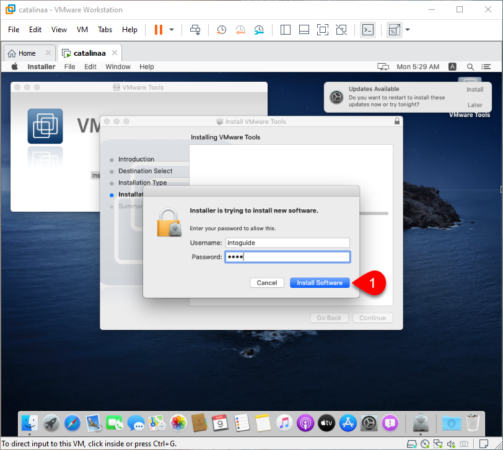
This time enter your password to access the system preferences, after that wait until the VMware Tools is installed.
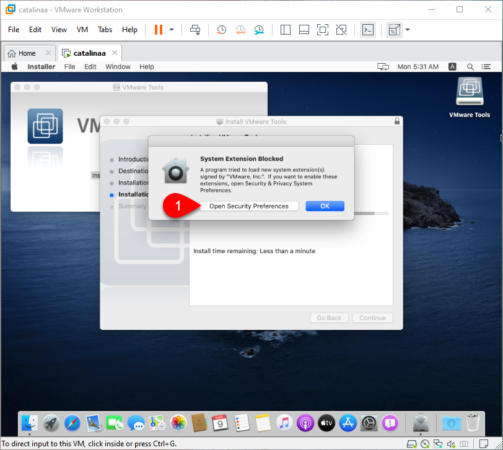
During the installation an extension alert will appear which says, the extension is blocked. Click on the Open system preferences and to allow the extension.
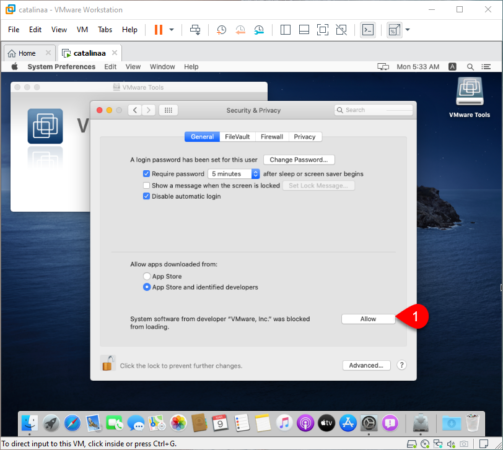
Once the system preferences is launched, click on the lock icon and enter your password.
Now Click Allow to allow the VMware Tool extension on the system.
Go menus and quit the system preferences, once the system preferences is quit, you will be on VMware Tools installer window. Click restart to restart the system.
Once the system is restart, the system blocked extension will again appear, again allow the extension and wait until the changes occurs.


Next Step
Here is the thing, when a website is hacked, specialist suggest that contact your host and restore the backup. Because every week, daily based on your subscriptions they are taking backup of the sites. Once it is restored you are good to go. The same is with windows, if you have your system’s backup, anything goes wrong, easily restore it. Till now you have taken my point, that For macOS Catalina Virtual Machine take a backup, who knows what will occur.
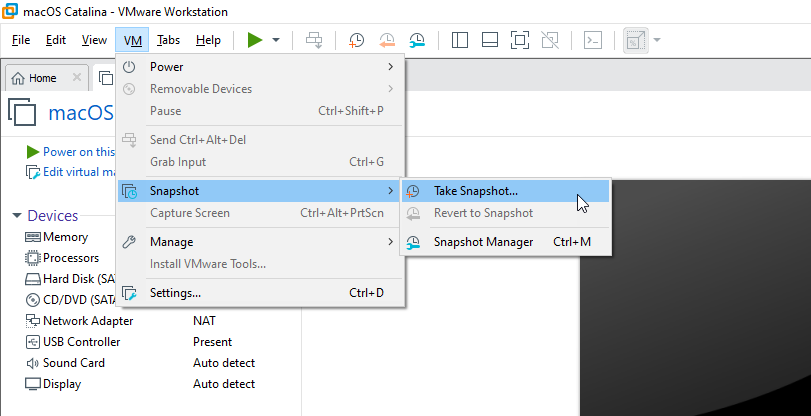
Backup inside the Vmware is called Snapshot. You can take a snapshot at any stage of the computer. If it is running or it’s powered off, just go to VM> Snapshot and choose take a Snapshot. Provide a name and description and click ok.
Gathering Point
To summarize this post, just download VMware and macOS Catalina ISO file. Create a new Virtual machine and configure the settings then start the installation. When the installation succeeded, install Vmware Tools and take a Snapshot. By way anything goes wrong we are here, just let us know.
Related Searches:
- macos catalina vmware image
- macos catalina vmware image download
- macos catalina iso vmware
- mac os catalina iso download
- vmware catalina black screen
- catalina vmdk
- macos catalina virtualbox
- catalina vmware file
21 comments
On the apple logo it gives me a message that vm has disabled the cpu. Is it because i have an amd cpu?
Hi Ghulam,
Thanks a lot for this post, it is without a doubt very useful, particularly because it is so detailed and concise.
I’ve got a question though: have you perhaps come across a situation in which all went just fine, you got the VM working with macOS, all’s running as expected, except in terms of performance? I mean, I created a VM on VMware Workstation Pro, in my personal PC (a Lenovo setup with an i5-1035G1 and 16GB RAM) and regardless of the guest processor setup, I can’t seem to make it work smoothly. macOS simply drags too much to the point it is not productive.
Do you have any ideas on this?
Eduardo
Hi Eduardo
It is working very well in the vmware on my computer but in virtualbox it is so slow.
So, I have no idea why it is slow on your computer.
Hi Ghulam,
Thanks for coming back to me so quick 🙂
I just remembered one detail, despite the fact that you do not instruct this on your post. Do you happen to have the option “Virtualize Inter VT-x/EPT or ADM-V/RVI” under Processors active?
I do not, because VMware won’t let me start the machine with that option active. Even though I do have the option to virtualize active in my BIOS…
Nevermind, I misread the popup, it has nothing to do with my host 🙂
That being said… i have no clue why macOS on my guest VM is dragging.
Perhaps, try and install once again, may be it will fix itself.
Seems the “culprit” is VMWare tools. I’ve done a fresh install on a brand new VM and… all was perfectly fine. that is up until the moment i installed the VMWare tools. From that moment i was able to extend the screen to full size amongst other things, but i lost performance greatly. Not sure yet what to do next, but trying…
I’m stuck at a screen with “prohibitory symbol”. Apple explains it here httpssupport.apple.com/en-us/HT210901) but its not working. Changed to windows and then back to Apple but nothing worked
Boot loop for me too. No welcome screen.
After installation it is taking me back to utilities selection. Also, I am unable to input the name from of partition so I left it “UNTITLED”
Thank you so much! I have achieved it!
great article! I’ve been trying this for about a week with no success until I found your site. One Question. How can I install Xcode? I get an error xcode can’t be installed on “macOS Caltalina by …” because macOS version 10.15.2 or later is required.
The Virtual Machine says during Startup that no cd iso was found where could the problen be?
To pair a Bluetooth keyboard, turn it on and wait for your computer to connect to it…….
That is what appears on the screen and I cannot do anything else.
Hey! Have you tried passing your keyboard through via USB? Solved that for me!
I am stuck on a boot loop.
Hi, Change the operating system from windows to mac, and if didn’t work change it back to mac.
My keyboard is not working
That is because your vmware is kind of corrupt. reinstall it, or download a new one.
This does not work. VMWare on Windows DOES NOT have the Mac OSX option unless you hack it. This does not tell you how to get that option.
sorry man, I forgot to mention it in the post.
Download and install unblocker.