
This is a series on macOS 101 on Windows 10. Here you will learn How to Install macOS 10.14 Mojave, macOS 10.15 Catalina and macOS 11 Big Sur on VirtualBox. Each Guide is divided into pages so you should not face any problem.
How to Install macOS Big Sur on VirtualBox on Windows?
Recently at WWDC 20, Apple released the new macOS called macOS Big Sur with many new features and updates to the new version. macOS Big Sur Beta version is available on the internet for the developers and the DMG version will replace macOS 10.15 Catalina this fall. You can participate at the developer.apple.com to try the beta version and give your feedback and opinion as a developer member about the macOS Big Sur. If you want to try the betas, we suggest you installing it on a secondary device, or even you can try it installing virtually on your Windows PC. Since beta versions are not the final version and it will have crashes or error, hence the best way to try it is installing virtually. If you want to give it a try then follow the step by step guides on how to install macOS Big Sur on VirtualBox on Windows.
What is Virtualization
Virtualization is indeed the process of creating a virtual rather than an actual copy of something and is so similar to the original. And desktop Virtualization allows you to run two or more OS (Operating Systems) using only one PC. So, it’s like two or more computers in one PC. One is physical and the others are virtual which acts as like original OS.
In Desktop Virtualization we can use multiple Operating Systems on a single computer including Windows, Linux, Mac, and more. In addition, it lets your Macintosh run Windows, creating a virtual PC environment for all your Windows applications.
There are many virtual machines software, but the best virtual machines software which we have used and have a good experience are VMware and VirtualBox. If you want to try macOS Big Sur on your Windows or PC, follow the following steps:
How to Install macOS Big Sur on VirtualBox on Windows
Before starting the installation steps make sure your system is compatible and have the following aspects:
Prerequisite
- Make sure to enable Virtualization Technology form BIOS of your PC
- A 64-bit Operating system (Windows)
- 4 GB RAM for better performance
- 30 GB free storage
If you are having a system having this functionality and can support installing macOS Big Sur then you can try it.
Now, this is a good idea to download all the required files first you need to install macOS Big Sur on VirtualBox on your PC. Download the required files from the links given below.
Step 1. Install VirtualBox on Windows
When you have downloaded all the required files for the process, the first step is to install VirtualBox on your PC. Make sure the VirtualBox is the latest version because some old version is not compatible with installing macOS Big Sur. Installing VirtualBox is quite simple, just follow the following steps:
- Open VirtualBox and Run the setup
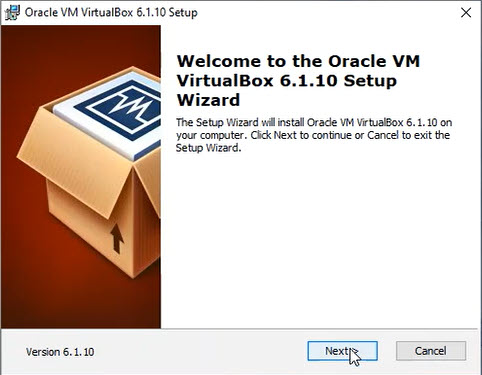
- Click Next > again click Next in the Custom Setup
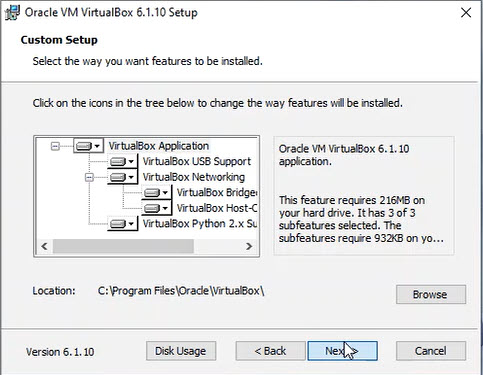
- Warning: Network Interface, Click Yes to proceed
- Install
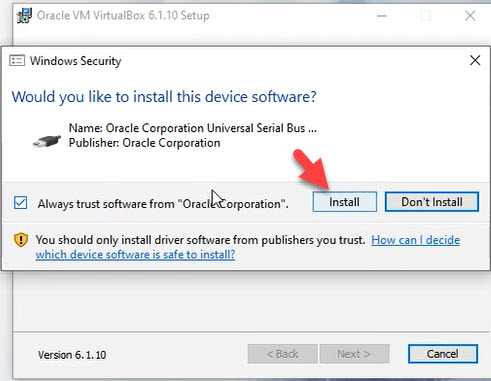
- Would you like to install this device software? Click Install
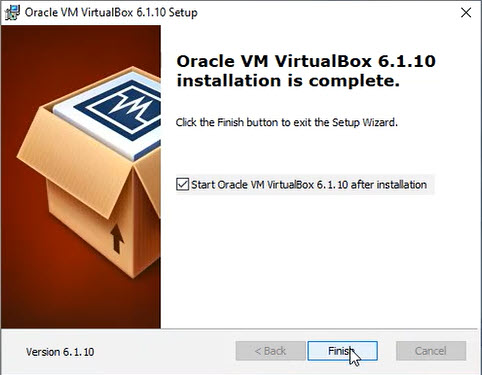
- Finish

Step 2. install VirtualBox Extension Pack to Avoid Freeing Errors
When you have installed VirtualBox, now you need to Download VirtualBox Extension since installing the macOS Big Sur on VirtualBox the mouse and keyboard won’t work, so in order to avoid the error download and install the Extension. Follow the following steps to do so:
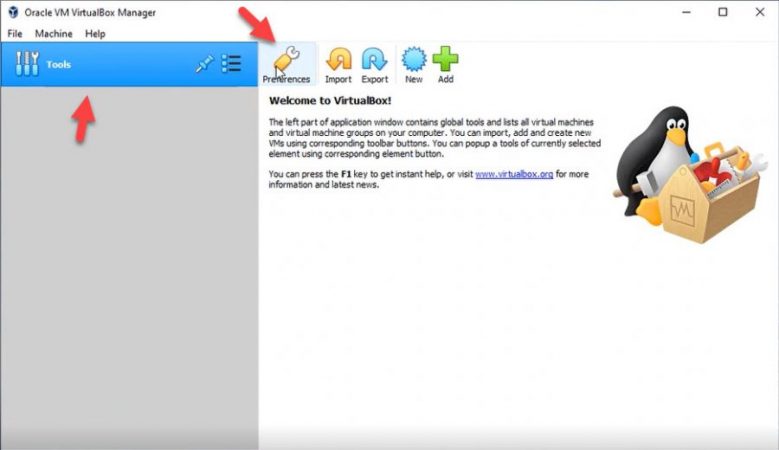
- Open VirtualBox
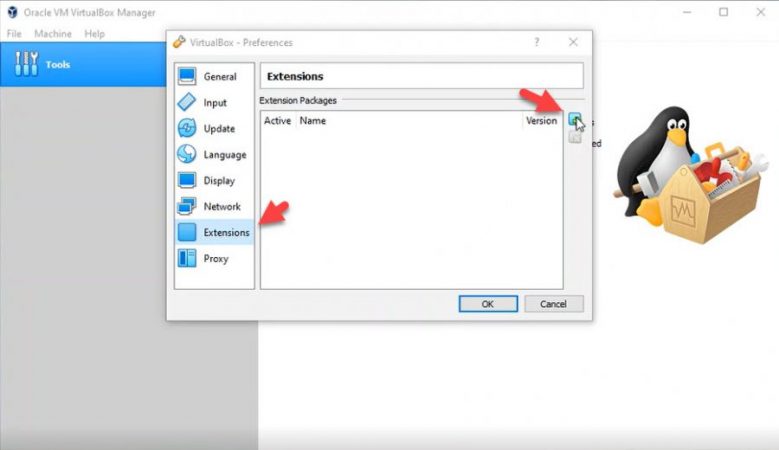
- Click on Tools> Preferences> Extensions
- Click the Plus Icon
- Select VirtualBox extension
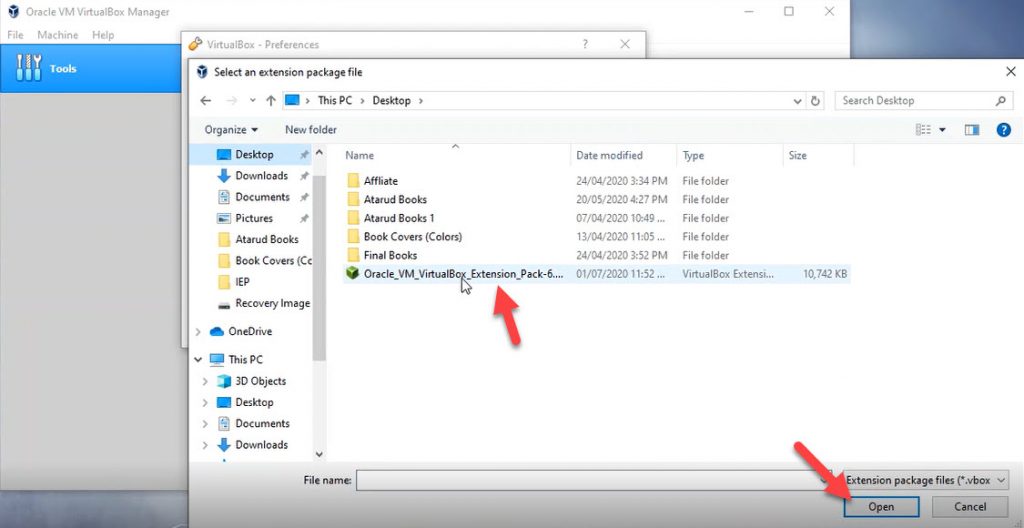
- Click Install and agree to the terms and conditions

- Click the Ok button
Step 3. Create a New Virtual Machine and Customize and Customize the Setting
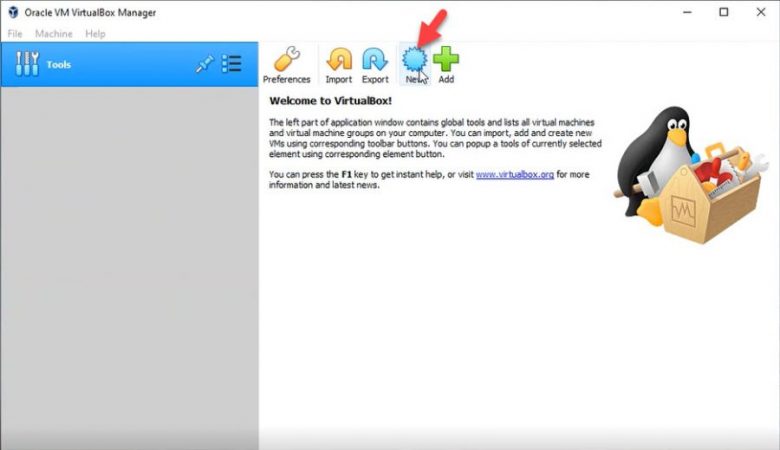
Now, in this step you need to create a New Virtual Machine for macOS Big Sur. For creating a new Virtual machine, follow the following steps:
- Open VirtualBox
- Click New
- Name your machine (macOS Big Sur)
- Click Expert Mode
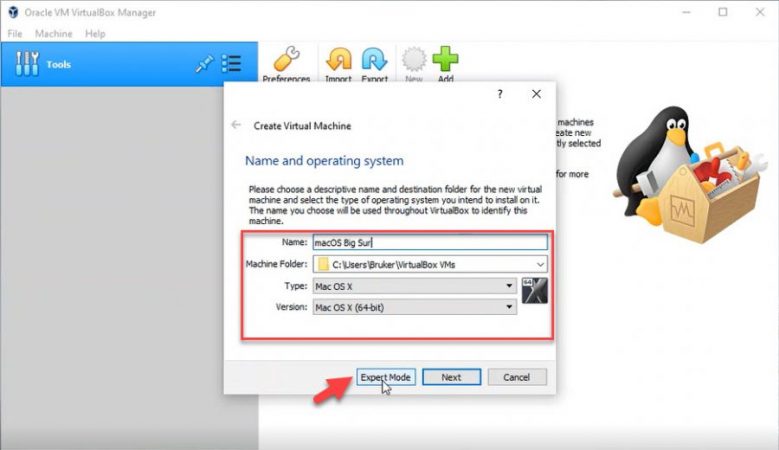
- Once again name your operating system and choose the machine folder
- Select Mac OS x from the Type
- Select Version Mac OS x (64-bit)
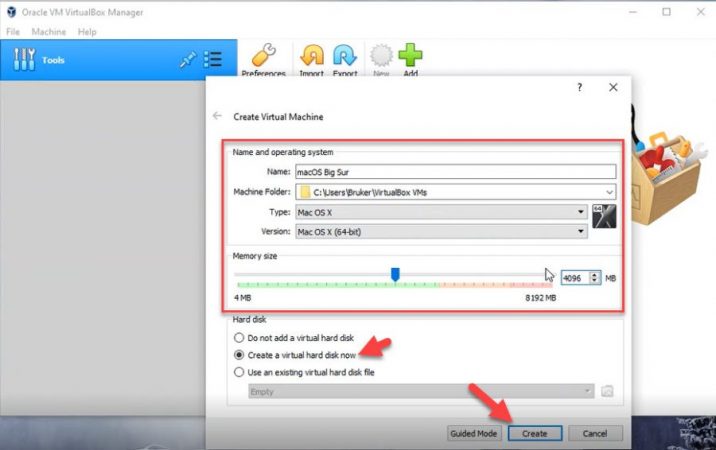
- Maximize the Ram size to 4GB
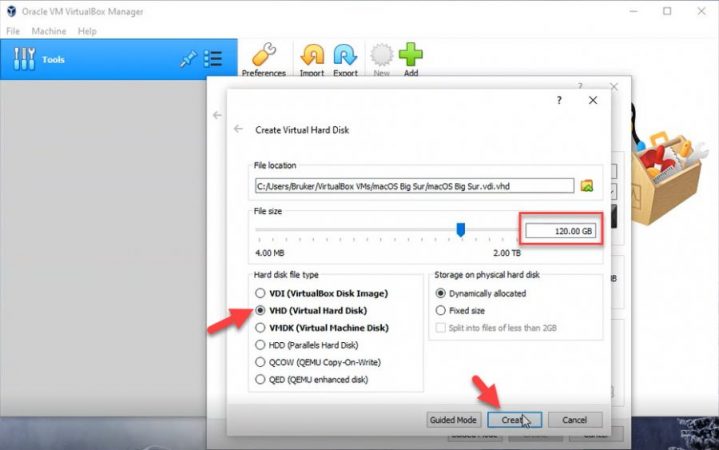
- Select Create a virtual hard disk now and Click Create
- Decide the File location
- Make sure to maximize the disk size to at least 120 GB
- Select VHD (Virtual Hard Disk) and then click Create
Customize the Settings
When the virtual machine is created, the next step is to customize the settings of the created virtual machine as required for the installation. The following customization is required:
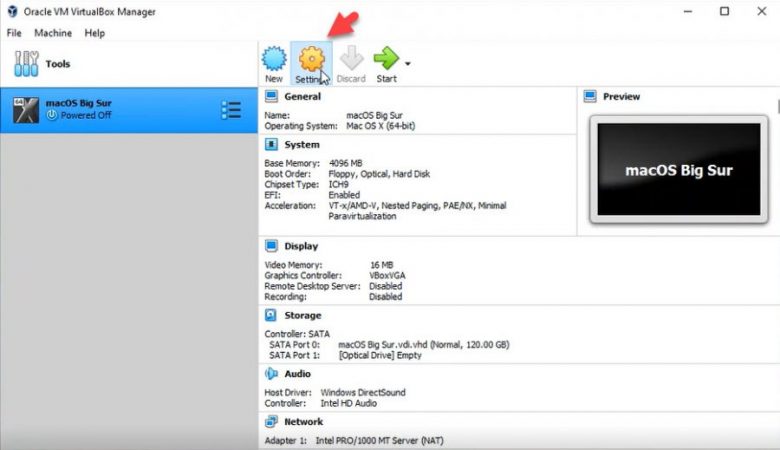
- Select the Created Virtual Machine (macOS Big Sur)
- Navigate to Settings
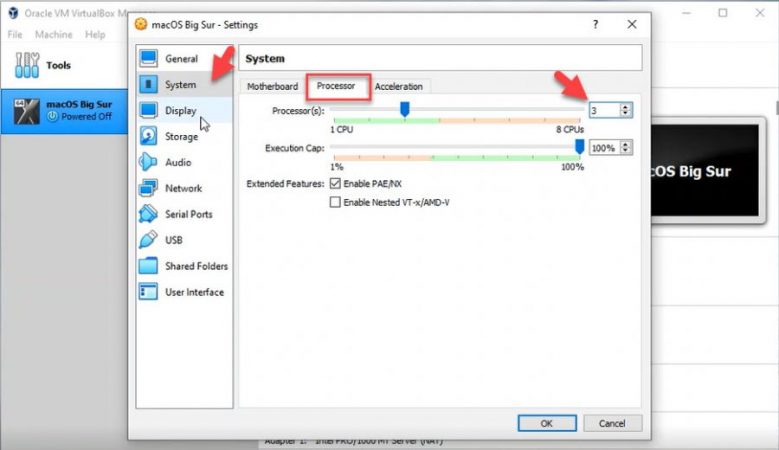
- Click System> Processor and maximize the processor to 3 or 4
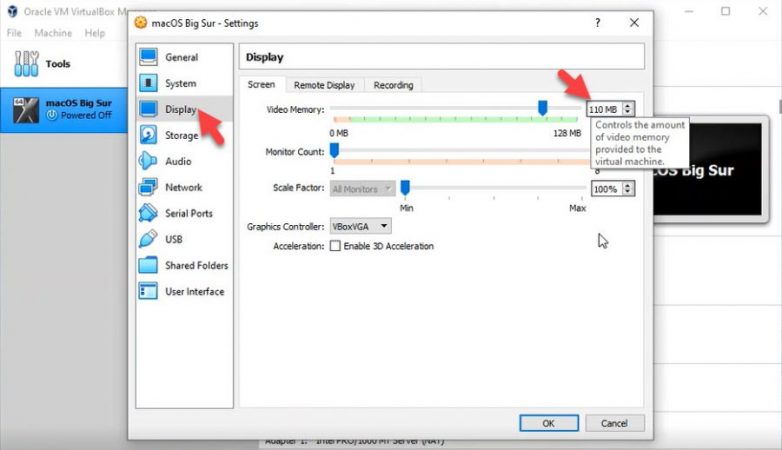
- Then Click Display and maximize the video memory size to 128 MB
- Click Storage> Empty> Click CD icon and click Choose/Create a Virtual Optical Disk
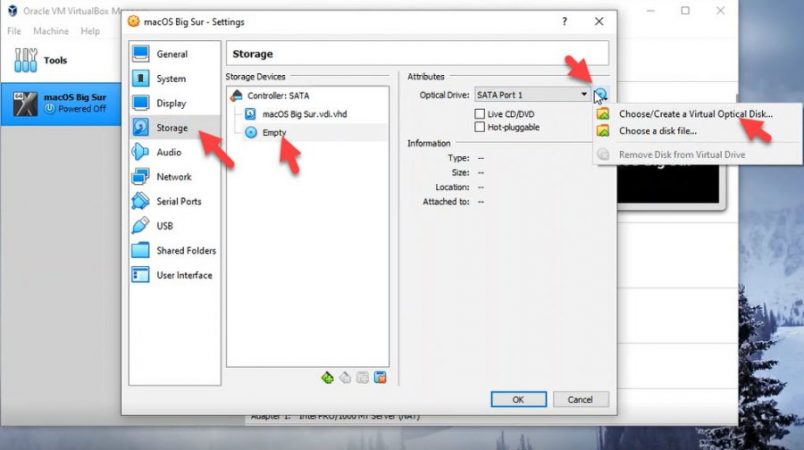
- Click Add or Plus icon to add the Optical Disk
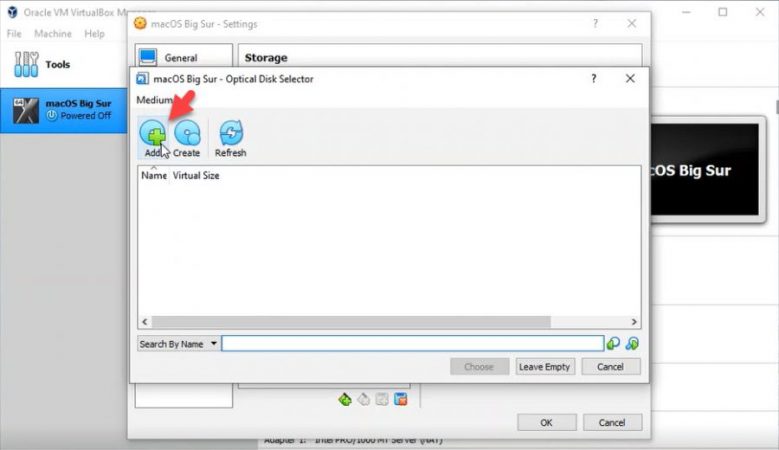
- Find the Downloaded macOS Big Sur ISO image you have already downloaded and open it
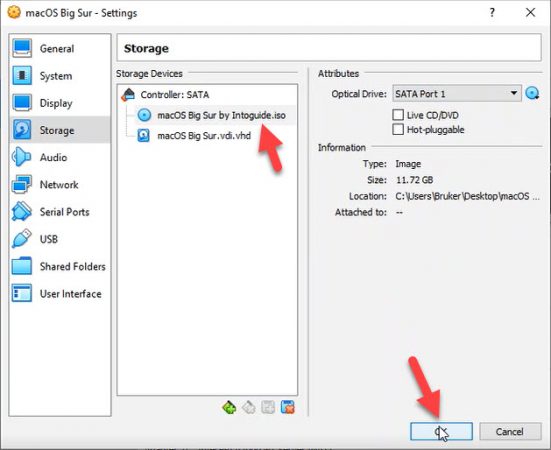
- Click Choose

- Make sure the macOS Big Sur is first in the storage devices if it’s not changed the SATA Port from Optical Drive Number to 0
- Finally, click Ok
Step 4. Run VirtualBox Code to Avoid Errors Using Command Prompt
Once you have created a virtual machine for macOS Big Sur, the next step is to run the VirtualBox code to avoid errors using CMD (Command Prompt). Applying these codes will solve errors such as -cpuidset and it modifies the VM as an Apple product. In addition, this step will enable many features of Mac for the VM.
Important: It’s very important to exit the VirtualBox before applying the codes, if you don’t exit the program your virtual machine might not proceed to the installation process. To do so, don’t just click exit button, click on and then click Exit button in order to quit the program from the background of the system too.

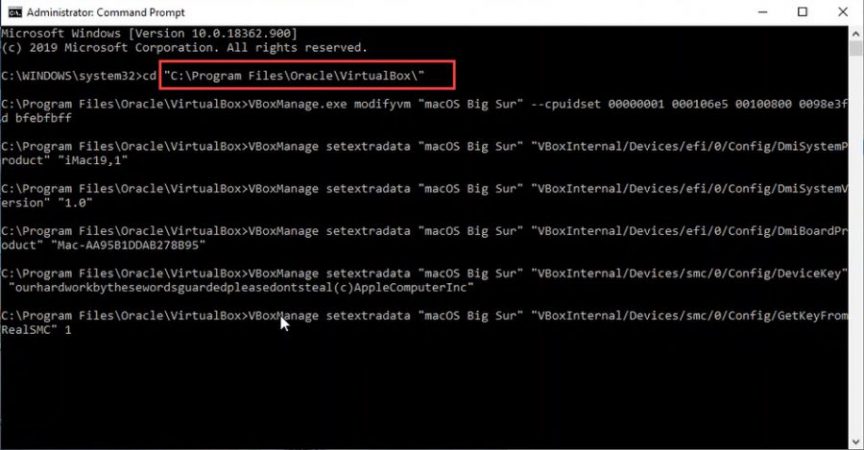
When the VirtualBox is exit completely, now this is time to apply the following codes using CMD, but before applying the codes. It’s essential to edit the code by replacing “Your VM name” to the virtual machine name you created already. For instance, I named the virtual machine “macOS Big Sur” as follow:
cd "C:\Program Files\Oracle\VirtualBox\" VBoxManage.exe modifyvm "VM Name" --cpuidset 00000001 000106e5 00100800 0098e3fd bfebfbff VBoxManage setextradata "VM Name" "VBoxInternal/Devices/efi/0/Config/DmiSystemProduct" "iMac19,1" VBoxManage setextradata "VM Name" "VBoxInternal/Devices/efi/0/Config/DmiSystemVersion" "1.0" VBoxManage setextradata "VM Name" "VBoxInternal/Devices/efi/0/Config/DmiBoardProduct" "Mac-AA95B1DDAB278B95" VBoxManage setextradata "VM Name" "VBoxInternal/Devices/smc/0/Config/DeviceKey" "ourhardworkbythesewordsguardedpleasedontsteal(c)AppleComputerInc" VBoxManage setextradata "VM Name" "VBoxInternal/Devices/smc/0/Config/GetKeyFromRealSMC" 1

When the VM Name is replaced with the name of the virtual machine you created, now open CMD and run it as administrator. Copy the codes line by line and run it on CMD, remember not to copy it all at once, you have to run it line by line and hit enter on CMD. If you don’t see any error, you have done the steps successfully till now and you can move ahead.
Step 5. Start the Created Virtual Machine
You are now half away to get the process completed. The macOS Big Sur image is now ready to be started. Now the process is quite easy, just open VirtualBox and perform the following steps:
- Start the created virtual machine and wait for the codes to be completed until you see the Apple logo

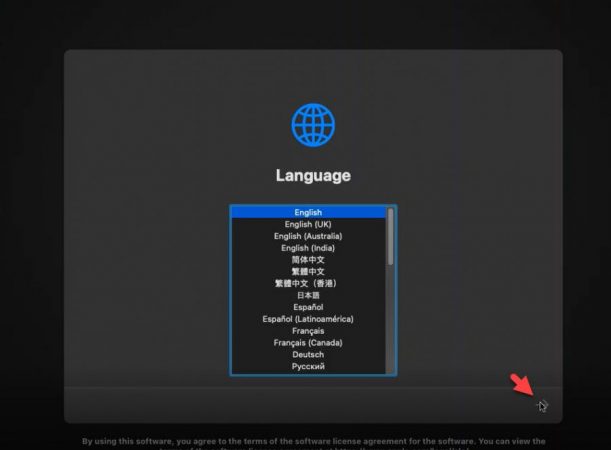
- Select your Preferred Language and then click the –> Arrow
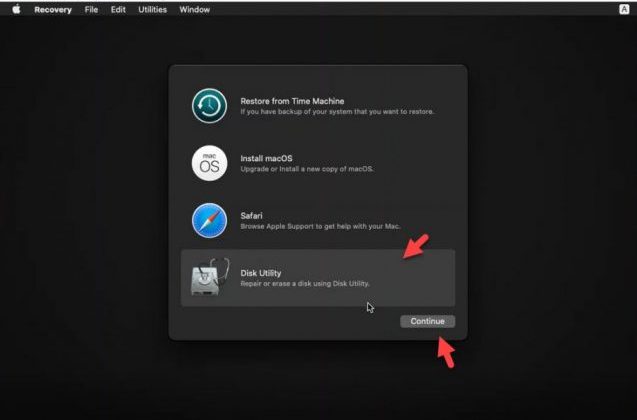
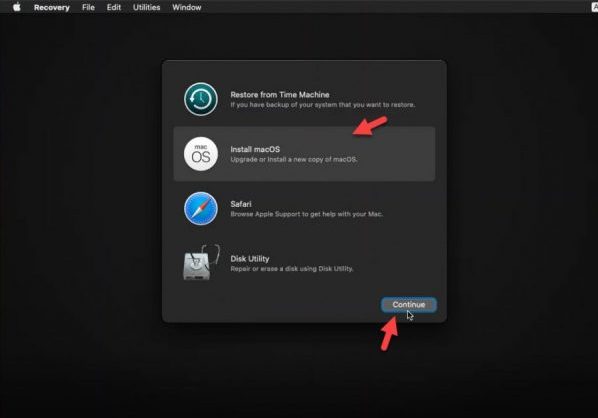
- Select Disk Utility and Continue
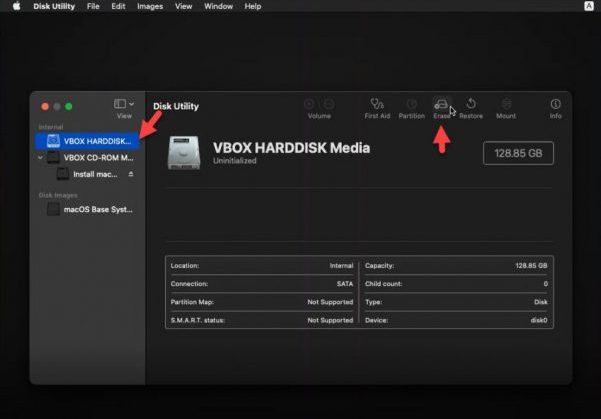
- Select VBOX HARDDISK MEDIA and click Erase
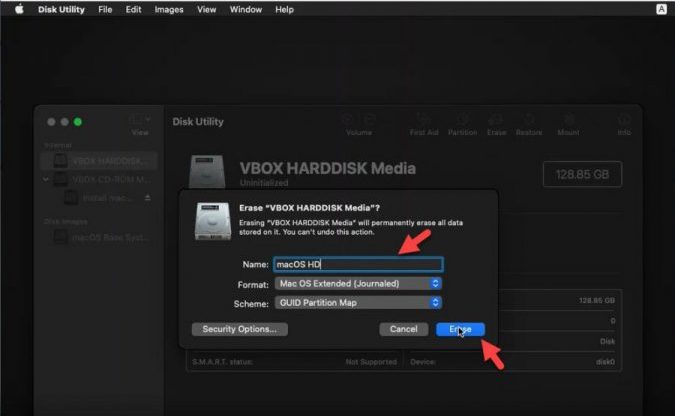
- Name the new HardDisk (for example macOS HD) and click Erase
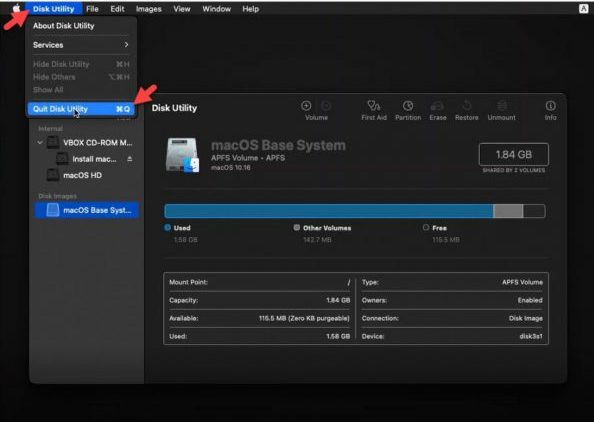
- Click Done, Go to the top menu, click Disk Utility and click Quit Disk Utility
- Click Install macOS and then click Continue
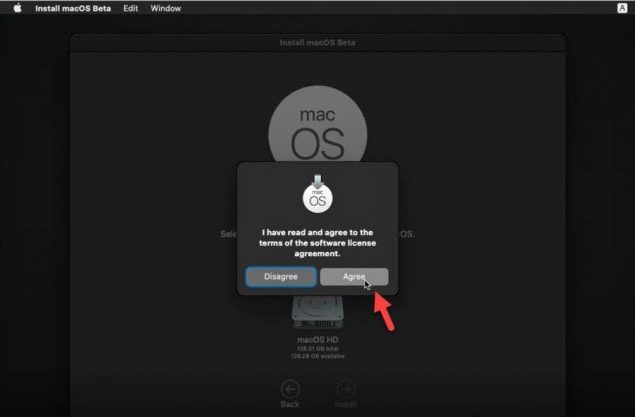
- Click Continue and Agree to the macOS Beta license agreement
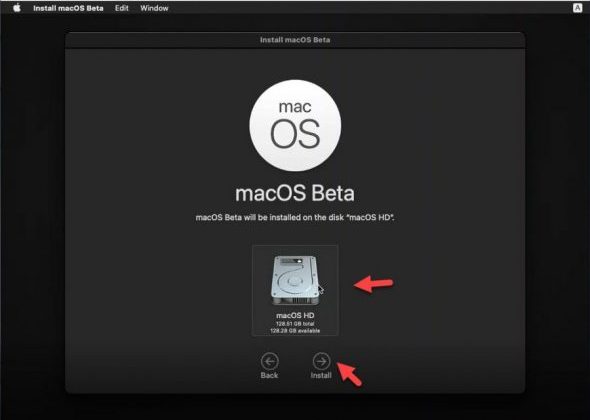
- Select the disk where you want to install macOS and click Install
- Wait for the codes run to be completed and it can take more than 30 minutes depending on the speed of your PC
When the codes are run now the machine is ready for the installation process. Proceed to the installation process in the next step below.
Step 6. Perform the Installation Process
If you are in this step, you are almost done with the process with the few more clicks you will have installed macOS Big Sur on VirtualBox on Windows successfully. The clean installation process is as follow:
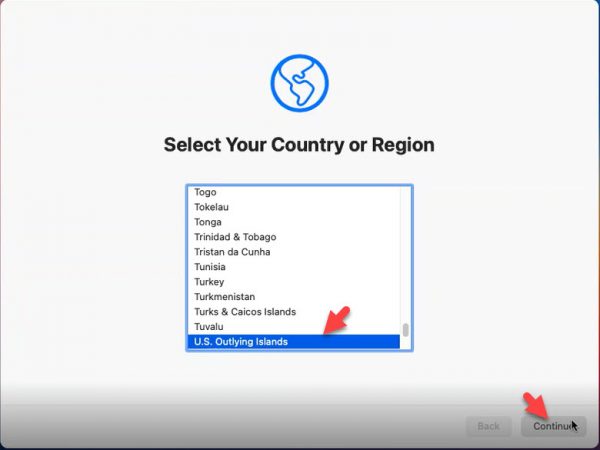
- Select your Country or Region and click Continue
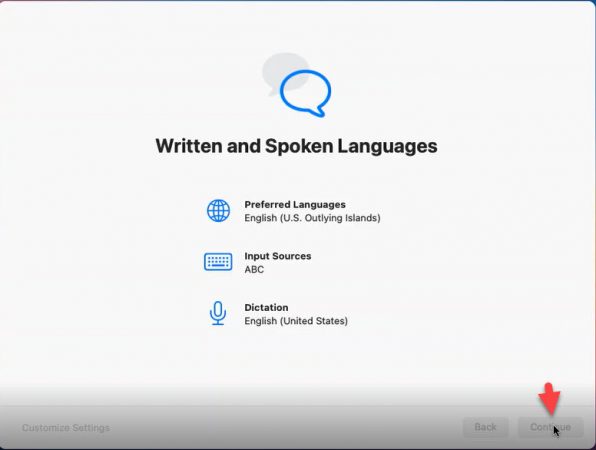
- Click Continue if you don’t want to customize written and spoken language
- You can skip Accessibility by clicking Not Now button

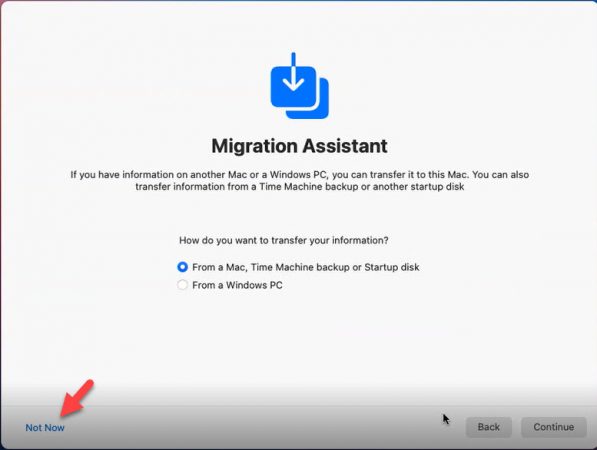
- If you don’t need anything to migrate from a Windows PC or From Mac, skip the step by clicking Not Now
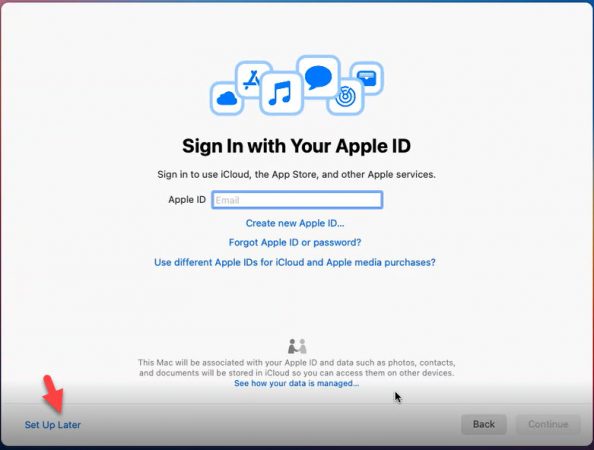
- Enter your Apple ID or click Set Up Later and Skip the step
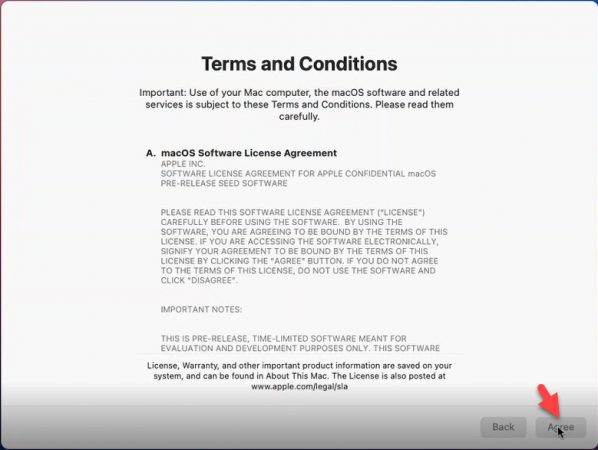
- Agree to the Terms and Conditions
- Give Full Name, Account name, password, and password hint and click Continue

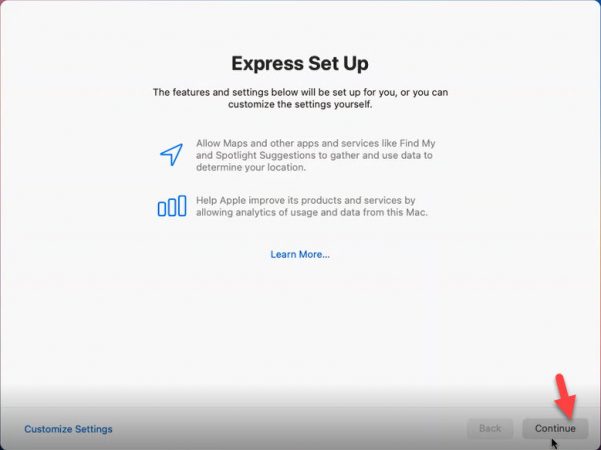
- Click Continue in Express Set-Up
- Click Continue in the Analytics step
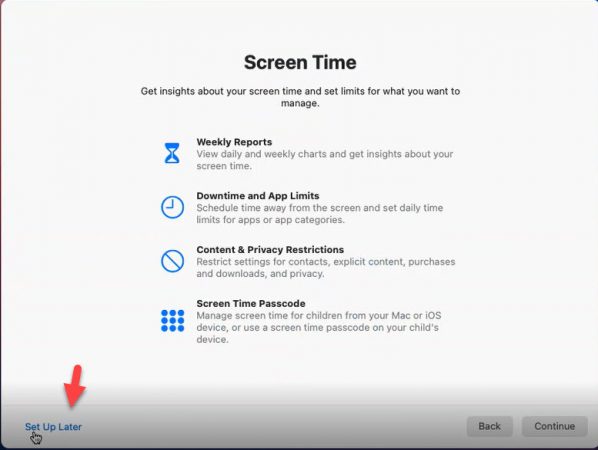
- You can manage Screen Time or else click Set Up later
- You can Enable Ask Siri and click Continue
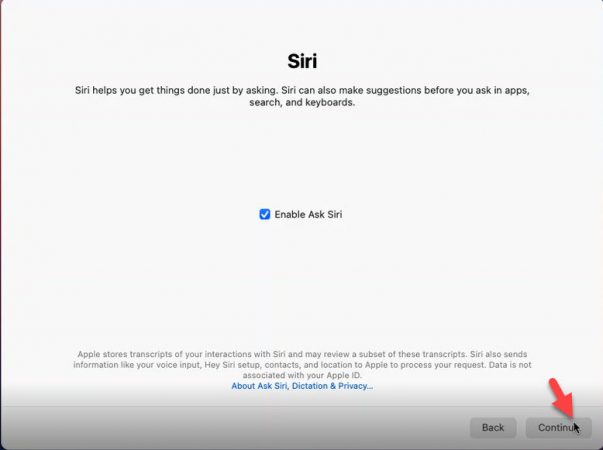
- Select your language for Siri
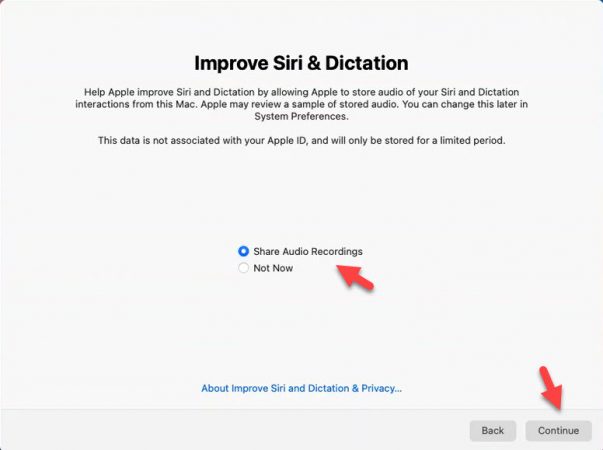
- Improve Siri and Dictation if you want by ticking option Share Audio Recording or skip by clicking Not Now
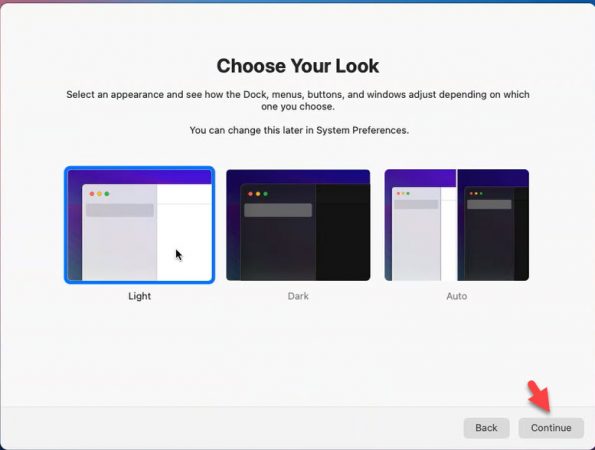
- Choose the Look of your Mac: Light, Dark or Auto and click Continue
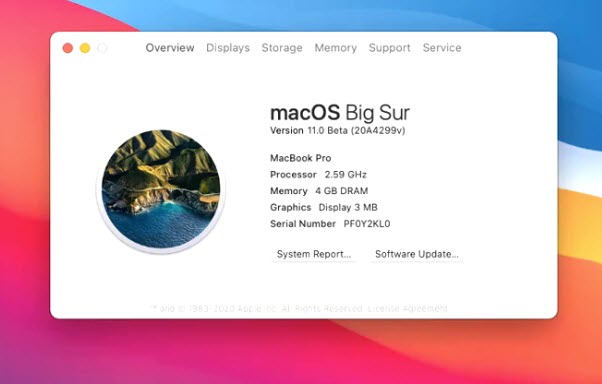
Congratulations on installing macOS Big Sur on VirtualBox on Windows PC successfully. Hope you are not tired and now can enjoy using macOS Big Sur virtually on your PC.
Bottom Line:
I hope you performed the steps successfully without any error. If you faced any error during the process, please comment on it using the comment section below. Moreover, your feedback and suggestions are appreciated, please let us know your opinion about the article by using the comment section. Stay Tuned for the coming tech articles and information.
Conclusion:
well, It was all about How to Install macOS 10.14 Mojave on VirtualBox on Windows. I hope it was helpful for you for testing the new macOS 10.14 Mojave on Windows. If you really liked the post please comment on the post, so we feel better. And by the Once read the what’s your idea for this Post and give us 5 stars.
5 comments
Stuck at #[EB.BST.FBSI+]
Installed macOS Mojave 10.14. But I cannot use the spotlight search, Finder and notes.
Are you noticing some kind of error?
Whenever I try to open I am getting the error, The app stopped working unexpectedly
Cannot finish the install. It gets stuck on Choose Startup Disk and before it shows 28 min remaining. Using macOS Big Sur 11.0.1 (20B29).iso