
In this article, you will be learning the step-by-step guide to Install Windows 11 on VirtualBox on any operating system that you are using. So, read and follow this post to the end.
Windows 11 insider preview is released on the market, and many users are testing it and they have a very good Response regarding the new Windows 11. However, since Microsoft is about to leave millions of computers behind with their TPM and secure boot requirement, Still users are trying to install it and test it on their computers.
Microsoft is not very clear about the windows 11 requirements that have taken the TPM and the secure boot very seriously. According to Microsoft the computers with the 8th generation of processors and above can support windows 11. Even the 7th generation intel processor can’t support Windows 11, also not to forget most of the 7th generation processors possesses the same features as the gen 8.
Based on what Microsoft has released, only these editions of Intel and AMD Processors can support Windows 11. Other processors can not support Windows 11, you can bypass the TPM 2.0 and Secure boot but you can not receive further feature updates.
List of intel Processors that can support Windows 11:
| Intel 8th Gen (Coffee Lake) | Intel 9th Gen (Coffee Lake Refresh) | Intel 10th Gen (Comet Lake) |
| Intel 10th Gen (Ice Lake) | Intel 11th Gen (Rocket Lake) | Intel 11th Gen (Tiger Lake) |
| Intel Xeon Skylake-SP | Intel Xeon Cascade Lake-SP | Intel Xeon Cooper Lake-SP |
| Intel Xeon Ice Lake-SP |
AMD Processors that can support Windows 11:
| AMD Ryzen 2000 | AMD Ryzen 3000 | AMD Ryzen 4000 |
| AMD Ryzen 5000 | AMD Ryzen Threadripper 2000 | AMD Ryzen Threadripper 3000 |
| AMD Ryzen Threadripper Pro 3000 | AMD EPYC 2nd Gen | AMD EPYC 3rd Gen |
Now The thing is even if you cannot install windows 11 inside your computer, you can test it out in the virtual machine. There are several virtual machines available but among them, VirtualBox is very popular and it is open source. So you can test Windows 11 without any limitation, anywhere, anytime, and without any payment.
I know the feel of windows 11 is different compared to Windows 10 but again it is better to test it in a virtual machine than never test it or to go buy a new system. At the moment Microsoft is not very very clear and they have not responded to anything regarding these limitations and errors. Still don’t lose hope and wait until the final version of Windows 11 is released. Till that time we can see some statements regarding the hardware requirements. Then you can decide to buy a new system or install Windows 11 on your actual computer.
Steps to Install Windows 11 on VirtualBox
- Download Required files which are VirtualBox and Windows 11 ISO Image.
- Install VirtualBox, then create a New Virtual Machine, finally attach the Windows 11 ISO Image.
- Install Windows 11 on VirtualBox on Windows 11, macOS, and Linux
1. Download Required Files to Install Windows 11 on VirtualBox:
It does not It does not matter if you are using Windows, Mac, Linux, Ubuntu, or salaries, the steps of installing windows 11 or on VirtualBox are simple as you can think. I admit there may be some difference regarding installing VirtualBox on the different operating system but rather than that Steps of Installing Windows 11 on VirtualBox is the same. So, follow the below steps one by one.
- Download VirtualBox: VirtualBox is a virtualization software developed by Oracle and it is provided for all the users for free to test operating systems. VirtualBox is available for Windows, Linux, Linux distributions, solarize, and Mac. If you are on Windows I recommend downloading the VirtualBox using the Internet download manager because this way it will be downloaded faster. If you are on a Mac or inside Linux I recommend you to download to get that the VirtualBox using the Xtreme download manager.
- Download Windows 11 ISO: At the moment Microsoft has not released the Windows 11 ISO image, however, there are other ways that you can download the windows 11 insider preview without even an insider account. Even though once Microsoft released the final version of Windows 11, you can download Windows 11 from Microsoft’s official website or using the create Windows 11 install media tool.
2. Install VirtualBox on Your Host Operating system
After downloading the required files, we need to start installing the VirtualBox on the computer. At the moment I’m using the windows 11 insider preview so, I’m going to install it here in windows 11.
Install VirtualBox on Windows 11
To tell you the truth installing the VirtualBox on a windows machine is not really a hard thing but if you are a beginner it is. So, follow this post on how to install VirtualBox on Windows 11. Everything is explained with step-by-step screenshots, so, follow them carefully and install them on your Windows 11 Machine.
Install VirtualBox on Linux Distributions
If you are using Linux and its distribution, the process of Installing VirtualBox in each of them is different. Not a lot different but there are some commands which are different from each other. So, Follow the below post to Install VirtualBox on Linux Distributions.
- How to Install VirtualBox on Ubuntu?
- How to Install VirtualBox on Kali Linux?
- How to Install VirtualBox on Linux Mint?
For the other versions of the Linux Distributions, do a google search to watch a video on YouTube.
Install VirtualBox on macOS Monterey
Installing VirtualBox on a macOS machine is not really a hard thing, just you have to download the macOS package for the VirtualBox. After that one just install the package and you have the application official VirtualBox in the application directory. However, if you are stuck on some steps you can just follow the below article which has explained everything step by step with the screenshots.
3. Create a New VM and Install Windows 11 on VirtualBox
Now that you have downloaded the required files and install the VirtualBox on your host OS. let’s just go ahead get started with creating a new virtual machine and attaching the windows 11 ISO to the VM, and finally let’s install Windows 11 on the VirtualBox, so let’s get started.
Step 1. Launch VirtualBox and Create a New Virtual Machine
Go on and open the VirtualBox, click new, you will see a dialog box off the Name and operating system. In that dialog box, you will see Expert mode, click on it. We can configure, Name, RAM, and Hard Disk at the same time using the expert mode. The expert mode saves a lot of time compare to basic steps.
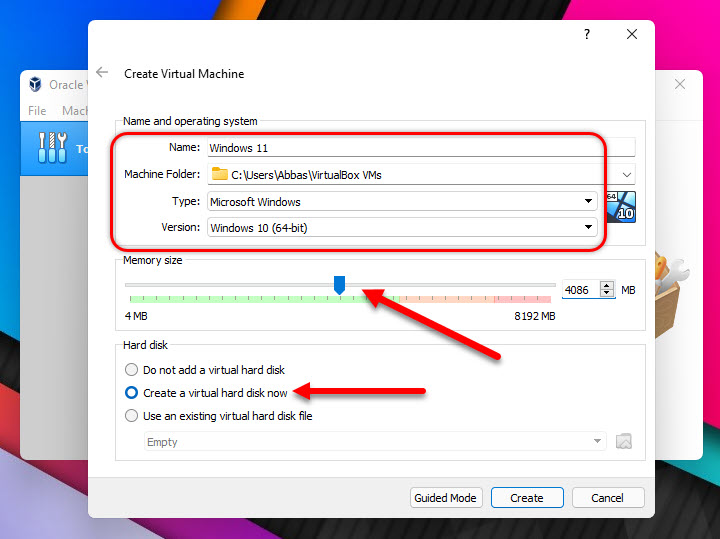
Now that you are in the expert mode of creating a new virtual machine, provide a name for the virtual machine. Choose a location to save it or by default, it’s going to save the Virtual machine under the users’ directory. Also the moment you type windows for the name VirtualBox, it is going to detect that it is a Microsoft operating system. So, you don’t have to worry about the OS type it will be Microsoft Windows, however, if you type windows 11 on the name. the version of Windows will be changed to windows 7 (64-bit). You need to change windows 7 (64-bit) to Windows 10 (64-bit) manually.
Make sure the windows 11 must have at least 4GB of ram which will be 4086 megabytes. And regarding the hard disk choose to create a virtual hard disk and finally when you are done with all the naming, choosing the version Windows, ram, and hard disk, click create to create the VM.
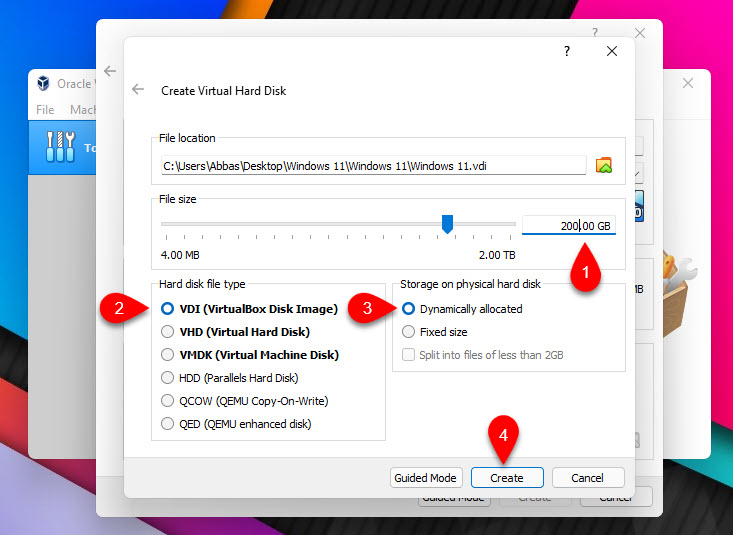
For the next step, you need to configure the hard disk location, hard disk size, and finally the hard disk type. By default Windows 11 needs at least 60GB of storage so you can choose any amount that you need. I’m going to choose 200 GB because I will do some experiments with the OS myself so that matches storage is required. So decide yourself how much storage you need and once you are done go to the hard disk type for this stop
In total, you can see that VirtualBox has a total of 6 hard disk types, among them VDI (VirtualBox disk image) is the hard disk type of the VirtualBox. It does not matter which one you choose because every one of them is a virtual hard disk, and it can be used to install guest OS. And besides, that one VMDK is the hard disk type of the VMWare, HDD form parallels on macOS, QCOW and QED is the Hard Disk type in QEMU and VHD is from windows In Hyper-V.
among them, you can see dynamically allocated and fixed-size under this storage on a physical hard disk. You have to choose dynamically allocated and click create.
Dynamically allocated is a type of disk which stores the mentioned amount of storage over time when you use the virtual machine. However, fixed size is a different matter. If you choose 10 GB it will store exactly 10GB on your actual hard drive so it is not a very good option and besides, it is an older technology.
Step 2. Attach Windows 11 ISO to the Virtual Machine
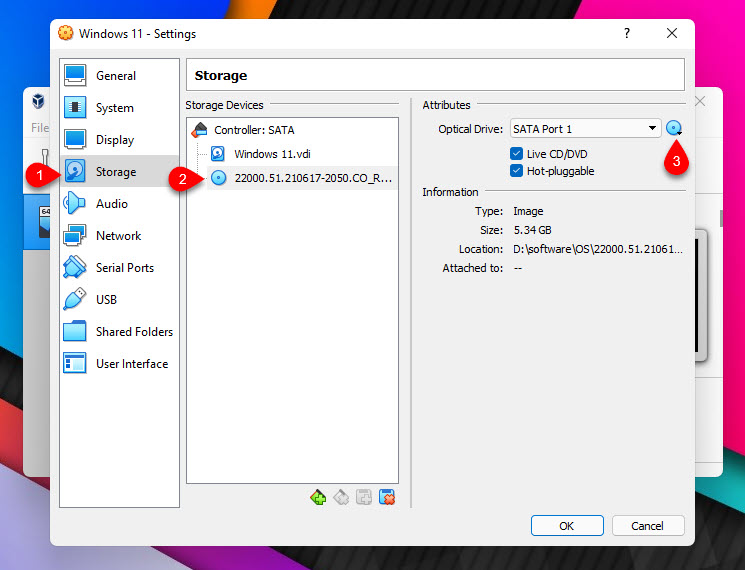
It is time for us to attach the windows 11 ISO image to the virtual machine. To attach the windows 11 ISO image to the virtual machine, select the virtual machine, click on the settings, go to the storage. Click on the empty CD icon, then under attributes click on the CD icon and choose a disk image. Now locate the windows 11 ISO image, once you located the ISO image check the live CD/DVD and Hot-pluggable.
Finally click OK, to apply the changes. If you don’t understand see the below screenshot.
Step 3. Install Windows 11 on VirtualBox
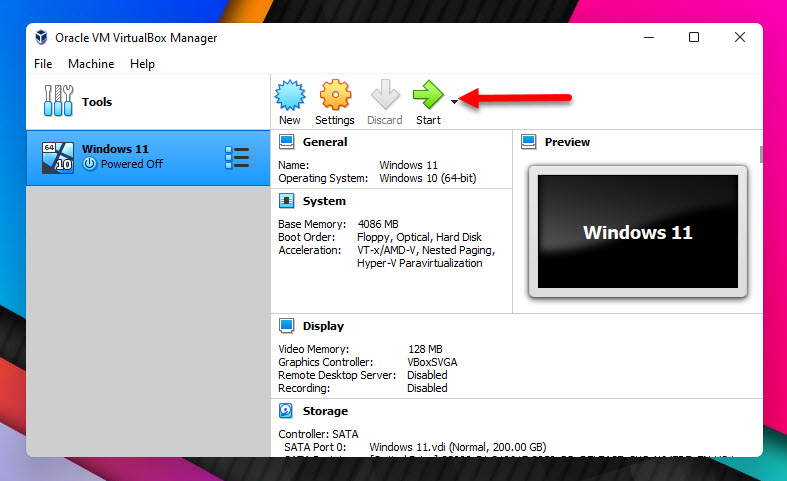
Finally, we are ready to install windows 11 on VirtualBox in Windows 11. Select the virtual machine which contains windows 11, and click Start it is going to power on the virtual machine and we are going through the step-by-step installation of windows 11 on VirtualBox.
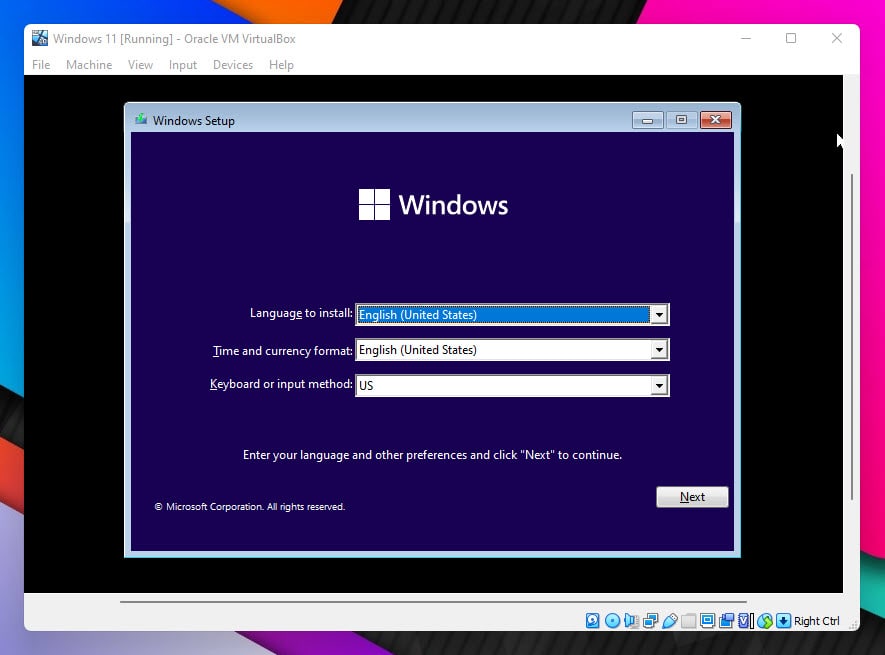
The moment the virtual machine is powered on, you have to wait at least it’s gone to the installer window. The installer window is known as the windows setup where you are going to set up the language, time and currency format, keyboard, and input method. The moment you are done with this section simply, click next.
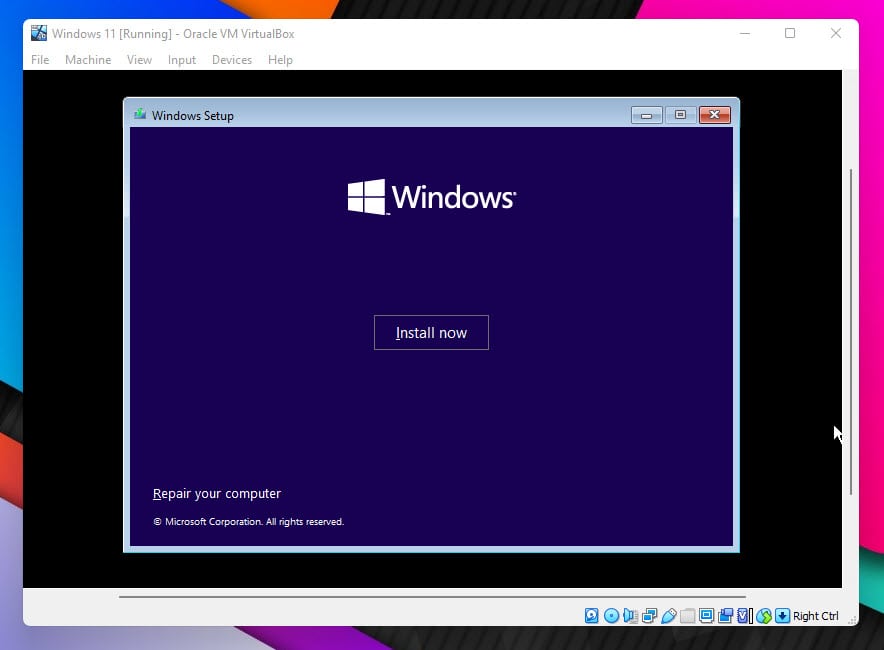
Now you are ready to install windows 11 on VirtualBox, choose to install now, so we can move to the next step.
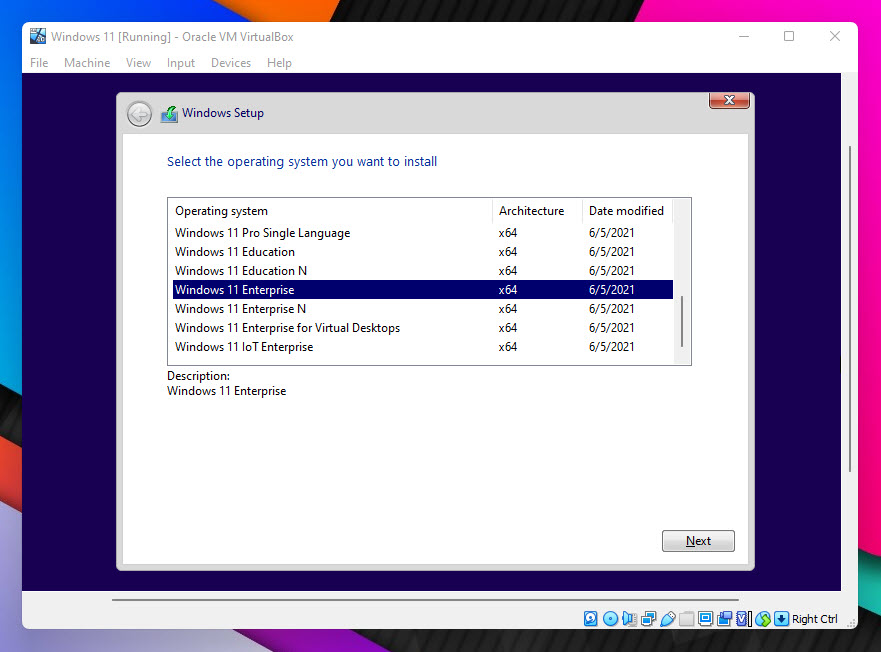
Microsoft has released Windows 11 in many different editions among them windows 11 home, pro, education, and finally enterprise are popular. Do not forget that Windows 11 is now available in IoT for enterprise and the windows 11 education N and pro N and finally home N. I am going to Install Windows 11 Enterprise, but you can Install Windows 11 Home or Windows 11 Pro. It is up to you to decide.
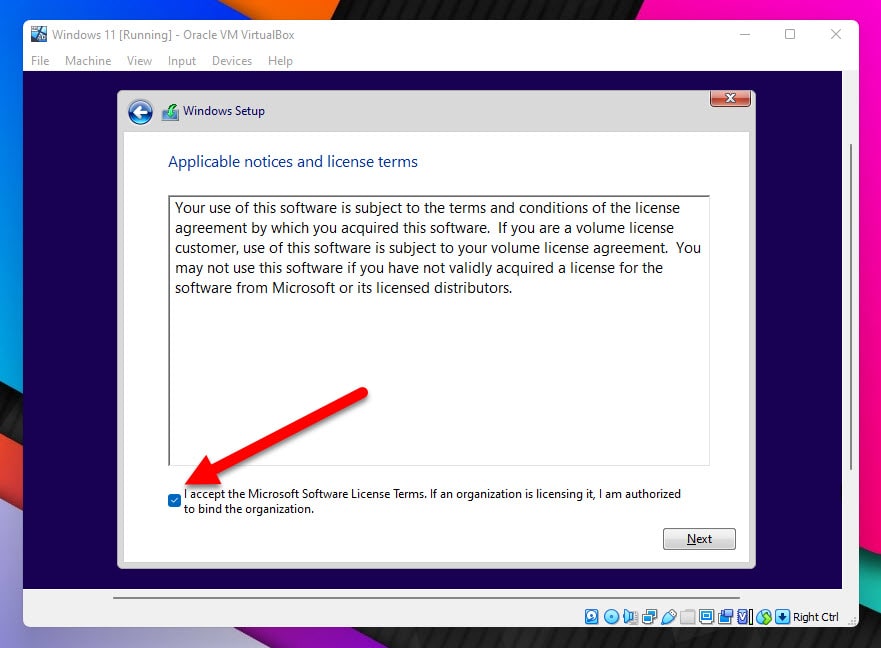
You have to agree with the terms and license of Microsoft regarding the use of windows 11. The moment you agreed with the terms and conditions just simply click next.
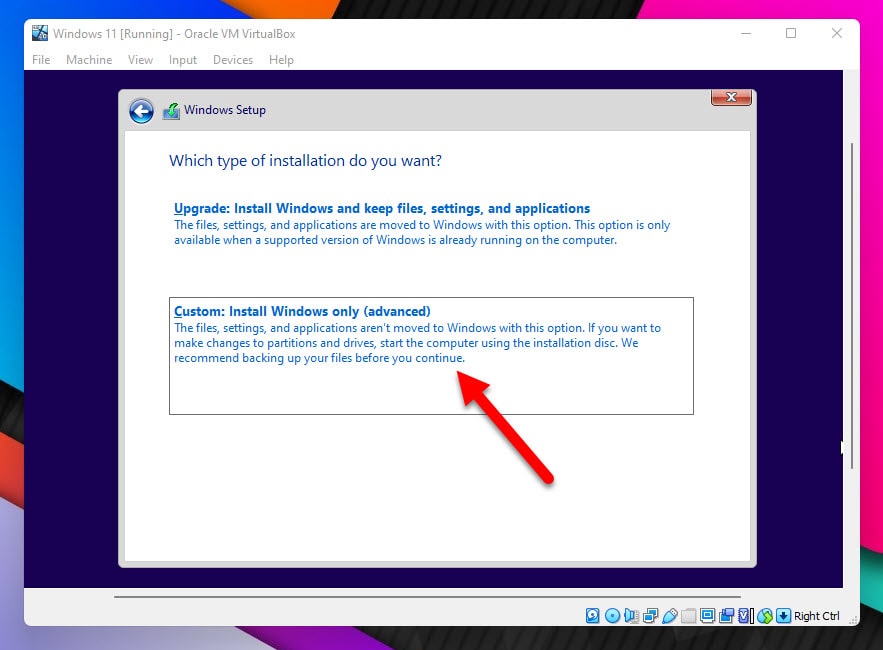
We are performing a clean installation of Windows 11 on the virtual machine, that’s why you have to choose custom install Windows only (advanced).
You will need to create a new partition for windows 11. If you want to create multiple hard drives on the virtual machine, click new, enter the amount of storage that you want to separate the hard drive. In my case, I’m going to choose 200 GB all for the drive C to install windows 11.
The moment you are done with creating the partition for windows 11, click next.

Now you have to wait until the files of windows 11 should be copied from the ISO to the virtual machine hard drive.
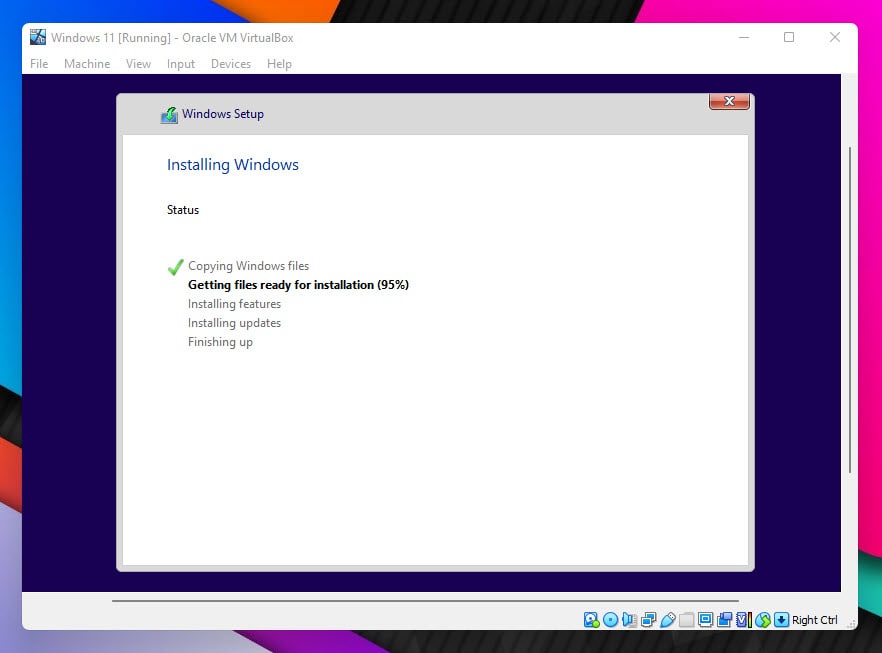
Once all the files are copied from the ISO into the hard drive, the system is going to restart itself. You will also notice a restart warning which is around 10 seconds.

You will have to wait around 10 minutes for installing some other files of windows 11 into the hard drive on a black screen.
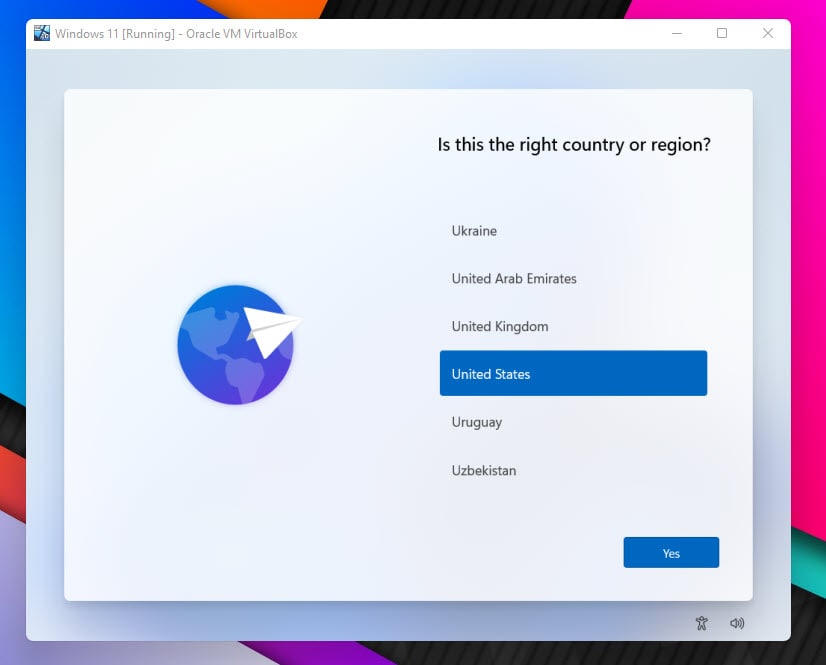
Here you are on the main page of the installation of windows 11 after the restart. You will need to choose your region and click Next.
Now the installer is asking that is the right keyboard layout or input method, if yes, click Yes. If no, go on and choose the right keyboard layout for your computer.
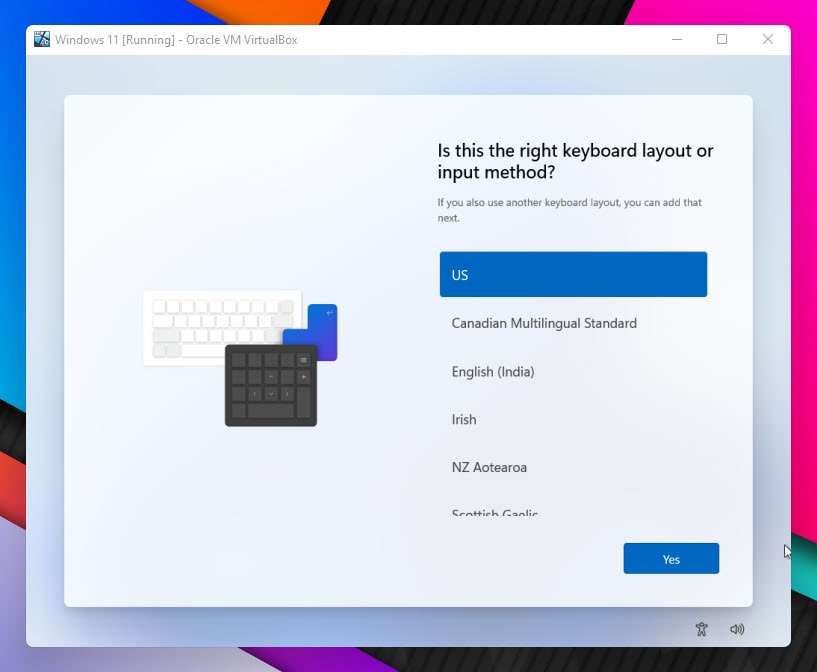
Now it is time to add a second keyboard layout, if yes go on and add a layout if no simply clicks skip.
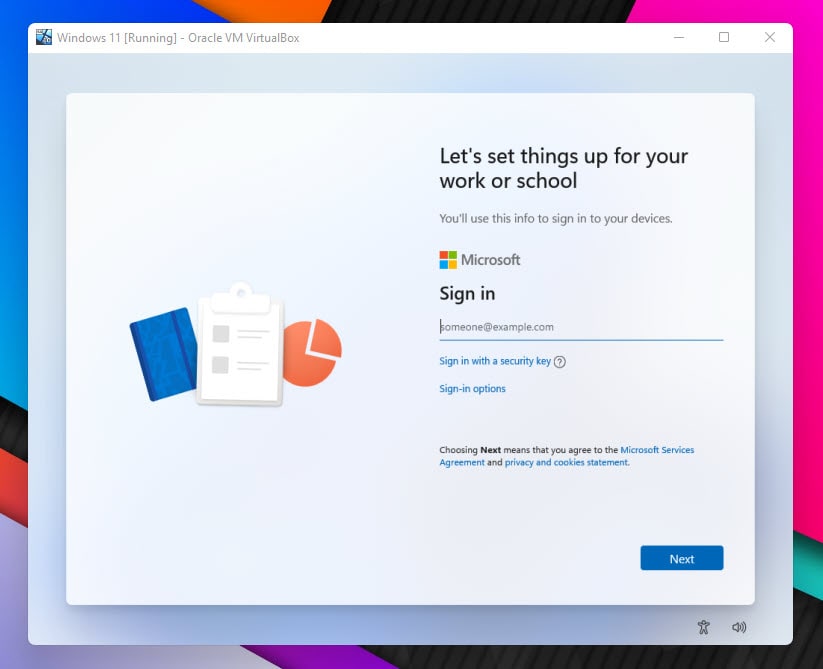
When you are installing windows 11 enterprise, it is not asking that whether you want to use these windows for personal usage or a line of work. But when you are installing windows 11 home and pro Microsoft asks that you want to set this computer for personal usage or no for work. Also if you are installing windows 11 home you need to sign in with a Microsoft account for the first time. You can not even create a Local account with the for the first time setup on Windows 11 Home edition.
I am going to log in with a local account and then later join the Windows 11 enterprise to the domain. I will sign in options, and join a domain.
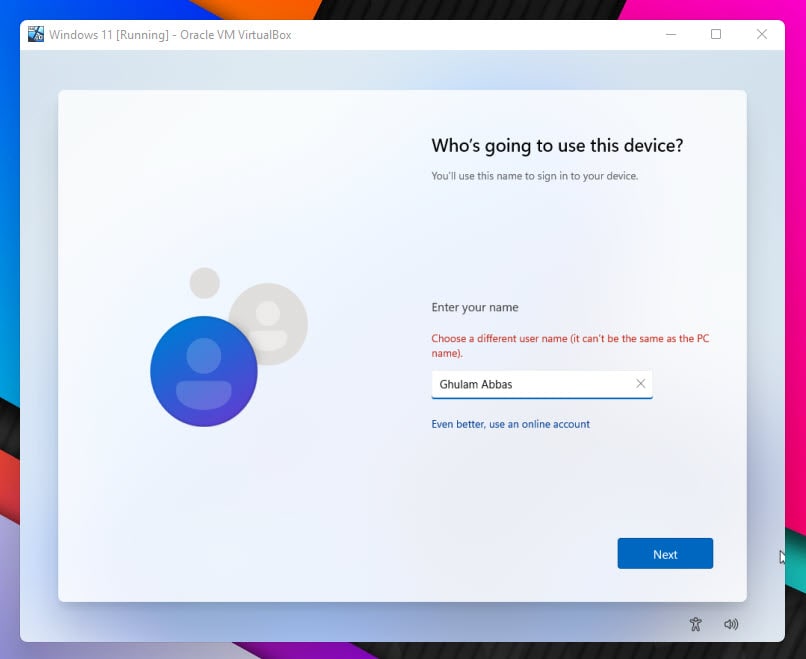
I am going to insert my user name, and then follow it with the password, password confirmation. And Finally, with the 3 security questions, you need to choose.
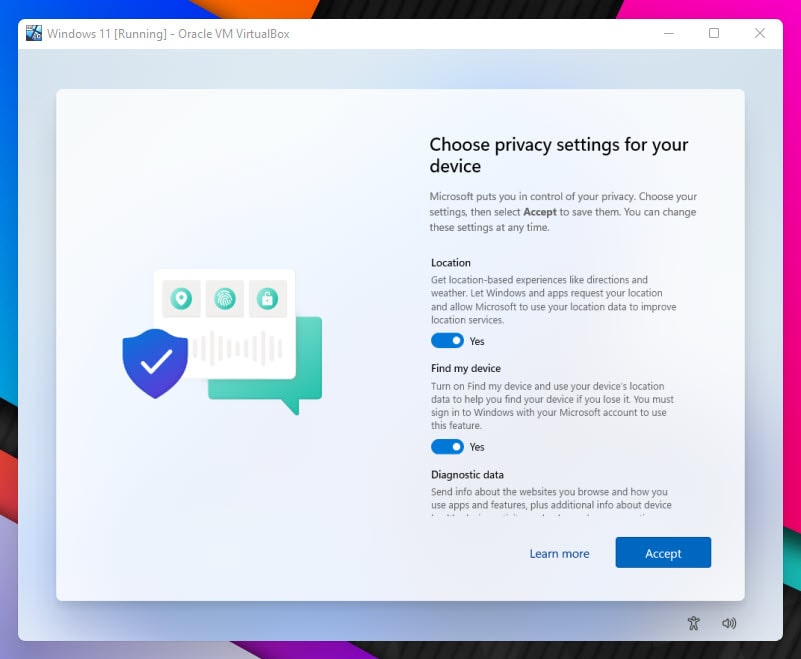
Now you need to choose the privacy settings for the device and once you are done with them click accept and wait for the first view of the windows 11 desktop.
Summary:
To summarize how to install windows 11 on VirtualBox, you need to download and install VirtualBox on your actual computer. It does not matter if you are using Windows, macOS, Linux, or any other versions of the Linux distributions. As long as you follow the provided links above you know how to install VirtualBox on your host OS. The moment you installed VirtualBox you can create a new virtual machine, and then start installing windows 11.
Also Read:
1 comment
Hello Ghulam,
Your guide was amazing.
Thanks for the ISO link as well.
It worked perfectly for me.
Thanks