How to Recover Overwritten Files on Mac With App-Specific Features
Let’s begin with app-specific backup features. Many users don’t realize that the apps they use may already have built-in backup tools. These features often work in the background, allowing you to “unreplace” a file on your Mac without additional software. Apps like Apple’s Pages and Numbers, Microsoft Word and Excel, and even creative tools such as Photoshop or coding apps like Visual Studio Code include recovery options that let you restore earlier versions in just a few steps.
To illustrate, let’s use Apple’s Pages app as an example. Pages automatically saves a new version of your document each time you hit save. This makes it easy to restore an older version if a file is accidentally overwritten. You can either restore the entire file or copy portions from an earlier version. Here’s how:
-
Open the document you want to recover in Pages.
-
Go to the File menu at the top of the screen and select Revert To.
-
Choose Browse All Versions from the dropdown.
-
The screen will show your current version on the left and a stack of older versions on the right. A timeline appears along the side.
-
Scroll through the timeline or use the arrows next to the stack to find the version you need. Click a thumbnail to see it full size.
-
To replace your current file with an older version, click Restore.
-
If you want to keep both the current and older versions, hold down the Option key and click Restore a Copy. This opens the older version in a new window so you can save it separately.


What about other apps
The process in Numbers is almost identical to Pages, so you can follow the same steps there. Many other apps offer similar functionality, though the feature names may differ. For instance, in Microsoft Word and Excel, it’s called Version History. While the interface looks different, the principle is the same: the app maintains a record of previous versions, letting you restore or save them as needed.
How to Retrieve Replaced Files From Backups on Mac
Not every app has built-in tools to protect against accidental file replacement. That’s where system-wide backups come in. If you’ve set up backups using macOS’s Time Machine or a cloud service like iCloud, you have a reliable way to recover files that were overwritten or replaced.
 Most people don’t think about backups until it’s too late. If you haven’t set up any backups, you can skip ahead to data recovery tools.
Time Machine
If Time Machine is running on your Mac or MacBook, you’re in luck! Here’s a quick refresher: Time Machine is macOS’s built-in system that takes hourly, daily, and weekly snapshots of your files and folders. It allows you to go back in time and recover individual files, folders, or even your entire system. Whether you need to restore a replaced folder or an overwritten file, Time Machine simplifies the process—provided the file or folder exists in a previous backup.
Here’s how to browse your Time Machine backups and recover replaced files or folders:
-
If you’re using an external drive for Time Machine, connect it to your Mac.
-
Go to the folder where the replaced file or folder was located. For example, if the replaced folder was in “Documents,” open that folder in Finder.
-
Click the Time Machine icon in the menu bar and select Browse Time Machine Backups.
-
If you don’t see the icon, go to System Settings > Time Machine and enable it.
-
A timeline on the right side of your screen will display available backups. Scroll through the timeline or use the arrows to find a version from before the file or folder was replaced.
-
Once you’re in the correct snapshot, navigate to the replaced file or folder. You’ll see the contents of the folder as they appeared at that specific point in time.
-
Click Restore. The file or folder will return to its original location.


After you click Restore, a window will pop up and ask if you want to replace the existing file, keep the original, or keep both versions.
-
If you choose Keep Both, you’ll see two files with the same name in the folder. The older version will include “(original)” at the end of its name.
-
If you choose Replace, the restored file will overwrite the existing one.
Cloud Backups
Cloud backups differ from local backups like Time Machine. While Time Machine captures snapshots of your entire system, cloud services sync your files in real-time. These approaches don’t replace each other—they complement each other. Cloud backups are ideal for accessing files across devices, but they don’t provide the full-system coverage that local backups offer.
On a Mac, popular cloud solutions include iCloud, Dropbox, and Google Drive. iCloud, being Apple’s built-in service, integrates seamlessly with macOS. That’s why we’ll use iCloud as an example.
By default, iCloud Drive syncs files and folders from these locations:
-
Desktop
-
Documents Folder
-
iCloud Drive (files you manually store there)
If your replaced file or folder was in one of these locations, here’s how you can restore it using iCloud Drive’s version history feature:
-
Open a browser, go to iCloud.com, and log in using your Apple ID credentials.
-
Navigate to Settings and select Data Recovery from the options.
-
Click Restore Files to view a list of available versions for your files.
-
Browse the list to find the file or folder you want to recover. Check the box next to the items you need.
-
Click Restore to revert to the selected versions. The files will be restored to their original locations.


 Note. iCloud Drive saves previous versions of files for 30 days. After that, older versions are automatically deleted and can’t be recovered. If you need to restore a file, it’s important to act quickly.
What about Dropbox or Google DriveOther cloud services, like Dropbox and Google Drive, also offer file version history features:
-
Google Drive has a different retention policy. Older file versions may be deleted after 30 days or once 100 versions are stored. To prevent automatic deletion, you have the option to keep specific versions forever.
-
Dropbox stores previous versions of files for up to 180 days (it depends on your plan). File version history doesn’t count toward your storage quota.
Got No Backups? Use Data Recovery Apps to Retrieve Replaced Files on Your Mac
If you don’t have backups—or if your backups don’t include the replaced file—you still have a shot at recovery. Earlier, we explained the technical details of how data recovery software works by scanning for leftover data on your drive. However, it’s important to understand that this method isn’t guaranteed. Success depends on several factors:
-
 How much time has passed since the replacement occurred? The longer you wait, the more likely the system will overwrite the replaced file’s data with new data. This happens naturally as you create, edit, or even download new files. Every action your Mac takes could overwrite the space previously occupied by the replaced file.
 -
 The type of storage where the file was saved—your Mac’s HDD, SSD, or an external device. Traditional hard drives offer the best chances for recovery because they don’t immediately erase data when a file is replaced. SSDs are much less forgiving, with TRIM enabled. TRIM automatically erases old data blocks when a file is deleted/replaced, which leaves you with little to no chance of recovery. However, if the SSD is connected through a hub, the TRIM commands often don’t pass through, which leaves your data intact for longer.
You won’t know for sure if a file can be recovered until you run a scan with a data recovery app and see what it uncovers.
 As soon as you realize a file has been replaced, stop using the affected drive immediately. Do not install the recovery app on that drive, avoid downloading anything to it, and don’t modify, save, or move files—any of these actions could overwrite the recoverable data. Use a separate drive, USB stick, or external hard drive to download and install the recovery software. If the replaced files are on your Mac’s internal drive, install the recovery app on an external device instead.
We’ve tested many popular recovery apps, and our top recommendation is Disk Drill. It consistently recovered the most data in our tests and performs reliably in real-world scenarios. If remnants of the replaced files exist, Disk Drill is one of the best tools to recover them.
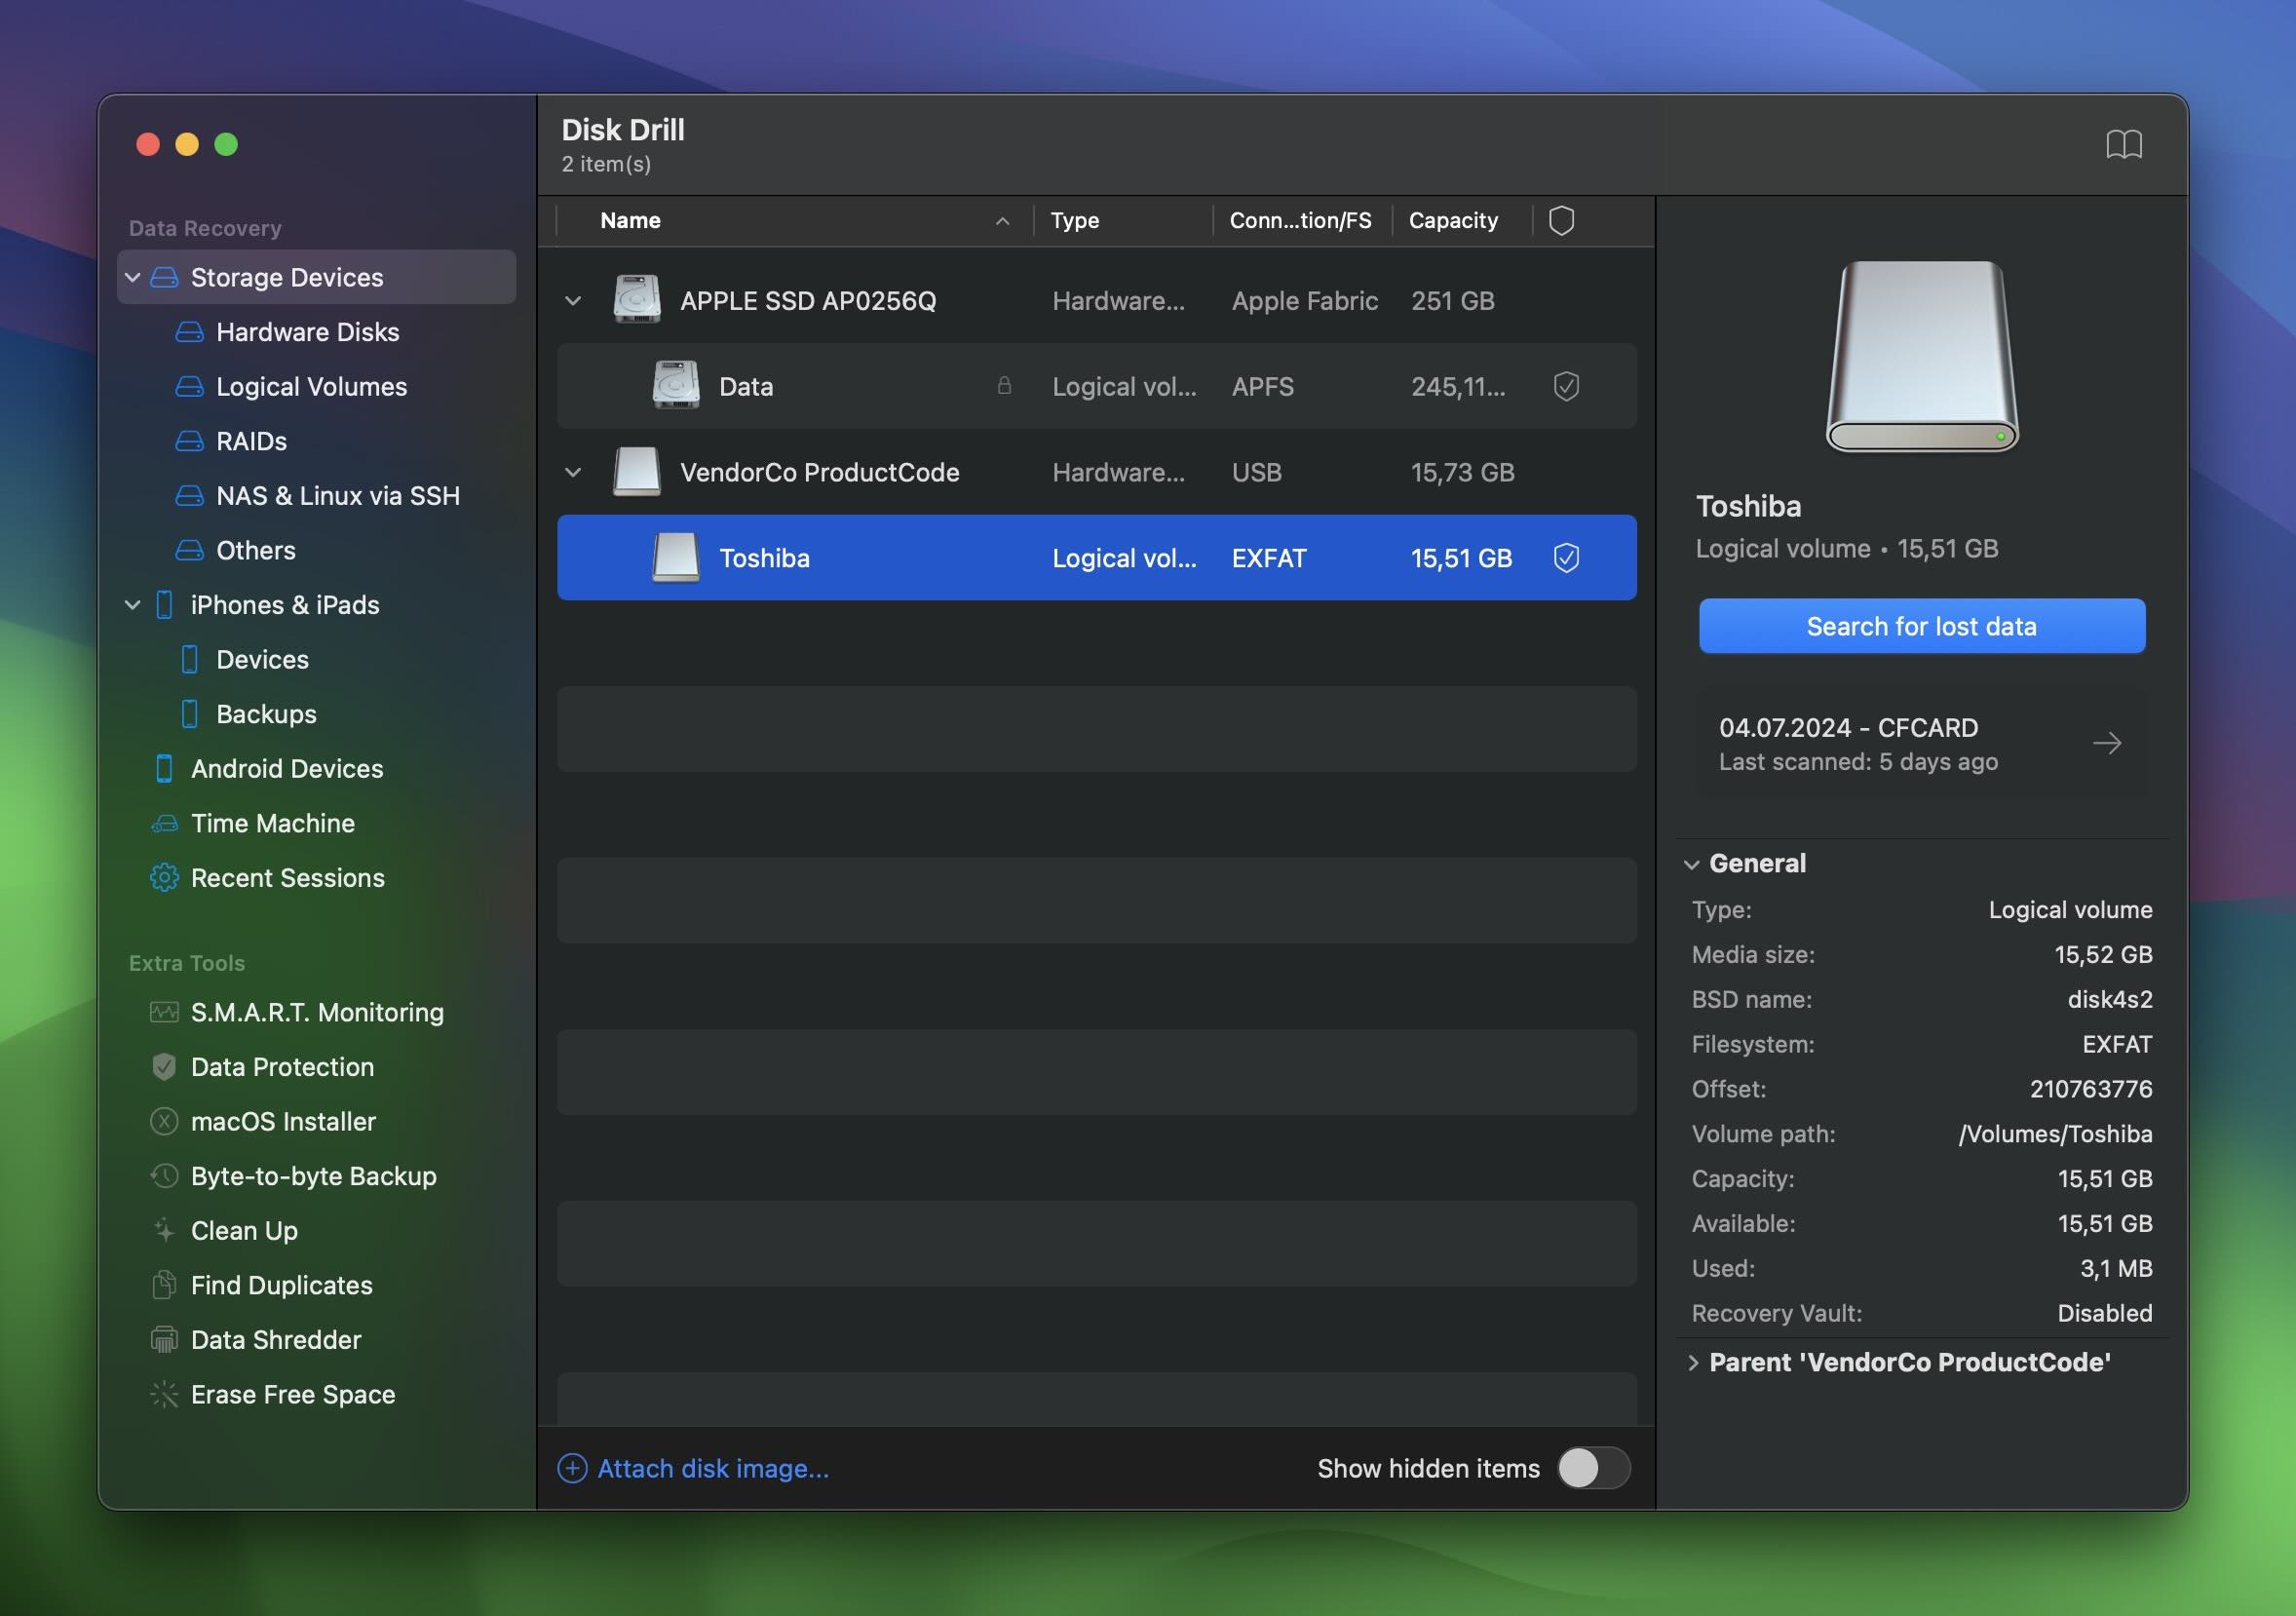
Here’s a quick guide on how to use Disk Drill to recover replaced files on your Mac:
-
Download and install Disk Drill. Do not install it on the drive where the replaced files were stored to avoid overwriting the data.
-
When you open Disk Drill, it may prompt you to grant permissions for storage access. Follow the instructions to allow this, Disk Drill is safe.
-
From Disk Drill’s list of drives, select the drive where the replaced files were located. This could be your Mac’s internal SSD, an external drive, or another storage device.
-
Click Search for Lost Data.
-
Disk Drill displays a progress percentage, but you don’t need to wait for the scan to finish completely before you can check results. Click Review Found Items at the top to see the files it has already identified.
-
Each file will show a thumbnail preview on the right. An eye icon near the filename lets you preview the file’s contents to confirm it’s the one you need.
-
Pay attention to the Recovery Chances сolumn. It rates each file as High, Average, or Low, giving you a clear idea of how likely it is to recover that file fully. Focus on files marked as “High” for the best results, but you can still attempt to recover those with lower chances.
-
Next to each file and folder, you’ll see a checkbox. Select the files or folders you want to recover.
-
Once you’ve made your selections, click the Recover button at the bottom. Disk Drill will prompt you to choose a location to save the recovered files—make sure to select a different drive to avoid overwriting recoverable data.


Why Disk Drill is the Best Choice Here
Disk Drill stands out for all the right reasons. Here’s why it’s the top pick:
-
Ease of Use: The interface is clean and intuitive—no confusing menus or unnecessary steps. Recovery is straightforward, even for beginners.
-
Multiple Recovery Methods in One Scan: Disk Drill combines Quick Scan, Deep Scan, and Signature Scan in a single process. Quick Scan finds recently lost files by scanning the directory, Deep Scan digs into the entire drive to rebuild files even without metadata, and Signature Scan identifies files by their unique extensions, like
.jpgor.docx. It covers all bases efficiently. -
Supports Almost Every File Type: Documents, photos, videos, system files—Disk Drill can recover virtually anything, as long as it hasn’t been fully overwritten.
-
Mac Compatibility: Fully compatible with macOS Sequoia and regularly updated, ensuring smooth performance and reliability.
-
Proven Reliability: Tested extensively in real-world scenarios, Disk Drill consistently delivers results.
The Bottom Line
The methods we’ve discussed are tested and effective, but without backups, there’s no guarantee that data recovery apps can fully restore overwritten files. Success depends on whether the files have already been overwritten. In some cases, all replaced files can be recovered; in others, only partial recovery is possible, and sometimes there’s nothing recoverable at all.
Recovery tools can offer hope, but it’s important to set realistic expectations. If you don’t already have a backup running on your Mac or MacBook, we strongly recommend setting one up—preferably with Time Machine. It’s quick and easy to enable, and with a backup in place, you’ll never face this kind of data loss again.