
The tick boxes, also known as checkmarks, in MS Word are valuable tools for organizing and enhancing the interactivity of documents. These checkboxes can be used alongside bullet points or within a paragraph to create an organized and interactive document. With its ability to insert checkboxes, also known as tick boxes, users can easily create lists, forms, or surveys within their Word documents. This feature allows users to create organized content using bullet points and paragraphs. To utilize this feature, simply enter the desired text and add a checkmark or tick box to each item. This feature allows users to create organized content using bullet points and paragraphs. To utilize this feature, simply enter the desired text and add a checkmark or tick box to each item. This feature allows users to create organized content using bullet points and paragraphs. To utilize this feature, simply enter the desired text and add a checkmark or tick box to each item. This feature allows individuals to mark items as complete or incomplete by simply ticking the checkbox icon. Users can insert checkboxes in the form of boxes and use them as bullet points.
Checkboxes in MS Word have become increasingly popular due to their versatility and convenience. They are commonly used in online documents and can be represented as bullet points or tick symbols. Adding checkboxes to text allows for easy tracking and organization. They are commonly used in online documents and can be represented as bullet points or tick symbols. Adding checkboxes to text allows for easy tracking and organization. They are commonly used in online documents and can be represented as bullet points or tick symbols. Adding checkboxes to text allows for easy tracking and organization. Tick boxes, also known as check boxes, are commonly used in various online documents for creating to-do lists or tracking progress. They allow users to select multiple options from a list or indicate agreement with certain terms and conditions. Bullet points can also be used for similar purposes. By incorporating checkboxes into a Word document, individuals can streamline their workflow and efficiently manage tasks. This can be achieved by using bullet points to create a list of tasks in MS Office, allowing users to tick off completed items.
Using checkboxes, bullet points, and tick marks not only promotes organization but also enhances document interactivity. These word options can be used in a list format to create a more organized and interactive document. It enables recipients or collaborators to actively engage with the content by checking off completed tasks using tick boxes or making selections from a list or menu. This step helps ensure progress and organization. This interactive element, such as tick boxes, check boxes, menus, and bullets, fosters clarity and accountability while facilitating efficient collaboration on shared documents.
In conclusion, the checkbox feature in MS Word offers a practical solution for organizing information and promoting interactivity within word documents. It allows users to create a bullet list or tick off items in a menu. It allows users to create a bullet list or tick off items in a menu. It allows users to create a bullet list or tick off items in a menu. Whether it’s creating step-by-step checklists or designing a menu of options, checkboxes prove to be an invaluable tool in enhancing productivity and streamlining workflows.
Benefits of Using WPS Office for Checkbox Insertion
Seamless integration of checkbox functionality in WPS Office
WPS Office offers a seamless and user-friendly experience. With just a few simple steps, you can add checkboxes to your menu effortlessly, enhancing the functionality and visual appeal of your list.
Unlike other office suites, WPS Office simplifies the process of adding checkboxes by providing an intuitive menu that allows users to easily locate and insert them. With just a few steps, users can quickly add checkboxes to their documents. Whether you are creating a step-by-step to-do list, a survey form with checkboxes, or any other document that requires checkboxes, WPS Office ensures a hassle-free experience.
Enhanced customization options for checkboxes in WPS Office
One of the key advantages of using WPS Office is the wide range of customization options available for checkbox insertion. This list of customization options can be completed in just a few simple steps. This step allows you to tailor the appearance and behavior of checkboxes according to your specific needs. Here is a list of steps to follow.
WPS Office offers a list of step-by-step formatting options, including changing the size, color, and style of checkboxes. You can also adjust the alignment of the insert checkbox within the document and control its behavior when checked or unchecked in just one step. This step of customization empowers you to create professional-looking documents that align with your desired aesthetic. With the check box feature, you can easily achieve the desired level of customization.
Furthermore, with WPS Office, you can easily add step-by-step labels or captions alongside each checkbox, providing clear instructions and context for your readers. This feature proves particularly useful when designing forms or questionnaires where precise instructions are crucial.
Compatibility with different versions of MS Word
Worried about compatibility issues between different versions of MS Word? Look no further! WPS Office ensures seamless compatibility across various versions of MS Word, allowing you to work on documents without any disruptions or formatting inconsistencies.
Whether you are using an older version like MS Word 2007 or a more recent one like MS Word 2019, rest assured that WPS Office will preserve the integrity of your checkbox elements during file conversions. This compatibility feature saves time and effort by eliminating the need for manual adjustments when sharing documents across different platforms.
In addition to MS Word compatibility, WPS Office also supports other popular file formats such as PDF, Excel, and PowerPoint. This versatility ensures that you can collaborate with colleagues or clients who may be using different office software, without worrying about document compatibility issues.
Enabling the Checkbox Feature in MS Word for macOS
Step-by-step instructions to enable checkbox feature on macOS
To enable the checkbox feature in MS Word for macOS, follow these simple steps:
-
Open MS Word on your Mac.
-
Click on the “View” tab located at the top of the screen.
-
In the toolbar, click on “Toolbars” and select “Customize Toolbars and Menus.”
-
A dialog box will appear with a list of available toolbars and commands. Scroll down until you find “Forms.” Check the box next to it and click “OK.”
-
The Forms toolbar will now be visible in your MS Word window.
How to access the checkbox option in the toolbar or ribbon
Once you have enabled the Forms toolbar, accessing the checkbox option is straightforward:
-
Locate the Forms toolbar at the top of your MS Word window.
-
Within this toolbar, you will find a variety of form controls, including checkboxes.
-
To insert a checkbox into your document, simply click on the checkbox icon in the Forms toolbar.
-
Position your cursor where you want to place the checkbox within your document and click again.
Alternative methods to enable checkboxes on macOS
If you prefer alternative methods to enable checkboxes in MS Word for macOS, here are two options:
-
Ribbon method:
-
Click on “Home” in the ribbon at the top of your screen.
-
Look for a group called “Controls” or “Form Controls.”
-
Within this group, there should be an icon representing a checkbox.
-
Click on this icon to insert a checkbox into your document.
-
-
Keyboard shortcut method:
-
Press “Option + Command + X” simultaneously.
-
This keyboard shortcut will activate or deactivate checkboxes as needed.
-
By utilizing these alternative methods, you can quickly enable checkboxes without having to navigate through different menus or toolbars.
Adding Checkboxes to Word Documents on Windows
To make your Word documents more interactive and user-friendly, you can easily add checkboxes using Windows OS. Whether you want to create a checklist or gather feedback from readers, checkboxes can be a valuable tool. We’ll provide tips for efficient placement and alignment of checkboxes within your Word documents.
Accessing the Checkbox Feature on Windows OS
To begin adding checkboxes to your Word documents on Windows, follow these simple steps:
-
Launch Microsoft Word: Open the application by clicking on its icon in the Start menu or taskbar.
-
Create a New Document: Either open an existing document or start with a blank page.
-
Enable Developer Tab: Click on “File” in the top-left corner of the screen and select “Options.” In the Word Options dialog box, choose “Customize Ribbon.” Under “Customize the Ribbon,” check the box next to “Developer” and click “OK.”
-
Display Developer Tab: Once you have enabled it, you should see a new tab labeled “Developer” in the ribbon at the top of your screen.
-
Insert Checkbox Control: Click on the “Developer” tab and locate the “Controls” group. Within this group, click on the checkbox control icon (☑) to activate it.
-
Place Checkbox in Document: Now that you have activated checkbox control mode, simply click anywhere within your document where you would like to insert a checkbox.
Different Ways to Insert Checkboxes
Microsoft Word offers multiple methods for inserting checkboxes into your documents:
-
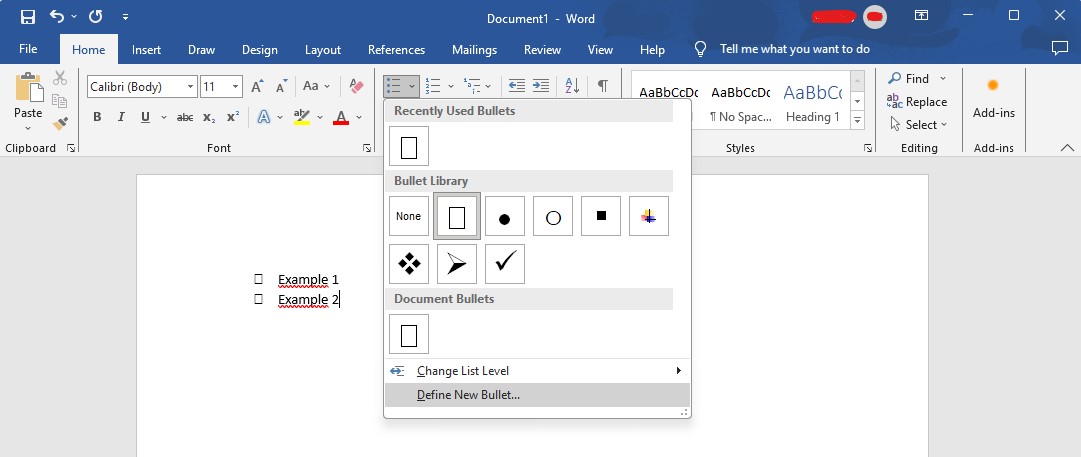
Using Menus: If you prefer using menus instead of icons in ribbons, navigate to “Insert” > “Symbol” > “More Symbols.” In the Symbol dialog box, select either Wingdings or Wingdings 2 as the font. Scroll down to find the checkbox symbol and click “Insert.”
-
Using Shortcuts: Pressing specific keyboard shortcuts can also insert checkboxes. For example, you can use Alt + 0251 on the numeric keypad to insert a checkbox symbol.
Tips for Efficient Placement and Alignment of Checkboxes
When adding checkboxes to your Word documents, consider these tips for optimal placement and alignment:
-
Grouping Checkboxes: If you have multiple checkboxes related to a specific topic or category, it is beneficial to group them together visually. You can achieve this by using tables or text boxes.
-
Aligning Checkboxes: To maintain consistency and enhance readability, ensure all checkboxes are aligned neatly in columns or rows.
-
Adjusting Size: Resize checkboxes as necessary to suit your document’s layout. Right-click on a checkbox and select “Size” from the context menu to adjust its dimensions.
-
Formatting Options: Customize checkboxes with various formatting options available in Word. For instance, you can change the color or add borders to make them stand out.
By following these instructions and utilizing different methods for inserting checkboxes, you can effectively enhance your Word documents’ interactivity and organization. Remember to experiment with placement and alignment techniques while keeping your content visually appealing.
Inserting Checkboxes in Word Using Different Methods
Exploring various techniques to add checkboxes, such as copy-pasting or dragging from a template
There are several methods you can use. One convenient technique is copying and pasting checkboxes from a pre-existing template. This is particularly useful when you have a document that already contains the desired checkbox design. Simply select the checkbox, press Ctrl+C to copy it, navigate to your desired location within the document, and press Ctrl+V to paste it.
Another method involves dragging and dropping checkboxes from a template. Many Word templates come with pre-designed form elements, including checkboxes. To utilize this method, open the template that includes the checkbox design you prefer. Then, click on the checkbox element and drag it onto your document at the desired location.
Utilizing keyboard shortcuts and quick actions for faster checkbox insertion
To expedite the process of inserting checkboxes in MS Word, consider utilizing keyboard shortcuts and quick actions. These time-saving techniques can significantly enhance your productivity. Here are some useful shortcuts:
-
Keyboard Shortcut: Press Ctrl+F9 to insert a blank field. Instructions: Place your cursor at the desired location within your document, then press Ctrl+F9 to create an empty field where you can insert a checkbox.
-
Quick Action: Use “Symbol” option in the “Insert” tab. Instructions: Click on “Insert” in the menu bar at the top of your screen, then select “Symbol”. From there, choose “More Symbols” and navigate to the “Symbols” tab. Look for a checkbox symbol among the available options and click on it to insert it into your document.
-
Keyboard Shortcut: Press Alt+0252 (numeric keypad) for ASCII code. Instructions: Ensure that Num Lock is enabled on your keyboard’s numeric keypad. Then hold down the Alt key and type 0252 using the numeric keypad. Release the Alt key to insert a checkbox.
Integrating third-party add-ins or plugins for advanced checkbox functionality
If you require more advanced checkbox functionality in MS Word, integrating third-party add-ins or plugins can be a game-changer. These tools offer additional features and customization options that go beyond what is available natively in Word. Here are some popular options:
-
Kutools for Word: This add-in provides a comprehensive set of tools for enhancing productivity in Word, including an option to insert checkboxes with various styles and layouts.
-
DocTools CrossReferenceManager: While primarily focused on cross-referencing, this plugin also offers an easy way to create checkboxes with customizable properties.
-
Form Pilot Office: Designed specifically for form creation, this software allows you to generate complex forms with checkboxes effortlessly.
By utilizing these third-party solutions, you can unlock advanced functionality and streamline your workflow when working with checkboxes in Microsoft Word.
Step-by-step Guide: How to Add Checkboxes to Word Documents
Detailed instructions with screenshots on inserting checkboxes step by step
Adding checkboxes to your Microsoft Word documents can be a useful way to create interactive and organized online documents. Whether you want to create a checklist or gather feedback, checkboxes provide an easy-to-use interface for users. Here’s a step-by-step guide on how to insert checkboxes in MS Word.
-
Open your Word document and navigate to the location where you want to add the checkbox.
-
Click on the “Developer” tab at the top of the screen. If you don’t see this tab, you may need to enable it first by going to “File” > “Options” > “Customize Ribbon” and checking the box next to “Developer.”
-
In the “Controls” group, click on the “Check Box Content Control” button. This will insert a checkbox at your cursor’s location.
-
To customize the appearance of your checkbox, right-click on it and select “Properties.” From here, you can change various options such as size, color, and style.
-
Once you’ve made all desired customizations, save your document.
Customization options like changing size, color, and style of checkboxes explained
Microsoft Word offers several customization options that allow you to modify the appearance of checkboxes according to your preferences. Here are some ways you can personalize your checkboxes:
-
Size: Adjusting the size of checkboxes can help make them more visible or fit better within your document layout.
-
Color: Changing the color of checkboxes allows you to match them with other elements in your document or highlight specific items.
-
Style: Word provides different styles for checkboxes, including checkmarks or X marks.
To access these customization options:
-
Right-click on the checkbox and select “Properties.”
-
In the properties window that appears, navigate through different tabs to modify size, color, style, and other checkbox properties.
-
Experiment with different settings until you achieve the desired look.
Troubleshooting common issues while adding checkboxes
While adding checkboxes to Word documents is generally straightforward, you may encounter a few common issues along the way. Here are some troubleshooting tips to help you overcome them:
-
Missing Developer Tab: If you don’t see the “Developer” tab in your Word interface, follow the steps mentioned earlier to enable it.
-
Unable to Click on Checkbox: Ensure that your document is not in “Read-only” mode as this can prevent interaction with checkboxes.
-
Checkbox Alignment: If your checkboxes appear misaligned or out of place, adjust their position by selecting and dragging them using the mouse cursor.
-
Printed Checkboxes Not Visible: Sometimes, checkboxes may not be visible when printing the document. To fix this issue, go to “File” > “Options” > “Display” and check the box next to “Print drawings created in Word.”
By following these troubleshooting tips, you can resolve common problems and successfully add checkboxes to your Word documents.
Tips and Tricks for Using Checkboxes in MS Word
Organizing information effectively using nested or grouped checkboxes
Checkboxes in MS Word are a versatile tool that can greatly enhance the organization of your documents. One useful technique is to create nested or grouped checkboxes, allowing you to categorize and subdivide information efficiently.
By nesting checkboxes, you can create a hierarchical structure that reflects the relationship between different items. For example, if you’re creating a to-do list, you could have main categories such as “Work” and “Personal,” with subcategories like “Meetings,” “Tasks,” or “Appointments” under each. This way, you can easily visualize and manage your tasks by simply checking or unchecking the corresponding checkboxes.
To create nested checkboxes in MS Word:
-
Place your cursor where you want to insert the checkbox.
-
Go to the “Developer” tab (if not visible, enable it from the options).
-
Click on the “Check Box Content Control” button.
-
Repeat steps 1-3 for each level of nesting required.
Grouping checkboxes is another effective way to organize information. It allows you to gather related items together while maintaining their individuality within a group. For instance, if you have multiple requirements for a project, you can group them under a single checkbox labeled “Project Requirements.” This simplifies navigation through long documents and provides a clear overview of completed tasks.
To group checkboxes in MS Word:
-
Select all the checkboxes that belong together.
-
Right-click on one of them.
-
Choose “Grouping” from the context menu.
-
Select “Group.”
Utilizing conditional formatting based on checkbox selection status
Conditional formatting is an invaluable feature in MS Word that enables dynamic changes to formatting based on specific conditions being met—such as when a checkbox is selected or cleared.
Imagine having a checklist where completed tasks are automatically highlighted or marked as complete when their corresponding checkboxes are checked. This not only saves time but also provides visual feedback on progress.
To apply conditional formatting to checkboxes in MS Word:
-
Select the checkbox you want to format.
-
Go to the “Developer” tab.
-
Click on the “Properties” button.
-
In the “Content Control Properties” dialog box, select the “Change…” button next to “Checked symbol.”
-
Choose your desired formatting options (e.g., font color, highlight color).
-
Repeat steps 1-5 for each checkbox requiring conditional formatting.
Techniques for bulk editing and managing multiple checkboxes simultaneously
When dealing with large documents or forms containing numerous checkboxes, manually editing them one by one can be time-consuming and tedious. Thankfully, MS Word offers several techniques for bulk editing and managing multiple checkboxes simultaneously.
Here are some helpful methods:
-
Use the “Find and Replace” feature: If you need to modify specific text associated with checkboxes (e.g., label names), you can use the “Find and Replace” tool in MS Word to make changes across multiple instances at once.
-
Select multiple checkboxes: Hold down the Ctrl key while clicking on individual checkboxes to select multiple ones simultaneously. Once selected, you can apply formatting changes or delete them all at once.
The Importance of “MS Word Checkbox”
The importance of the “MS Word Checkbox” feature cannot be overstated. It offers a convenient and efficient way to organize information, create interactive documents, and streamline workflows. With checkboxes, users can easily track tasks, manage to-do lists, and collect data in a structured manner within their Microsoft Word documents.
By using WPS Office for checkbox insertion, users can benefit from additional features that enhance their productivity. WPS Office provides a user-friendly interface with intuitive tools specifically designed for checkbox management. This enables users to effortlessly insert checkboxes into their Word documents and customize them according to their needs.
With step-by-step guides available for both macOS and Windows operating systems, adding checkboxes to Word documents has never been easier. Users can choose from various methods to insert checkboxes based on their preferences or document requirements. Whether it’s through the Developer tab or utilizing keyboard shortcuts, MS Word offers flexibility in creating professional-looking checkboxes.
In conclusion, the “MS Word Checkbox” feature is an invaluable tool for anyone looking to improve organization and efficiency in document management. By utilizing this feature along with the tips and tricks provided in this blog post, users can take full advantage of the power of checkboxes in MS Word.
FAQs
How do I check/uncheck a checkbox in MS Word?
To check or uncheck a checkbox in MS Word, simply click on it. A checked box indicates completion or selection while an unchecked box represents an incomplete or unselected item.
Can I use different styles for my checkboxes?
Yes, you can customize the appearance of your checkboxes in MS Word by changing their style properties such as color, size, shape, and font.
Can I copy and paste checkboxes?
Yes, you can copy and paste checkboxes within the same document or across different documents just like any other content in MS Word.
Can I print my document with visible checkboxes?
Yes, when you print your Word document, the checkboxes will be visible on the printed copy unless you specifically choose to hide them.
Can I use checkboxes in tables?
Yes, you can insert checkboxes into tables in MS Word. This allows for efficient data collection and management within table structures.