
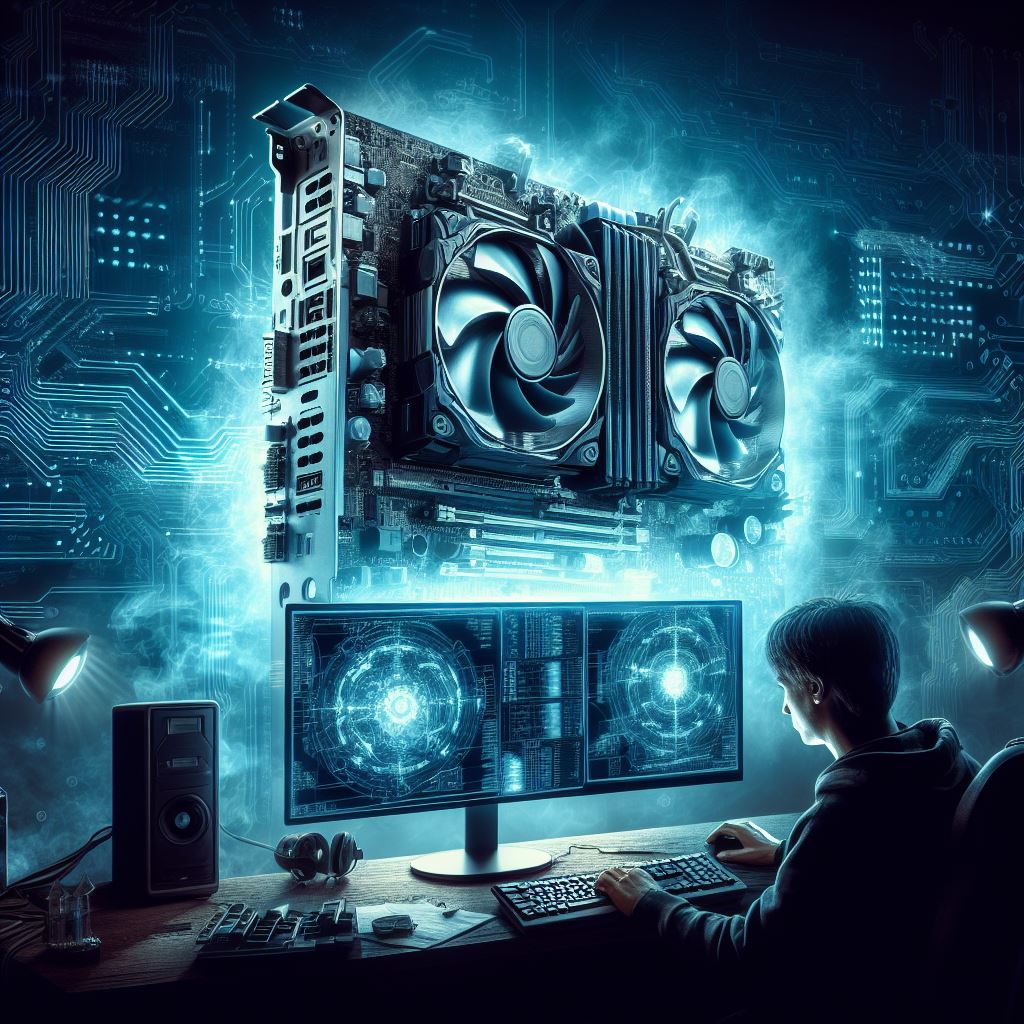
Want to take your gaming experience to the next level with better performance? Consider gpu overclocking for your graphics cards or video card. It’s time to dive into the world of advanced overclocking techniques for gaming PCs, including optimizing your CPU frequency and temperature with a high-performance CPU cooler. Utilize tools like Ryzen Master to fine-tune your settings and unlock the full potential of your gaming experience. By understanding the basics of CPU overclocking, you can unlock the true potential of your gaming rig and achieve enhanced performance like never before. This process involves tweaking your motherboard settings to increase the clock speed of your processors, allowing them to operate at higher frequencies, such as MHz. With advanced tuning, you can optimize your system for maximum power and speed.
In this guide, we’ll explore the benefits and risks associated with advanced overclocking techniques to boost the MHz of your motherboard’s threaded performance using Ryzen Master. In this guide, we’ll walk you through step-by-step instructions on how to approach overclocking your motherboard, from adjusting BIOS settings to testing for stability and performance. With the help of Ryzen Master, you can easily fine-tune your MHz settings for optimal results. In this blog post, you’ll learn how to maximize your gaming PC’s performance by utilizing GPU overclocking techniques. By engaging in manual overclocking, you can unlock the full potential of your graphics card and explore the overclocking headroom it offers. Discover how to optimize your core overclock for an enhanced gaming experience while ensuring stability and avoiding any potential damage.
So, if you’re ready to unleash the full power of your gaming computer and optimize its efficiency with advanced overclocking techniques, stay tuned for our in-depth exploration of motherboard, MHz, Ryzen Master, and more. Get ready to take your computer gaming experience from good to mind-blowing with GPU overclocking. With this technique, you can optimize your graphics performance on Windows for an even more immersive gaming experience.
Demystifying CPU Overclocking
Debunking Common Myths and Misconceptions
Overclocking the CPU on your computer motherboard can often be misunderstood by gamers due to various myths and misconceptions surrounding it. However, with the right knowledge and understanding, you can optimize your processor’s performance and achieve higher MHz speeds. One common myth is that overclocking your computer’s MHz using Ryzen Master will automatically void your warranty with MSI. While it’s true that some manufacturers may consider overclocking the processor as a breach of warranty, others explicitly allow it, especially on their enthusiast-grade CPUs. The mhz of the processor can be adjusted using software like Ryzen Master, which gives users more control over their computer’s performance. Before attempting any overclocking, it is crucial to check the guidelines provided by your CPU manufacturer, especially if you have an MSI computer with a Ryzen processor. Make sure to consult the Ryzen Master software for optimal performance.
Another prevalent misconception is that overclocking always leads to overheating and reduced lifespan of the computer’s processor. However, with the help of Ryzen Master software, you can safely optimize your graphics and achieve higher performance without compromising the longevity of your CPU. While it’s true that overclocking a computer’s processor increases power consumption and generates more heat, modern Ryzen CPUs with multiple cores are designed to handle higher temperatures. By employing proper cooling solutions such as aftermarket coolers or liquid cooling systems, you can mitigate the risk of overheating and ensure stable performance during intense gaming sessions. This is especially important when it comes to GPU overclocking and maximizing the GPU clock speed on your Ryzen processor.
Understanding Voltage, Temperature, and Frequency
Voltage plays a vital role in CPU overclocking. Increasing the voltage supplied to the processor allows for higher clock speeds and better gpu overclocking, but also results in increased power consumption and heat generation. This is particularly important for graphics and Ryzen processors. When overclocking your processor, it is crucial to find the right balance between increasing the GPU clock and maintaining temperature control. This will help prevent any potential damage to your Ryzen CPU or other components.
Temperature management is crucial when pushing your CPU’s clock rate beyond its stock frequency limits. Additionally, it is important to consider overclocking your GPU clock and memory clock for optimal performance. Investing in efficient cooling solutions is paramount when overclocking a Ryzen processor and graphics card, as higher clock speeds generate more heat. Proper airflow within the case, high-performance fans, and effective thermal paste application all contribute to maintaining optimal temperatures during overclocked operation for Ryzen processors with high-performance graphics chips.
Frequency refers to the speed at which a CPU or GPU clock operates measured in GHz (gigahertz). Overclocking is a method used to increase the clock speed of CPUs and GPUs chips, enhancing graphics performance. Overclocking Ryzen chips allows you to increase the frequency beyond its default setting for improved performance. However, not all CPUs are created equal. Some Ryzen processors have better potential for overclocking, allowing them to reach higher clock speeds while remaining stable compared to other chips. Researching individual Ryzen CPU models and consulting user experiences can provide valuable insights into their overclocking capabilities. The ryzen chip is a crucial component to consider when exploring overclocking options.
Factors to Consider for Different CPUs
Understanding the architecture and specifications of different CPUs, such as the Ryzen chip, is crucial when it comes to overclocking. Key factors to consider when overclocking a Ryzen chip include the power delivery system on the motherboard, the CPU’s thermal design power (TDP), and the quality of the silicon in your specific CPU unit. Motherboards with robust power delivery systems can provide more stable voltage regulation during overclocking, especially for Ryzen chips. Ryzen CPUs with higher TDPs are generally better suited for overclocking as they have more headroom for increased power consumption and heat dissipation. The chip has a significant impact on the CPU’s performance.
The quality of silicon in your Ryzen chip plays a significant role in determining its overclocking potential. Silicon Lottery refers to the natural variation in performance characteristics among individual Ryzen CPU chips due to manufacturing variances. Overclocking and auto OC can help optimize the performance of these chips.
Safely Overclocking Your CPU
Importance of Proper Cooling Solutions
To safely overclock your Ryzen chip, it is crucial to have proper cooling solutions in place. Overclocking increases the frequency and voltage of the Ryzen chip, resulting in higher temperatures. Without adequate cooling, the Ryzen chip can overclock and overheat, leading to instability or even permanent damage. Investing in a high-quality CPU cooler is essential to keep temperatures under control during intense gaming sessions, especially when overclocking the chip.
Choosing a Reliable Power Supply Unit (PSU)
A reliable power supply unit (PSU) is another critical component for overclocking your chip. Overclocking your CPU to higher frequencies requires more power, and a PSU with sufficient wattage and stable voltage output ensures consistent performance. Opt for a reputable brand that offers reliable power delivery and protection features like overclock, overvoltage, and short-circuit protection.
The Significance of Stress Testing
Stress testing is an integral part of safely overclocking your CPU. Overclocking involves running intensive programs or benchmarks for an extended period to assess stability and temperature levels. Stress tests help identify any instabilities or issues that may arise from overclocking. By monitoring the CPU temperature, clock frequency, and voltages during stress testing, you can fine-tune your settings for a stable overclock.
Monitoring Temperature Levels
Monitoring the temperature levels of your overclocked CPU is vital for maintaining stability and preventing overheating. High temperatures caused by overclocking can lead to throttling or system crashes during gaming sessions. Utilize software tools or BIOS utilities to overclock and provide real-time temperature readings so you can adjust settings accordingly.
Clear CMOS as a Safety Measure
When experimenting with different overclocking settings, it’s not uncommon to encounter instability or boot issues. In cases of overclocking, clearing the CMOS (Complementary Metal-Oxide-Semiconductor) can be helpful. This process resets the motherboard’s BIOS settings to default values, allowing you to start fresh without any unstable configurations. Additionally, it enables you to overclock your system for enhanced performance.
Fine-tuning CPU Voltage and Core Clock
To achieve a stable overclock, fine-tuning the CPU voltage and core clock frequency is essential. Increasing the voltage can overclock provide stability at higher frequencies, but it also generates more heat. Finding the right balance between voltage and temperature is crucial to prevent overheating while maintaining a stable overclock.
FCLK and Auto Overclocking Features
If your motherboard supports it, adjusting the Fabric Clock (FCLK) can enhance system performance when overclocking. FCLK synchronizes with the CPU clock speed and memory frequency for improved overall performance, especially when overclocking. Some motherboards offer auto overclocking features that simplify the process by automatically adjusting settings based on your CPU’s capabilities.
Step-by-Step CPU Overclocking Guide
Adjusting BIOS Settings for Optimal CPU Performance
To achieve advanced overclocking for your gaming PC, it’s crucial to understand how to adjust the BIOS settings. This step-by-step guide will walk you through the process of overclocking.
Firstly, let’s focus on the multiplier. The multiplier determines the clock speed of your CPU. By overclocking, you can increase this value and boost your CPU’s performance. However, it’s important to note that not all CPUs are capable of being overclocked due to certain limitations imposed by manufacturers.
Next, we have the base clock. This overclock setting affects the overall frequency of your CPU and other components in your system. Overclocking the base clock can lead to higher performance but may also cause instability if not done carefully.
Lastly, we come to voltage adjustments. When overclocking, increasing voltage is often necessary to maintain stability at higher clock speeds. However, overclocking with excessive voltage can generate more heat and potentially damage your hardware. When overclocking, it’s crucial to find a balance between performance and safety when tweaking these settings.
Monitoring Temperatures and Tweaking Settings
As you overclock your CPU beyond its default limits, monitoring temperatures becomes critical. High temperatures can lead to thermal throttling or even permanent damage if not addressed promptly. Overclocking can exacerbate these risks.
There are various software tools available that allow you to monitor temperature readings in real-time, especially when you overclock your device. Keep an eye on these temperatures while stress testing your system under heavy loads to ensure a stable overclock. If temperatures start reaching unsafe levels (usually above 80-85 degrees Celsius), it may be necessary to overclock and adjust either the clock speed or voltage settings accordingly.
It’s worth mentioning that every hardware configuration is unique, so what works for one person might not work for another when it comes to overclocking. Experimentation is key when finding the optimal settings for your specific setup.
Fine-Tuning Your Overclock
Once you’ve found stable settings with acceptable temperatures, there are additional tweaks you can explore to further optimize your overclock.
One option is to adjust the memory timings. This involves modifying the timing settings of your RAM modules, which can improve overall system performance.
Another consideration is power management. Some CPUs have features like Intel’s Turbo Boost or AMD’s Precision Boost, which dynamically adjust clock speeds based on workload. Understanding and configuring these settings can help maximize performance in different scenarios.
Lastly, don’t forget about regular maintenance. Overclocking puts additional stress on your hardware, so it’s important to keep your system clean and well-cooled. Regularly cleaning dust from fans and heatsinks and ensuring proper airflow can go a long way in maintaining stability.
GPU Overclocking Techniques
Overview of GPU Architecture and Overclockability
The architecture of a GPU plays a crucial role in determining its overclocking potential. Different GPUs have varying levels of overclockability due to differences in their design, power delivery, and cooling capabilities. Understanding the architecture of your specific GPU model is essential for effective overclocking.
Methods to Increase GPU Clock Speeds
There are several methods you can employ to increase the clock speeds of your GPU. One common approach is using software utilities specifically designed for overclocking. These tools allow you to adjust various parameters, such as core clock speed, memory clock speed, and voltage settings.
Another method involves modifying the BIOS settings of your graphics card. This allows for more advanced options and finer control over the overclocking process. However, it’s important to note that modifying BIOS settings carries some risks and should be approached with caution.
Balancing Core Clock, Memory Clock, and Voltage Adjustments
When overclocking your GPU, it’s crucial to strike the right balance between core clock speed, memory clock speed, and voltage adjustments. Increasing the core clock speed can lead to higher performance gains but may also result in increased heat output and power consumption.
Similarly, adjusting the memory clock speed can improve overall performance but can also introduce stability issues if pushed too far. Voltage adjustments are often necessary when pushing the limits of your GPU’s overclockability but should be done carefully as excessive voltage can damage the graphics card.
By experimenting with these three variables – core clock speed, memory clock speed, and voltage adjustments – you can find an optimal configuration that maximizes performance gains while ensuring stability.
Dealing with Thermal Throttling
Thermal throttling is a common concern. As temperatures rise during intense gaming sessions or heavy workloads, GPUs may automatically reduce their clock speeds to prevent overheating. To mitigate thermal throttling, proper cooling solutions are essential.
Investing in a high-quality aftermarket air cooler or even a liquid cooler can significantly improve thermal performance and allow for more aggressive overclocking. Applying high-quality thermal paste between the GPU die and the cooler can help to dissipate heat more efficiently.
Mastering GPU Overclocking Safety
Adequate Cooling Solutions for Stable Temperatures
To ensure a successful and safe GPU overclocking experience, it is crucial to prioritize adequate cooling solutions. Overclocking pushes the performance limits of your graphics card, which generates more heat than usual. Without proper cooling, the increased heat can lead to instability, crashes, or even permanent damage to your GPU.
Investing in high-quality cooling solutions such as aftermarket air coolers or liquid cooling systems can help dissipate the extra heat effectively. These solutions provide better airflow and temperature control, keeping your GPU within safe operating limits during overclocking sessions.
Back Up Original GPU BIOS Before Modifications
Before attempting any modifications to your graphics card’s BIOS settings, it is essential to back up the original BIOS. This precautionary step ensures that you have a safety net in case anything goes wrong during the overclocking process.
By backing up the original GPU BIOS, you can easily revert to the default settings if you encounter stability issues or other problems after making changes. Various software tools are available that allow you to create a backup of your GPU’s BIOS quickly and easily.
Troubleshooting Common Issues
Even with all precautions taken, there may be instances where aggressive GPU overclocks result in artifacts or system instability. It is important to be prepared for such situations and know how to troubleshoot common issues that may arise during overclocking.
One common issue is encountering graphical artifacts – visual anomalies like flickering textures or screen tearing. If you notice artifacts after overclocking your GPU, it generally indicates an unstable overclock. In such cases, reducing the clock speeds or adjusting voltage settings can help resolve the problem.
System instability is another potential issue when pushing your graphics card beyond its limits. If you experience crashes, freezes, or random reboots after overclocking, it could indicate an unstable configuration. Adjustments such as lowering clock speeds or increasing voltage within safe limits can often resolve these stability issues.
To troubleshoot effectively, it is recommended to make incremental changes rather than making drastic adjustments all at once. This approach allows you to identify the specific settings causing problems and find the optimal balance between performance and stability.
By following these advanced overclocking techniques, you can master GPU overclocking safety for your gaming PC. Remember to prioritize cooling solutions, back up your original GPU BIOS, and be prepared to troubleshoot common issues that may arise during the process. With proper precautions and careful monitoring, you can unlock the full potential of your graphics card while ensuring its longevity.
Overclocking with Intel Extreme Tuning Utility (Intel XTU)
Utilizing Intel XTU software for easy and efficient CPU tuning on Intel processors
Overclocking your gaming PC can provide a significant boost in performance, allowing you to squeeze out every bit of power from your hardware. One powerful tool that can help you achieve this is the Intel Extreme Tuning Utility (Intel XTU). This software is specifically designed for Intel processors and offers a range of advanced tuning options.
With the Intel XTU, you can easily adjust various parameters of your CPU to optimize its performance. One notable feature is the ability to adjust per-core frequency, which allows you to fine-tune the speed of each individual core. This level of control enables you to maximize performance in specific applications or games that may benefit from higher clock speeds on certain cores.
Exploring features like per-core frequency adjustment, voltage control, and stress testing capabilities within Intel XTU
In addition to per-core frequency adjustment, the Intel XTU also provides voltage control options. This allows you to modify the power supplied to your CPU, enabling you to find the optimal balance between performance and stability. By carefully adjusting voltages, you can push your CPU beyond its stock limits while ensuring it remains stable under heavy workloads.
Another valuable feature offered by the Intel XTU is its stress testing capabilities. This functionality allows you to test your overclocked settings under realistic conditions and identify any potential stability issues. By subjecting your system to intense workloads using stress tests provided within the software, such as Prime95 or AIDA64, you can ensure that your overclocked settings are reliable and won’t cause crashes or system instability during gameplay.
Maximizing gaming performance with Intel XTU’s real-time monitoring and fine-tuning options
One of the key advantages of using Intel XTU for overclocking is its real-time monitoring capabilities. The software provides detailed information about your CPU’s temperature, frequency, and voltage in real-time. This allows you to keep a close eye on the performance of your system and make adjustments as needed.
Intel XTU offers fine-tuning options that enable you to optimize your overclocked settings further. You can experiment with different Turbo Boost ratios to find the sweet spot for your specific CPU and achieve the best possible gaming performance. By carefully adjusting these ratios, you can ensure that your CPU operates at its maximum potential during demanding gaming sessions.
Maximizing Performance with Intel Core Processors
Advantages of Overclocking Intel Core Processors for Gaming
Overclocking your Intel Core processor can significantly enhance gaming performance, allowing you to push your system to its limits and achieve better results. By increasing the clock speed of your CPU, you can experience smoother gameplay, faster frame rates, and reduced lag.
One advantage of overclocking is the ability to unlock the full potential of your CPU cores. Modern CPUs come equipped with multiple cores that work in parallel to execute tasks more efficiently. By overclocking, you can increase the core frequency, enabling each core to perform at a higher level. This leads to improved threaded performance, allowing games that utilize multiple threads to run more smoothly.
Unlocked Multiplier CPUs and Higher Clock Speeds
To maximize overclocking capabilities, it is crucial to choose a quality CPU that supports unlocked multipliers. Unlocked multiplier CPUs provide greater flexibility in adjusting the clock speed by allowing you to directly modify the CPU ratio. This means you can increase the clock speed without affecting other components or settings on your motherboard.
By utilizing an unlocked multiplier CPU, you have greater control over achieving higher clock speeds. This enables you to fine-tune your system’s performance according to your specific gaming requirements. It’s important to note that not all CPUs offer this feature, so ensure that you select a compatible processor when building or upgrading your gaming PC.
Optimizing Power Settings and Enabling Turbo Boost Technology
In addition to choosing an appropriate CPU, optimizing power settings and enabling Turbo Boost technology are essential steps for maximizing performance during overclocking. Power optimization tools such as Intel XTU allow you to adjust various parameters like voltage and power limits for optimal efficiency.
Enabling Turbo Boost technology further enhances performance by dynamically increasing the clock speed when needed. During intense gaming sessions where additional processing power is required, Turbo Boost automatically boosts the clock speed above the base frequency. This results in extra performance gains, allowing your games to run smoother and more efficiently.
By fine-tuning power settings and enabling Turbo Boost technology, you can ensure that your Intel Core processor operates at its peak performance level during gaming sessions.
The Overclocking Process: Reiteration and Stress Testing
To recap the steps involved in CPU and GPU overclocking, it is crucial to understand the process thoroughly. Overclocking involves pushing your hardware components beyond their factory-set limits to achieve higher performance levels. This can be done by increasing the clock speed of your CPU or GPU, adjusting voltage settings, and optimizing other parameters.
However, simply increasing clock speeds without proper testing can lead to instability and potential damage to your system. That’s where stress testing comes into play. Stress testing is a critical step in the overclocking process as it helps ensure system stability under heavy loads.
Stress tests are designed to put your hardware through intense workloads that simulate real-world usage scenarios like gaming or rendering. By subjecting your system to these demanding tasks, you can identify any weaknesses or instabilities that may arise when operating at higher frequencies.
To conduct stress tests effectively, it is recommended to use reliable benchmarking tools specifically designed for this purpose. One popular tool is Prime95, which puts a heavy load on the CPU while monitoring its temperature and stability. Another commonly used stress test tool is FurMark, which stresses the GPU by running intensive graphics benchmarks.
When performing stress tests, it’s essential to monitor key metrics such as temperatures, voltages, and clock speeds using software utilities like MSI Afterburner or HWMonitor. These tools provide real-time data on how your system is performing during stress testing.
During stress testing, it’s important to repeat the tests multiple times for accurate results. This ensures that any issues or inconsistencies are not just random occurrences but rather consistent problems that need attention. By repeating the tests several times, you can identify patterns of instability or throttling that may occur under prolonged periods of heavy usage.
It’s worth noting that overclocking increases power consumption and generates more heat than running components at stock settings. To mitigate these effects and maintain system stability during overclocking, proper cooling is crucial. Investing in high-quality cooling solutions such as aftermarket CPU coolers or liquid cooling systems can help keep temperatures in check and prevent thermal throttling.
Troubleshooting Common Overclocking Issues
Identifying common problems
During the process of overclocking your gaming PC, you may encounter several common issues that can hinder system performance. These issues include system crashes, blue screens, or overall instability. It’s important to be able to identify these problems to effectively troubleshoot them and ensure optimal performance.
Troubleshooting techniques
When faced with overclocking issues, there are a few troubleshooting techniques you can employ to resolve them. One technique is adjusting voltages. Sometimes, increasing or decreasing the voltage supplied to certain components can help stabilize the system and prevent crashes or instability.
Another troubleshooting technique is reverting settings. If you experience issues after making changes to your overclocking settings, it may be necessary to revert back to the default settings. This can help isolate whether the problem lies in the specific changes you made during overclocking.
Updating drivers is another crucial step in troubleshooting overclocking issues. Outdated or incompatible drivers can cause conflicts and lead to system instability. By ensuring that all your drivers are up-to-date, you can minimize potential problems and improve overall system performance.
Finding the right balance
One of the key considerations when overclocking your gaming PC is finding the right balance between performance gains and system stability. While pushing your hardware beyond its default limits can result in significant performance improvements, it also increases the risk of encountering stability issues.
To strike this balance effectively, it’s essential to monitor your system closely during stress testing and benchmarking. Keep an eye on temperature readings, as excessive heat can contribute to instability. Pay attention to any signs of instability such as graphical artifacts or crashes during demanding tasks.
Experimentation plays a crucial role in finding this equilibrium. Gradually increase clock speeds and voltages while monitoring for any negative effects on stability. If you encounter problems along the way, make adjustments accordingly until you find a stable configuration that maximizes performance without sacrificing system reliability.
By implementing these troubleshooting techniques and finding the right balance between performance gains and stability, you can overcome common overclocking issues and optimize your gaming PC for an enhanced gaming experience.
Conclusion
Congratulations! You have now mastered the art of overclocking your gaming PC. By demystifying CPU overclocking, safely pushing your CPU’s limits, and exploring GPU overclocking techniques, you have unlocked a new level of performance for your gaming experience.
But remember, with great power comes great responsibility. Always prioritize safety by following the step-by-step guide and utilizing tools like Intel Extreme Tuning Utility (Intel XTU) to maximize performance while minimizing risks. And if you encounter any issues along the way, refer to the troubleshooting section for quick solutions.
Now it’s time to put your newfound knowledge into action and unleash the full potential of your gaming rig. So go ahead, push those boundaries, and elevate your gaming experience to new heights. Happy overclocking!
Frequently Asked Questions
How can I safely overclock my gaming PC?
To safely overclock your gaming PC, start by ensuring that your system is adequately cooled with a reliable cooling solution. Then, gradually increase the clock speed and monitor the temperature to avoid overheating. It’s also important to stress-test your system to ensure stability and make adjustments as needed.
What are the potential risks of overclocking my gaming PC?
Overclocking your gaming PC can potentially lead to increased power consumption, higher temperatures, and reduced component lifespan if not done properly. Unstable overclocks may result in system crashes or data corruption. It’s crucial to follow proper procedures and monitor your system closely to mitigate these risks.
Is it necessary to have advanced technical knowledge for overclocking?
While having advanced technical knowledge can be helpful, it is not an absolute requirement for overclocking. With readily available resources such as tutorials, guides, and software utilities, even beginners can learn how to safely overclock their gaming PCs. However, understanding the basics of computer hardware is recommended for better results.
Can I revert back to default settings if something goes wrong during overclocking?
Yes, you can always revert back to default settings if something goes wrong during the overclocking process. Most motherboards offer options like “Load Optimized Defaults” or a similar feature that resets all BIOS settings to their original values. This allows you to undo any changes made while troubleshooting or encountering instability.
Will overclocking void my warranty?
In most cases, manufacturers do not explicitly cover damages caused by user-induced overclocking under warranty. However, some components come with warranties that specifically allow for moderate levels of overclocking without voiding the warranty. It’s essential to check individual manufacturer policies regarding warranty coverage for overclocked systems.