
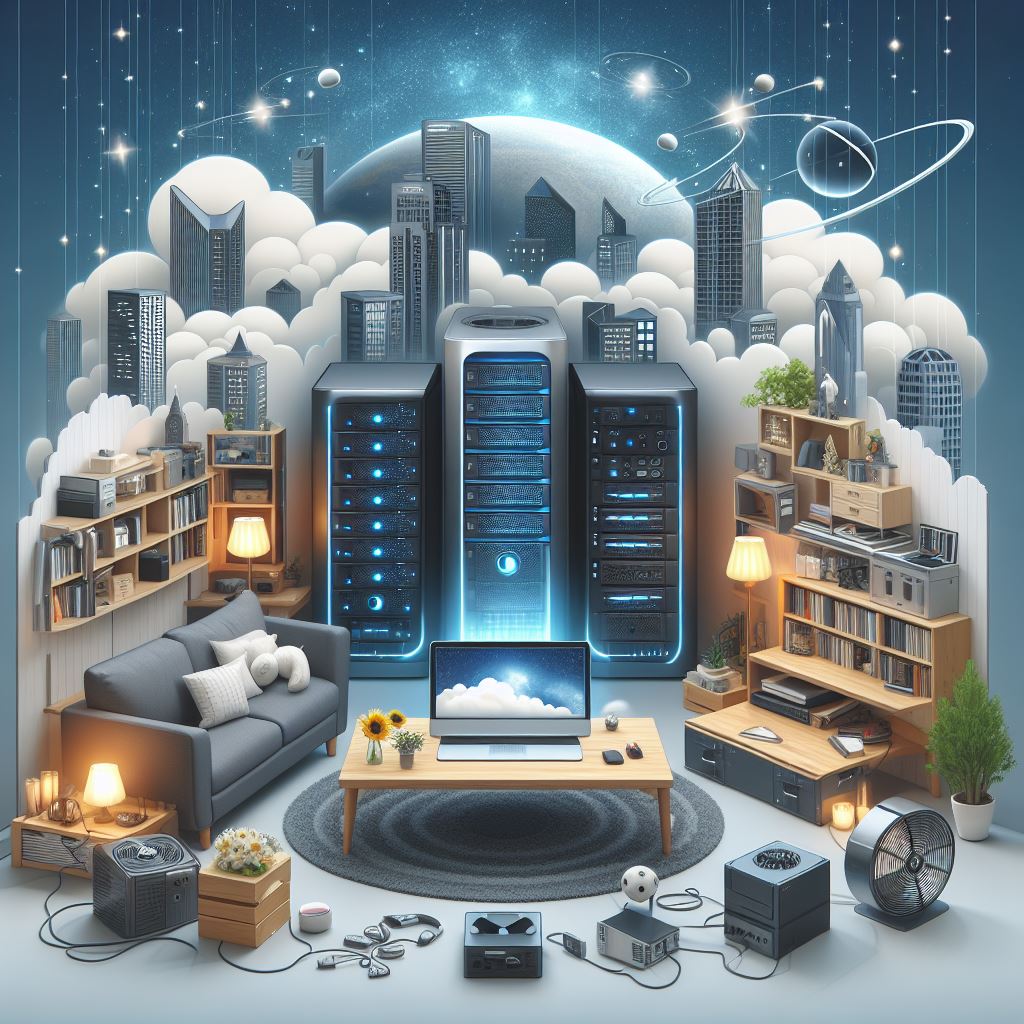
Looking to centralize your media collection and enjoy seamless streaming throughout your home? With MediaPortal, you can now easily access your favorite content on Smart TVs, Fire TV, and gaming consoles. A mediaportal home server setup for media streaming and storage with hard drive is the perfect solution for audio.
Imagine having all your movies, TV shows, music, and photos in one place on your home media server, accessible from any device with a user-friendly interface. Whether you’re setting up a home theater or looking to stream content from various streaming services, having a reliable media player is essential. With many media servers, you can say goodbye to scattered files across multiple devices and hello to a centralized hub of entertainment. A home server acts as a media player, allowing you to access your media files from any computer in your network. It also enables you to stream content from various streaming services.
We’ll cover everything from choosing the right enclosure to maximizing performance with RAID configurations for storage space. Whether you’re looking for a motherboard that supports multiple SATA connections or a CPU that can handle heavy workloads, we’ve got you covered. Get ready to transform your living room into a digital entertainment paradise with the latest smart TVs, home media servers, and gaming consoles. Enjoy the best of live TV and more!
Understanding Home Servers for Media Streaming
A home server acts as a central hub that stores and manages all your media files.
A home server is like a personal library for all your digital media. It functions as a computer that can store and manage data from multiple devices. The server’s CPU is responsible for processing and executing tasks efficiently. A home media server is a central hub in your home network where you can store, organize, and manage your media files, including movies, music, and photos. Instead of scattering your files across multiple devices or relying on external hard drives, a home server, also known as a media server, brings everything together in one convenient location. By using a computer equipped with a SATA enclosure, you can easily store and access all your files from one central hub.
It allows you to stream movies, music, and photos to various devices such as smart TVs, smartphones, or tablets.
With a home server setup for media streaming, you can enjoy seamless access to your entire media collection from any smart TV, computer, or wide range of devices connected to your home network. Whether you want to stream media files from your computer to your smart TV in the living room or to your smartphone while on the go, media servers make it possible. You no longer have to worry about transferring files between devices or dealing with limited storage space thanks to media servers. With a home media server, you can easily access and share files across your home network using your computer.
Home servers often come with features like transcoding, which ensures compatibility with different devices.
One of the key advantages of using a computer home server with SATA features is its ability to transcode a wide range of media files. Transcoding is the process of converting video or audio files into formats that are compatible with different devices, such as media servers or computers, for streaming purposes in home use. For example, if you have media files such as movies in media formats that are not supported by your smart TV or smartphone, the media server can automatically convert them into compatible formats on-the-fly. This allows you to stream the media files seamlessly. This ensures that media servers can stream media files seamlessly in various media formats without worrying about compatibility issues. Additionally, these media servers offer a wide range of features to enhance the streaming experience.
Transcoding is useful when streaming media over the internet, as it allows for efficient use of bandwidth. If you have limited bandwidth available or are accessing your media remotely, the home server can use adjust the quality and resolution of the video being streamed to optimize playback based on your network conditions.
In addition to streaming and transcoding capabilities, many home servers offer advanced features like automatic retrieval and organization of media files in various media formats. These features allow you to easily search and browse your media library based on genres, actors, directors, or other criteria. Some home servers even provide recommendations based on your viewing habits, making it easier to discover new media files and explore different media formats.
Choosing the Right Hardware for Your Server
Reliable and Powerful Processor
Selecting a reliable and powerful processor is crucial for smooth media streaming performance. The processor acts as the brain of your home server, handling all the tasks and calculations required to stream media seamlessly. When choosing a processor for media servers, look for models with multiple cores and high clock speeds to efficiently handle media files. This will ensure that your media server can handle multiple concurrent streams of media files without any lag or buffering issues. Processors from popular brands like Intel or AMD are excellent choices for home servers, offering exceptional performance and reliability for handling media files.
Sufficient RAM Capacity
To handle multiple concurrent streams of media files without buffering issues, your home server needs sufficient RAM capacity. RAM (Random Access Memory) is responsible for storing temporary data that the processor uses during operation.Having enough RAM ensures that your server can quickly access and process the data needed for smooth playback. Aim for at least 8GB of RAM for your media server, but if you plan on running more demanding applications or serving a larger number of users simultaneously on your media server, consider upgrading to 16GB or even 32GB.
Ample Storage Space
One of the primary purposes of a home server setup for media streaming is to provide ample storage space for your media library. You have various customization options. One option is using high-capacity hard drives directly connected to your server’s motherboard. These hard drives, also known as media servers, can range in size from several terabytes (TB) to even petabytes (PB), depending on your needs.
Another option is Network Attached Storage (NAS). NAS devices, also known as media servers, are dedicated storage solutions that connect to your network, allowing multiple devices to access files stored on them. Media servers often come with multiple drive bays, enabling you to expand storage capacity as needed by adding more hard drives.
Multiple Operating Systems
When setting up a home server, you have flexibility in choosing an operating system (OS) that suits your needs best. Popular choices include Windows Server, Linux distributions like Ubuntu or CentOS, or even specialized server OS like FreeNAS. Each operating system (OS) has its advantages and considerations when it comes to setting up a media server, so it’s essential to research and choose the OS that aligns with your goals.
Raspberry Pi for Simplicity
For those looking for a more compact and energy-efficient solution, consider using a Raspberry Pi as your home server. The Raspberry Pi is a small single-board computer that can be used for various applications, including media streaming and storage. It offers low power consumption while still providing enough processing power to handle media streaming tasks effectively.
Essential Software for Media Streaming and Storage
Plex Media Server
Plex Media Server is a popular choice. It offers an intuitive interface and extensive compatibility with different devices, making it a versatile option for users looking for a reliable media server. With Plex, you can easily organize your media files and access them from various streaming services.
One of the key advantages of Plex is its ability to transcode media content on-the-fly. This means that if your media files are in different formats or sizes, Plex will automatically convert them into a compatible format for smooth playback on your devices. Plex, the media server, offers robust support for subtitles, enabling you to effortlessly enjoy foreign-language films.
Emby
Another software option worth considering is Emby. Similar to Plex, Emby offers powerful media management features along with live TV support. With Emby’s live TV feature, you can stream and record live television directly from your home server. This makes it an excellent choice for those who want to consolidate their media streaming and live TV experience into one platform.
Emby also boasts an elegant user interface that allows you to navigate through your media library effortlessly. It supports various media formats and provides options for customization, allowing you to tailor the interface according to your preferences.
Kodi
If you’re looking for an open-source media server platform that offers extensive customization options, Kodi is the way to go. Known for its customizable interface and wide range of add-ons, Kodi allows you to transform your home server into a full-fledged home theater system.
With Kodi’s vast collection of add-ons, you can enhance your streaming experience by accessing additional content from various sources on your media server. Whether it’s movies, TV shows, or music, Kodi has a diverse selection of add-ons that cater to different interests on its media server.
Kodi also supports multiple operating systems including Windows, macOS, Linux, Android, and iOS. It is a versatile media server that caters to various platforms. This ensures compatibility across a wide range of devices, including smart TVs, streaming boxes, and media servers.
Setting Up Your Home Server Network
To ensure optimal network performance for your home server setup, it is essential to connect your home server directly to the router via an Ethernet cable. This wired connection provides a stable and reliable network link for your media server, minimizing any potential disruptions in data transfer.
Assigning static IP addresses to your devices on the home network is another crucial step in setting up your home server network. By assigning static IP addresses, you ensure consistent connectivity between devices, allowing them to communicate seamlessly with each other and with the home server. This eliminates any issues that may arise from dynamic IP address allocation when setting up a media server.
Enabling port forwarding on your router is necessary if you want to access your home server remotely from outside networks. Port forwarding allows incoming connections through specific ports on the router, directing them to the appropriate media server device or service within your local network. By configuring port forwarding correctly, you can securely access and manage your home server even when you are away from home.
By following these steps, you can create a robust and efficient home server network that caters specifically to your media streaming and storage needs. With a direct Ethernet connection, static IP addresses assigned to devices, and port forwarding enabled on your router, you can enjoy seamless access to media files stored on your home server from multiple devices within or outside of your network.
Moreover, setting up a dedicated home server provides several advantages over relying solely on cloud-based services for media streaming and storage purposes. Firstly, a media server offers greater control over data privacy since all media files are stored locally within the confines of your own network. Having a dedicated server ensures faster access speeds as there is no reliance on internet bandwidth limitations.
Furthermore, a home server allows for customization and flexibility in terms of storage capacity expansion. You have full control over adding additional hard drives or upgrading existing ones for your media server as per your requirements. This level of scalability enables you to accommodate growing media libraries without worrying about reaching storage limits imposed by cloud-based services.
Configuring Storage Solutions and Redundancy
RAID Configurations
RAID configurations are an essential aspect of setting up a home server for media streaming and storage. By combining multiple hard drives into one logical unit, a RAID media server offers data redundancy, ensuring that your valuable files are protected in case of hardware failures or accidents. There are different RAID levels to choose from when setting up a media server, each with its own advantages and considerations.
Backup Strategy Implementation
In addition to RAID configurations, implementing a backup strategy is crucial for safeguarding against data loss, especially when using a media server. While RAID provides redundancy within the server itself, backups offer an extra layer of protection by storing copies of your data in separate locations or on external drives. This way, even if your home server experiences a catastrophic failure or gets damaged due to unforeseen circumstances, you can still retrieve your important files.
File Systems with Data Integrity Checks
Utilizing file systems that provide data integrity checks and self-healing capabilities is highly recommended for a media server. Two popular options are ZFS and Btrfs. These media server file systems not only offer efficient storage capacity but also ensure the integrity of your data by performing regular checks for errors and automatically repairing any detected issues.
ZFS (Zettabyte File System) is known for its advanced features such as data compression, snapshotting, built-in support for RAID configurations, and its ability to function as a media server. The media server employs checksums to detect silent data corruption and has the ability to recover corrupted files using redundant copies stored on multiple drives.
Btrfs (B-Tree File System) is another robust file system that supports various features like snapshots, copy-on-write functionality, scalability, and media server compatibility. It also includes checksums to verify data integrity on the media server and can automatically repair corrupted files using redundant copies or parity information.
Consider Cloud Storage Options
While setting up local storage solutions is essential for immediate access to your media files, it’s worth considering cloud storage options as well. Cloud storage services, such as media servers, provide the convenience of accessing your files from anywhere with an internet connection. Additionally, these services offer data redundancy and backup capabilities.
Services like Google Drive, Dropbox, or OneDrive can be integrated into your home server setup to create a hybrid storage solution. This allows you to take advantage of both local storage and cloud storage for fast access, remote accessibility, and off-site backups with a media server.
Optimizing Media Streaming Performance
To ensure a seamless media streaming experience on your home server setup, there are several strategies you can employ to optimize its performance. Let’s explore some key techniques that can enhance the streaming capabilities of your media server.
Transcoding for Smooth Playback
One common challenge when streaming media files is compatibility between different devices. Not all devices, including media servers, support the same file formats or codecs. To overcome this hurdle, consider implementing transcoding capabilities on your media server. Transcoding involves converting media files into a compatible format on-the-fly, allowing smooth playback across various devices.
By automatically transcoding the media files to a format supported by the device requesting the content, you eliminate any compatibility issues and ensure an uninterrupted streaming experience. This process may require some additional computing power from your server, but it significantly improves flexibility and convenience for accessing your media library from diverse devices.
Prioritizing Media Streaming Traffic
When multiple devices are connected to your network and actively using bandwidth, it’s crucial to prioritize media streaming traffic for optimal performance. Quality of Service (QoS) settings can help achieve the goal of optimizing the performance of a media server. QoS allows you to allocate more bandwidth and network resources specifically for media streaming applications or services.
By configuring QoS rules on your router or network equipment, you can give priority to traffic generated by media streaming activities over other less critical data transfers. This ensures that video and audio streams on the media server receive sufficient bandwidth and low latency, resulting in smoother playback without buffering or interruptions caused by competing network activities.
Utilizing Wired Connections
While Wi-Fi offers convenience and mobility, wired connections generally provide better stability and higher bandwidth capacity. If possible, connect your home server directly to the router using an Ethernet cable instead of relying solely on wireless connectivity.
Wired connections minimize latency and maximize available bandwidth for data transfer between your server and other devices on the network. This reduces potential bottlenecks that may occur with wireless connections due to interference or signal strength limitations. For media streaming, where large files need to be transferred quickly and consistently, a wired connection can significantly enhance the overall performance and reliability of your setup.
Incorporating these optimization techniques into your home server setup for media streaming and storage will ensure a smoother and more enjoyable streaming experience. By transcoding media files on-the-fly, prioritizing streaming traffic with QoS settings, and utilizing wired connections whenever possible, you can eliminate compatibility issues, minimize buffering, and maximize the performance of your media server.
Securing Your Home Media Server
Change Default Login Credentials
To ensure the security of your home media server, it is crucial to change the default login credentials. Using strong and unique passwords will protect against unauthorized access. Avoid using common or easily guessable passwords like “password123” or “admin.” Instead, create a password that combines uppercase and lowercase letters, numbers, and special characters.
Enable Encryption Protocols
Another essential step in securing your home media server is enabling encryption protocols like SSL/TLS. These protocols provide secure communication between your server and any remote devices accessing it. By encrypting the data transmitted over the network, you can prevent potential eavesdropping or interception of sensitive information.
Regularly Update Operating System and Software
Keeping your server’s operating system and software up to date is crucial for maintaining its security. Developers frequently release updates that include patches for known vulnerabilities. By regularly updating your server’s software, you can ensure that any security flaws are addressed promptly, reducing the risk of exploitation by malicious actors.
Regular updates also help improve performance and add new features to enhance your media streaming experience. Set up automatic updates whenever possible so that you don’t have to manually check for updates regularly.
Managing and Organizing Your Media Library
Metadata Management Tools
To effectively manage your media library, consider utilizing metadata management tools such as TinyMediaManager or Ember Media Manager. These tools automatically fetch information about your media files, including details like title, genre, cast, and plot summary. By leveraging these tools, you can ensure that your media library is well-organized and easily searchable.
Categorization and Organization
Organizing your media library into categories, genres, or collections is essential for easy navigation and searching. You can create separate folders or directories for different types of media, such as movies, TV shows, documentaries, or music albums. Within each category, further organize the files by subcategories based on genres or themes.
For example:
- Movies
- Action
- Comedy
- Drama
- TV Shows
- Crime
- Sci-Fi
- Sitcoms
This hierarchical organization allows you to find specific content quickly without sifting through a cluttered library.
Automated Downloaders
If you want to streamline the acquisition of new TV shows and movies for your media library, consider using automated downloaders like Sonarr or Radarr. These tools automate the process of searching for and downloading episodes of TV shows or movies as soon as they become available.
By configuring these downloaders with your preferred quality settings and sources (such as torrent trackers), you can ensure that new content is automatically added to your library without any manual intervention required. This eliminates the need to manually search for new releases and simplifies the process of keeping your media collection up-to-date.
Automated downloaders also offer additional features like automatic renaming and organizing of downloaded files according to predefined rules. This ensures consistency in file naming conventions across your entire library.
Troubleshooting Common Home Server Issues
Check Network Connectivity
To ensure smooth media streaming and storage on your home server, it is crucial to check the network connectivity. Make sure all devices are properly connected and have a stable connection to the server. A weak or intermittent connection can lead to buffering issues and interruptions while streaming media.
Verify Open Ports on Router
For seamless remote access to your home server, it is important to verify that the necessary ports are open on your router. By opening specific ports, you allow external devices or users to connect to your server securely. Check your router’s settings and ensure that the required ports for media streaming and remote access are open.
Update Firmware/Drivers
Compatibility issues can often arise when using a home server setup for media streaming and storage. To address these issues, it is recommended to regularly update the firmware and drivers of your home server hardware components. Manufacturers release updates that fix bugs, improve performance, and enhance compatibility with various devices.
Updating firmware or drivers can be done through the manufacturer’s website or software provided specifically for your hardware component. By keeping your hardware up-to-date, you reduce the chances of encountering compatibility problems that may affect media streaming or storage functionality.
In addition to these troubleshooting steps, there are other factors you should consider when setting up a home server for media streaming and storage:
- Hardware Requirements: Ensure that your home server has sufficient processing power, memory, and storage capacity to handle multiple simultaneous streams and store large amounts of media files.
- Network Bandwidth: A high-speed internet connection with adequate bandwidth is essential for smooth media streaming within your local network as well as remote access.
- Security Measures: Implement appropriate security measures such as strong passwords, firewall protection, and encryption protocols to safeguard your data on the home server.
- Backup Strategy: Establish a backup strategy for your media library by regularly creating backups of important files stored on the home server. This will protect your media collection from data loss due to hardware failure or other unforeseen circumstances.
By following these troubleshooting steps and considering the additional factors mentioned above, you can optimize your home server setup for media streaming and storage, ensuring a seamless and enjoyable media experience for yourself and others in your household.
Conclusion
Congrats, you’ve made it to the end! We’ve covered a lot of ground in this article, exploring everything from understanding home servers for media streaming to troubleshooting common issues. By now, you should have a good grasp on how to set up your own home server for media streaming and storage.
But don’t stop here! Take what you’ve learned and put it into action. Start by choosing the right hardware and software for your needs, then dive into configuring your network and optimizing performance. Don’t forget about security and organization either – they’re crucial for a seamless media streaming experience.
Remember, building a home server is a journey, not a one-time task. Stay curious, stay open-minded, and keep exploring new ways to enhance your setup. With your newfound knowledge and the right tools at your disposal, you’ll be well-equipped to create the ultimate media streaming and storage solution. Happy streaming!
Frequently Asked Questions
Can I use a home server for media streaming and storage?
Yes, a home server is an excellent solution for media streaming and storage. It allows you to centralize your media collection and access it from various devices in your home network.
What are the benefits of setting up a home server for media streaming?
Setting up a home server for media streaming provides several benefits. It allows you to have control over your media library, ensures privacy and security, enables easy sharing with family members, and eliminates the need for external streaming services.
What kind of hardware do I need for a home server setup?
To set up a home server for media streaming and storage, you will need a reliable computer or NAS (Network Attached Storage) device with sufficient processing power, RAM, and storage capacity. Ensure that your network infrastructure supports fast data transfer speeds.
Which operating system should I use for my home server?
There are multiple operating systems suitable for a home server setup. Popular choices include FreeNAS, OpenMediaVault, and Windows Home Server. Consider factors such as ease of use, compatibility with your hardware, and available features when selecting an operating system.
How can I stream media from my home server to different devices?
You can stream media from your home server to various devices by using compatible software or applications. Plex Media Server is one popular option that offers seamless streaming across different platforms like smart TVs, smartphones, tablets, and game consoles.