
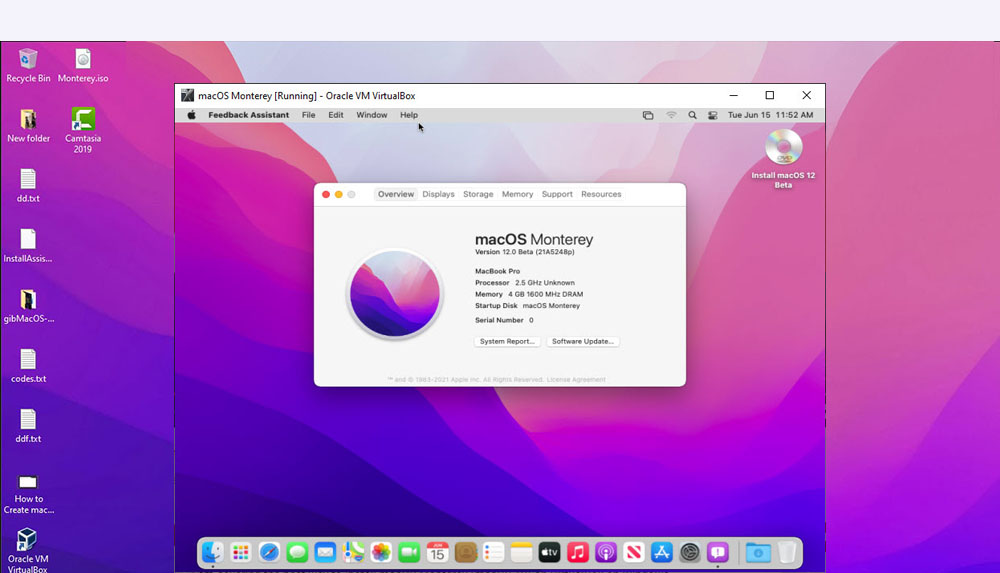
As like every year, Apple unveiled its new macOS called macOS Monterey this year in June at WWDC, and its DMG set to be released in the fall. macOS Monterey has some new features that will improve the Mac experience but as compare to macOS Big Sur this OS has smaller updates. This article helps you how to install macOS Monterey on VirtualBox on Windows – PC virtually.
What is Virtualization
Virtualization is indeed the process of creating a virtual rather than an actual copy of something and is so similar to the original. And desktop Virtualization allows you to run two or more OS (Operating Systems) using only one PC. So, it’s like two or more computers on one PC. One is physical and the others are virtual which acts like the original OS.
In Desktop Virtualization we can use multiple Operating Systems on a single computer including Windows, Linux, Mac, and more. In addition, it lets your Macintosh run Windows, creating a virtual PC environment for all your Windows applications.
There are many virtual machines software, but the best virtual machines software which we have used and have a good experience are VMware and VirtualBox. If you want to try macOS Monterey on your Windows or PC, follow the following steps:
How to Install macOS Monterey on VirtualBox on Windows – PC
Initially, make sure your system can support installing macOS Monterey virtually and is fully compatible and have the following specifications:
- 64-Bit Operating System (Windows) is required.
- 4 GB RAM at least.
- Minimum 30 GB free storage
If your system is consist of the above mention specification, you can begin installing macOS Monterey on VirtualBox on Windows – PC by following the steps below.
Step 1. Download Required Files:
- Download VirtualBox
- Download VM Virtualbox Extension Pack
- Download macOS Monterey
When you downloaded all required files, now you can move to the second step.
Step 2. Installing VirtualBox
VirtualBox is one the most famous tool for installing OS virtually on any system. It’s recommended to download and install the latest version of it from give link above. Then begin installation by following the simple steps below:
- Run the VirtualBox Setup
- Click Next on the Welcome page
- Click Next in the Custom Setup
- Select the way you want features to be installed and then click Next.
- Proceed with the installation by clicking Yes
- Click Install to begin the installation
Wonderful! in the next step you have to install VirtualBox Extension Pack to avoid freeing Errors.
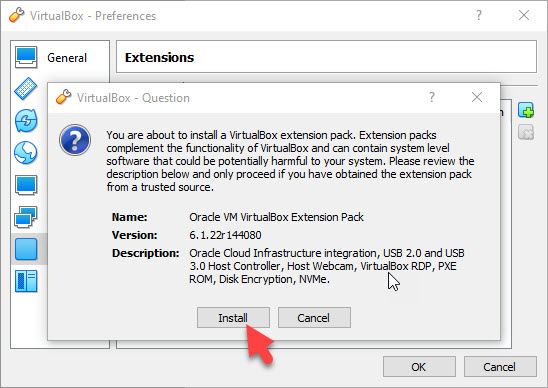
Step 3. Installing VirtualBox Extension Pack
By installing the VirtualBox Extension Pack you solve the problem with the mouse and keyboard and avoid their error. You must have already downloaded the file, and begin the installation by following the steps below.
- Open VirtualBox
- Click on Tools>Preferences
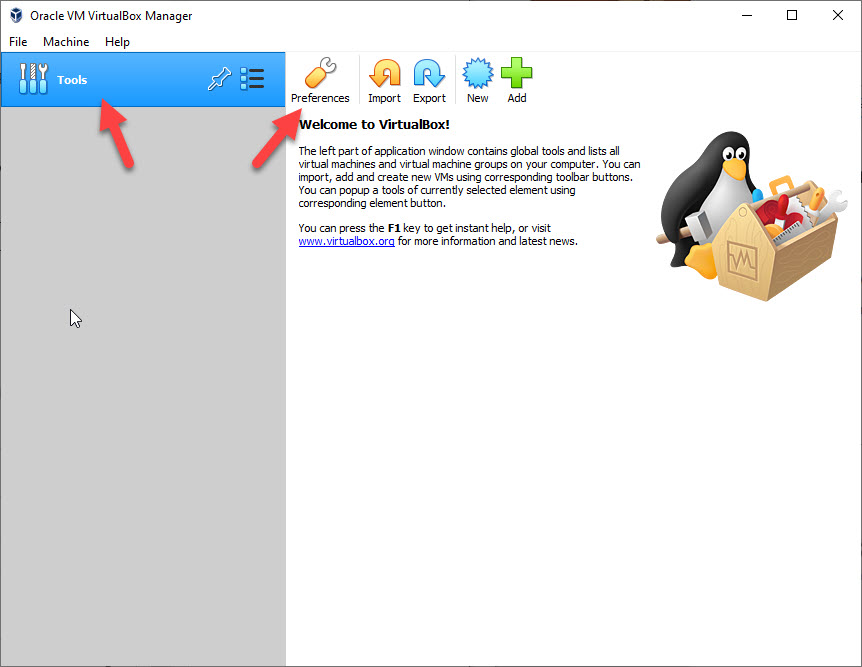
- Click on Extension and then click on the Plus icon
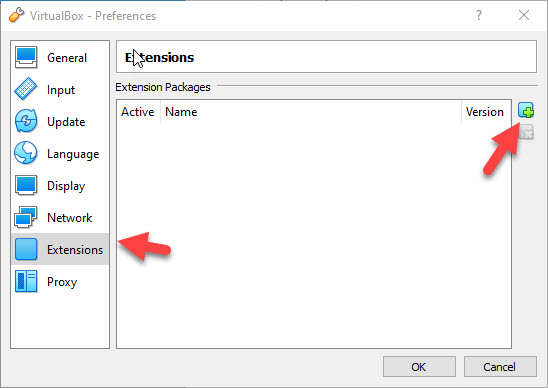
- Open Oracle_VM that you already downloaded
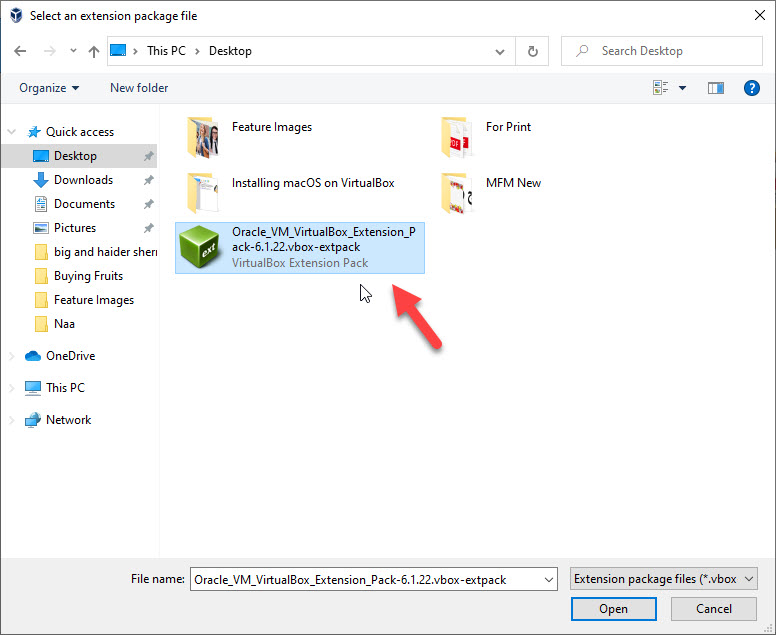
- Click install and Agree to the License
Step 4. Creating a New Virtual Machine on VirtualBox
In the next step, you need to create a new virtual machine on the VirtualBox in order to install macOS Monterey. Follow the following simple steps to create it.
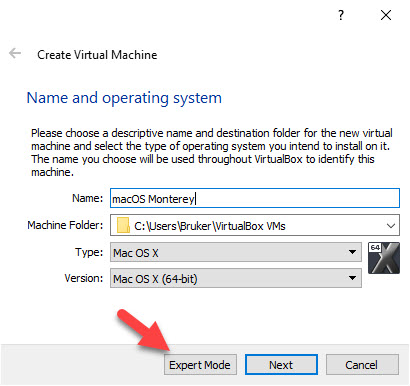
- Open VirtualBox and Click on the New icon
- Give a name to your machine and then click on Expert Mode
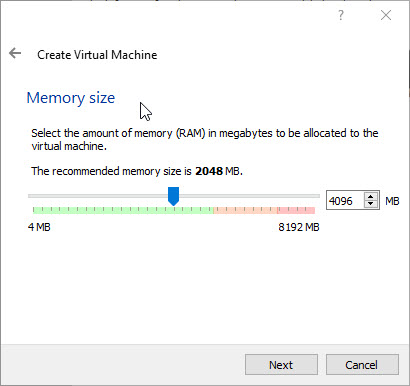
- Maximize the RAM size at least to 4 GB (4096 MB) for better performance and click Next
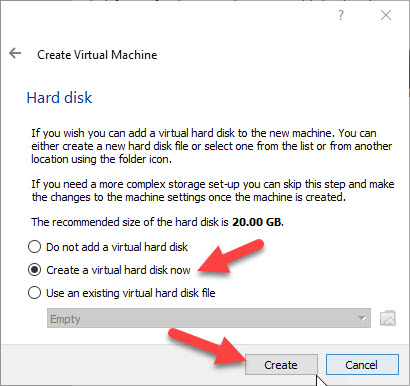
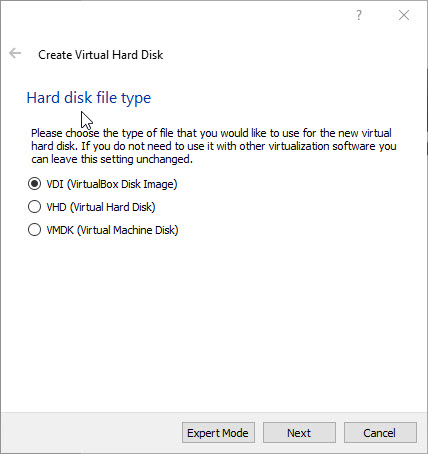
- Click on Create to create a new virtual hard disk now
- Select hard disk file type as VDI
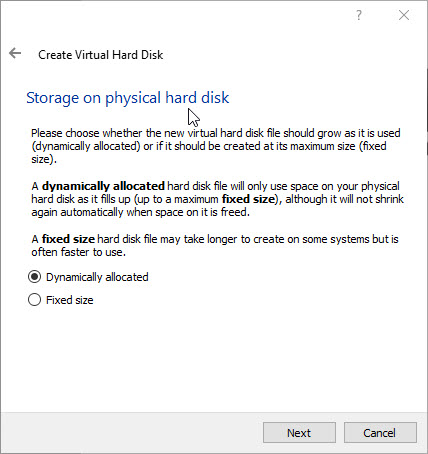
- Select Dynamically allocated and click Next
- Choose the File Location and maximize the size of the Hard Disk to 120 GB and finally click Create

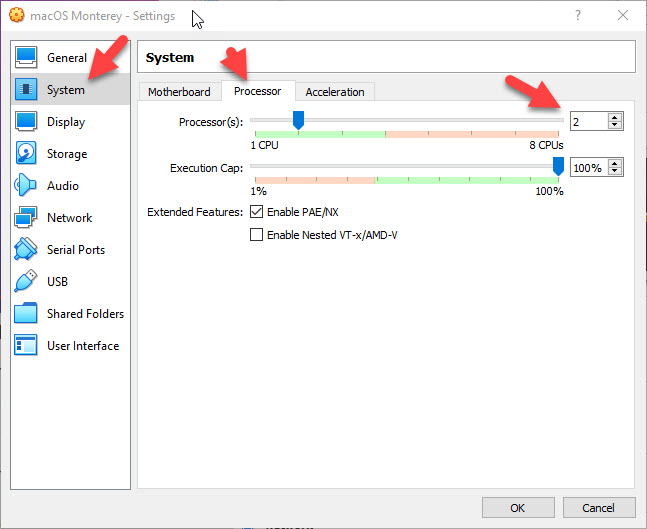
Step 5. Configuring the VM Settings
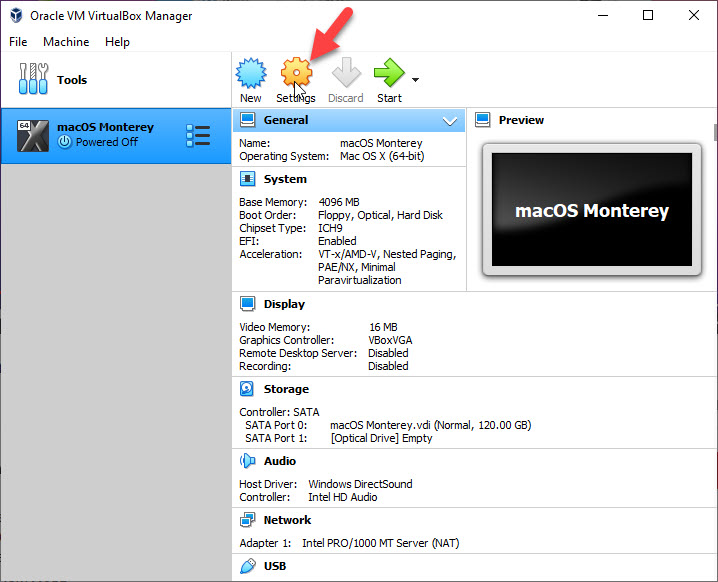
After creating a virtual machine the next step is to customize the setting of the created machine to make it ready for installation. The following customization is required.
- Go to settings
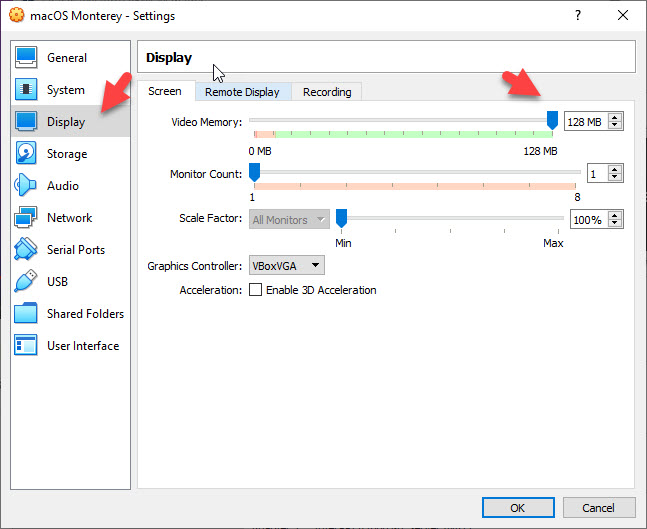
- Click Display and maximize it to 128 MB
- Click on system> Processor and make it 2
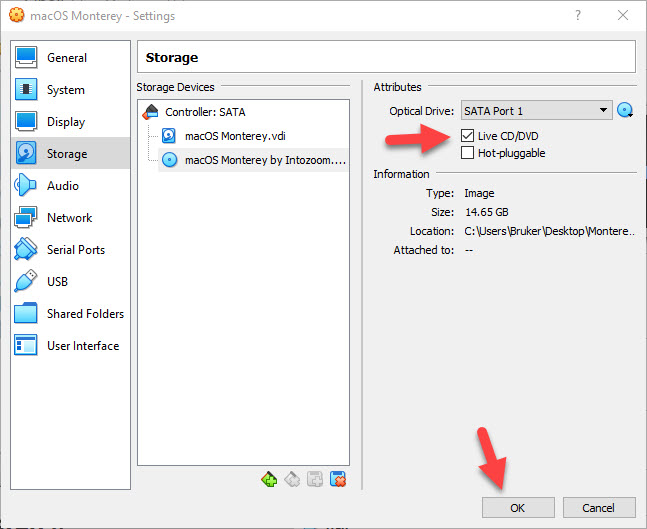
- Go to Storage> Empty> click on CD icon, choose a disk file and open it

- Tick live CD/DVD and click OK
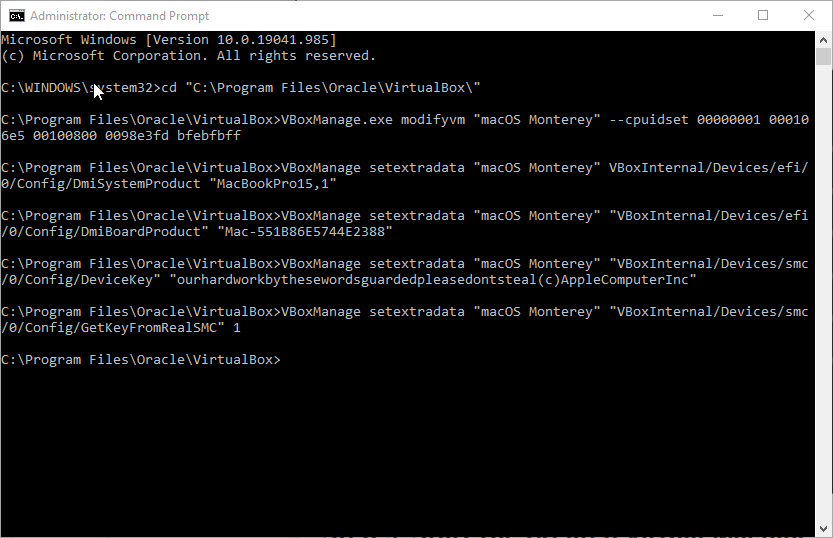
Step 6. Running VirtualBox Code Using Command Prompt
In this step, you need to run the VirtualBox Code to avoid errors such as -cpuidset and it also modifies the VM as an Apple product. Moreover, applying cod will enable many features of Mac on the VM.
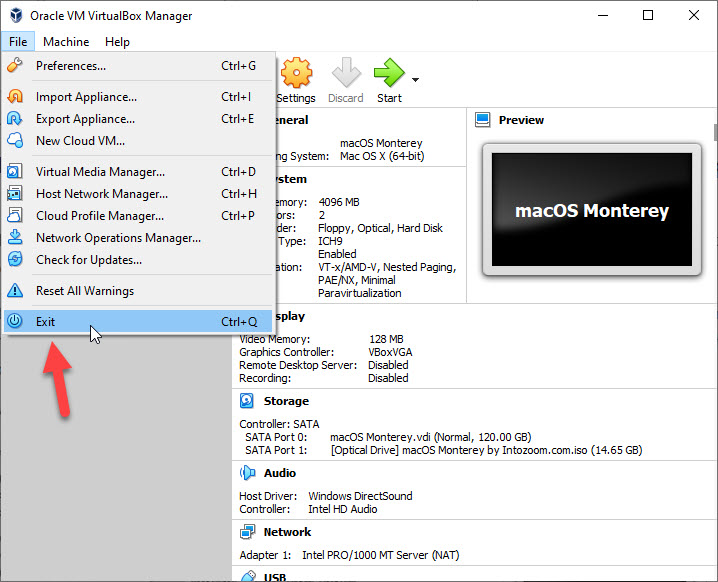
Important: Before running the code it’s significant to exit the VirtualBox completely. Click on the file in the top right corner then click Exit in order to exit the VirtualBox from the background of your system too.
After exiting the VirtualBox, open the VirtualBox Codes that you have downloaded from the above link and replace “VM Name” with the Virtual Machine Name you created already.
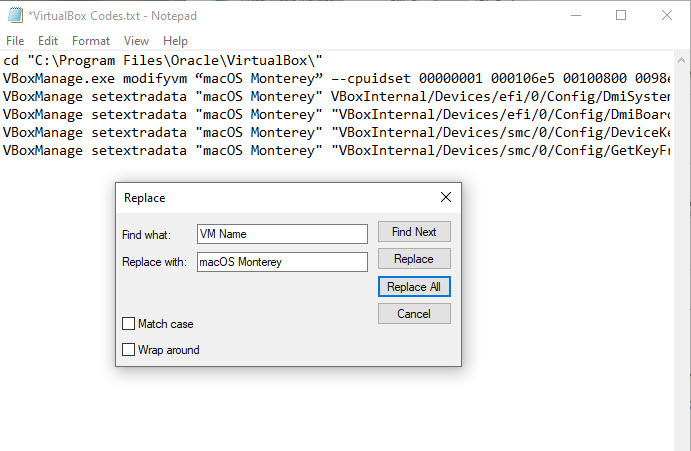
When you replaced the VM names with the created VM machine, now open the CMD and run it as administrator. Then you have to copy the code from the VirtualBox code and run it on the CMD line be a line. If you don’t see any errors in this step it means that you have successfully run the code.
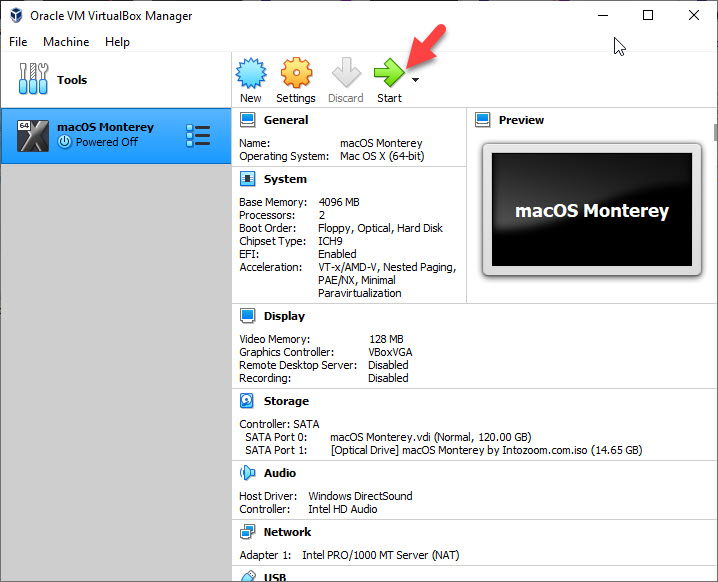
Step 7. Starting the Created Virtual Machine
Now the created virtual machine is ready to be started. In this step, you start the created virtual machine or macOS Monterey and begin the installation process by following the steps below.
- Open the VirtualBox and Power on the created machine.
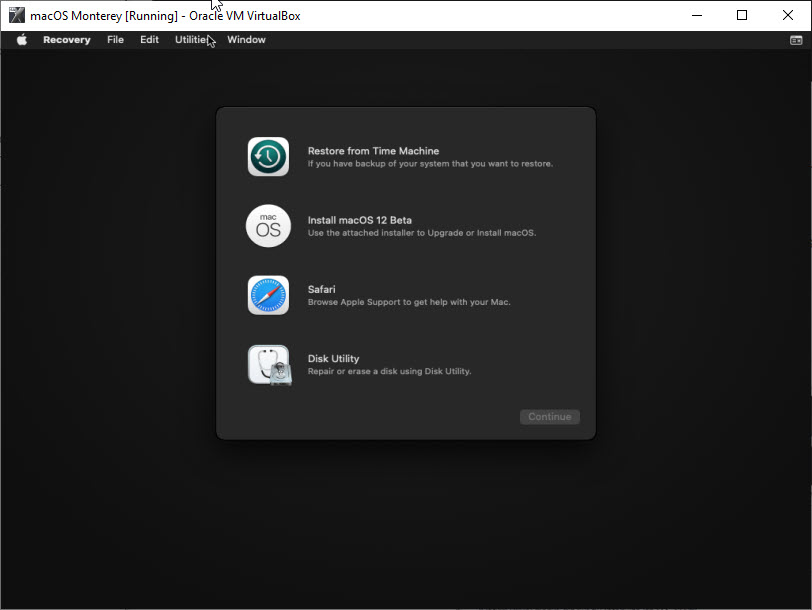
- Select your preferred language
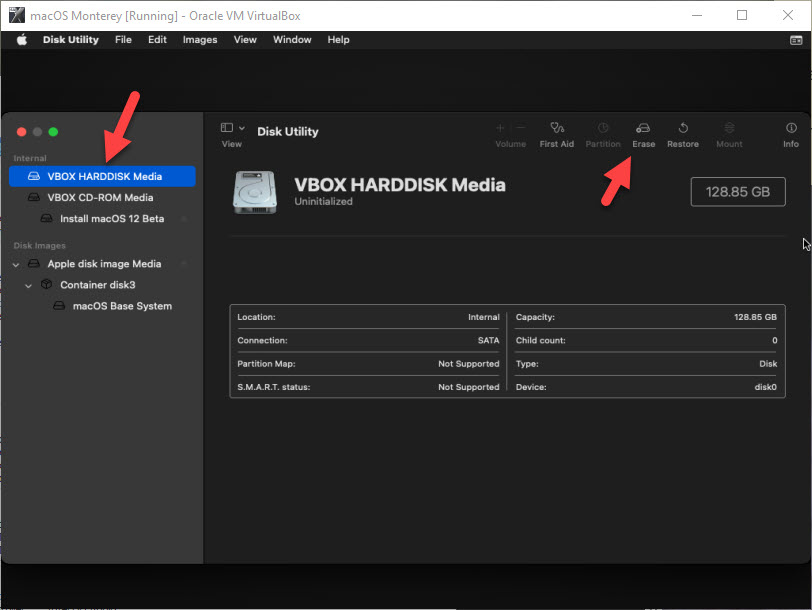
- Select Disk Utility and Continue
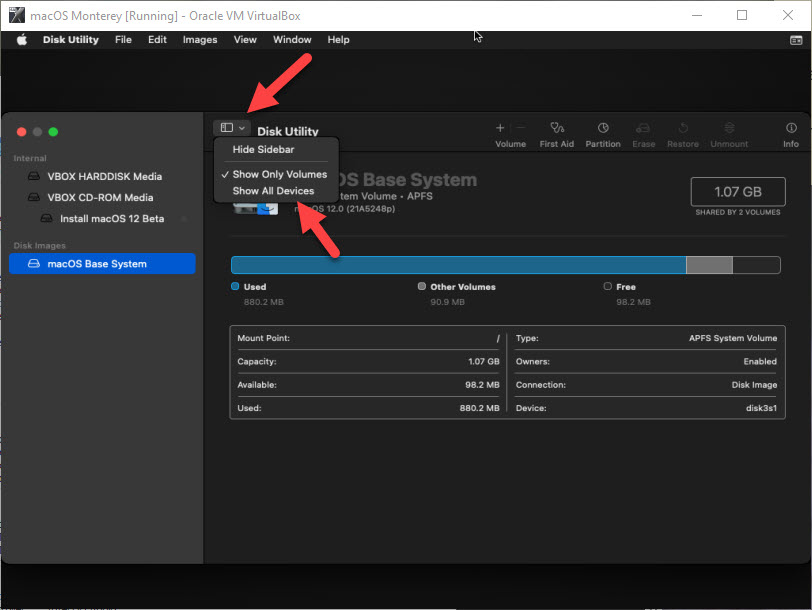
- Click View> All Devices
- Choose the Drive where you want to install the macOS on then Erase the disk by clicking on Erase
- Give a name to your Drive and change the format to APFS, make sure the scheme is on Guide Partition Map, and click Erase. After Erasing quit the Disk Utility page.
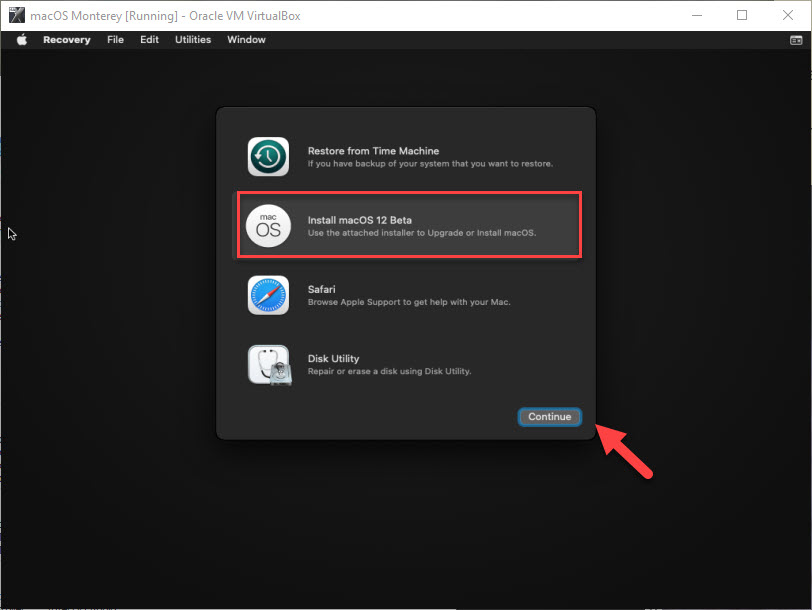
- In the next step choose Install macOS 12 Bet and click Continue.
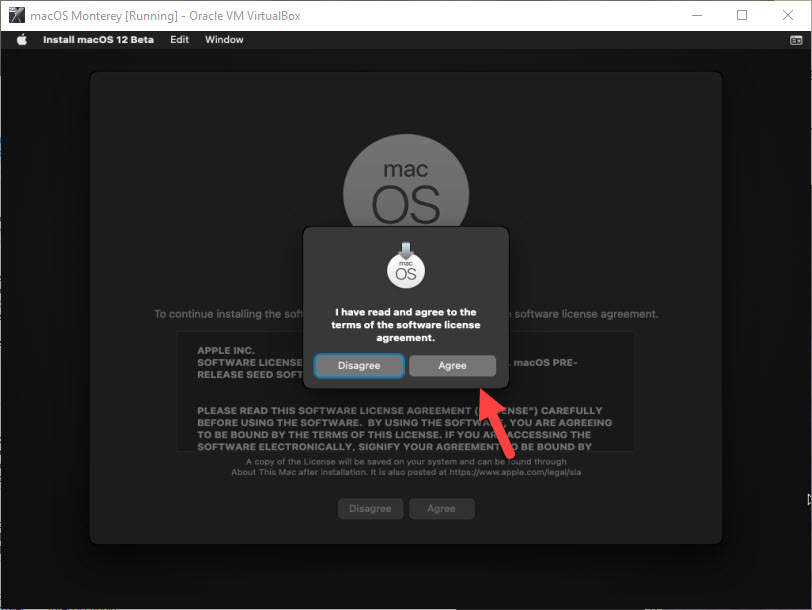
- Agree to the term and conditions.
- Select the Created drive and click Continue

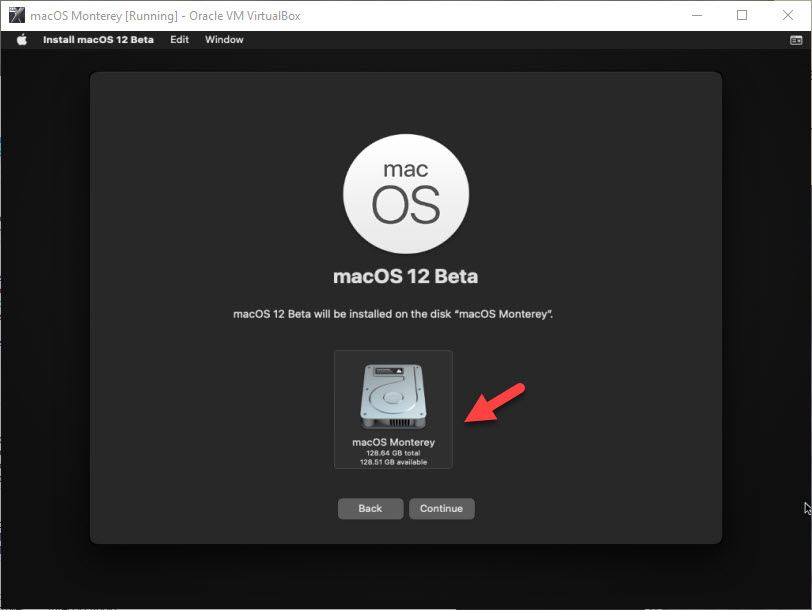
Some codes will be run automatically and this process will take more than 30 minutes depending on the performance of your PC. Wait for the process to be completed then move to the next step which is a clean installation of macOS Monterey.
Step 8. Performing Clean Installation of macOS Monterey
In the final step, you are going to perform the clean installation of macOS Monterey on Windows- PC. After the created VM is restarted follow the following steps for a clean installation.
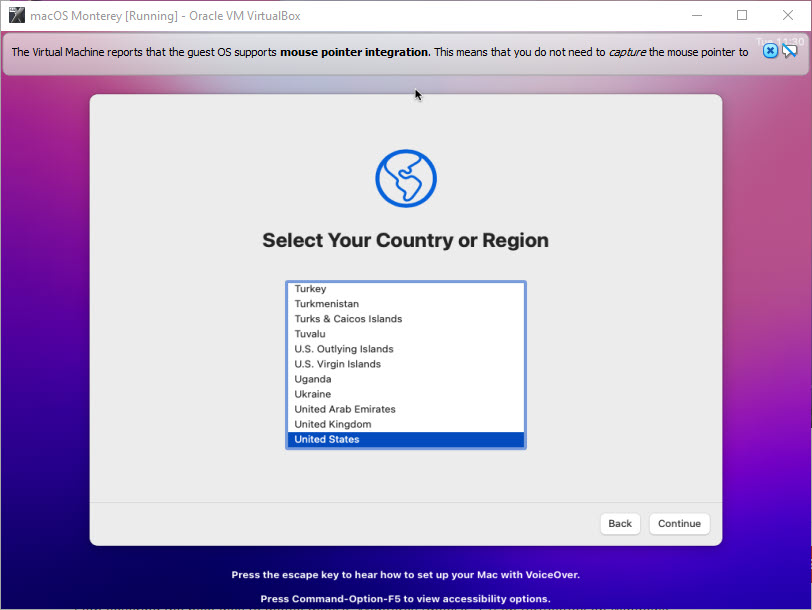
- Select your country and click Continue in the written and spoken languages.
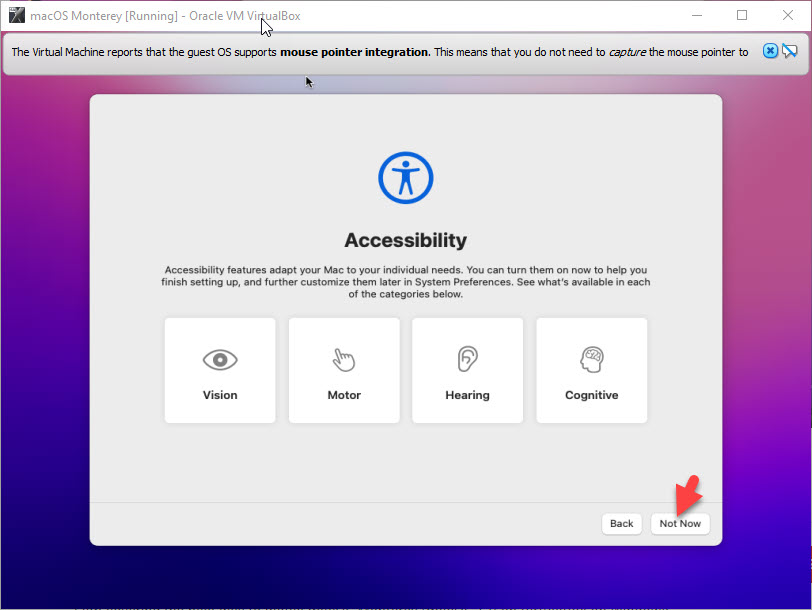
- In the Accessibility features click Not Now
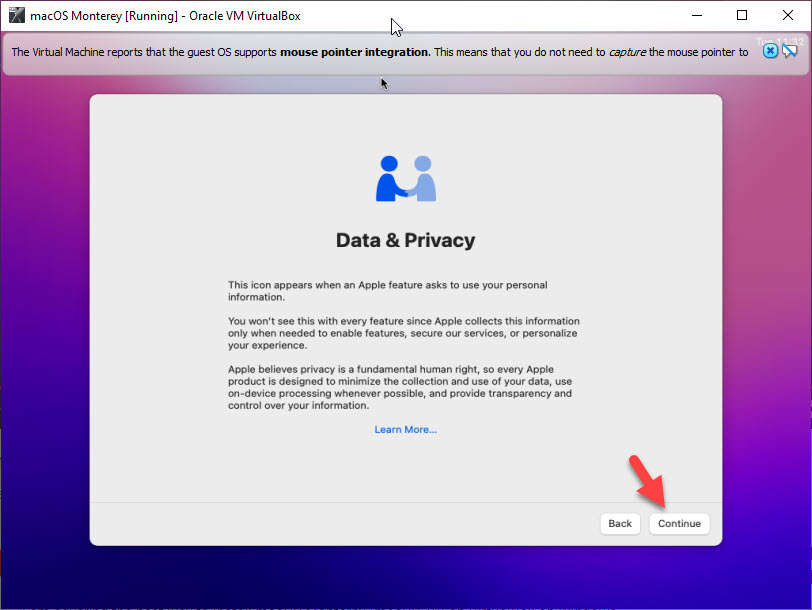
- Click Next in Data and Privacy when an Apple features ask for your personal information
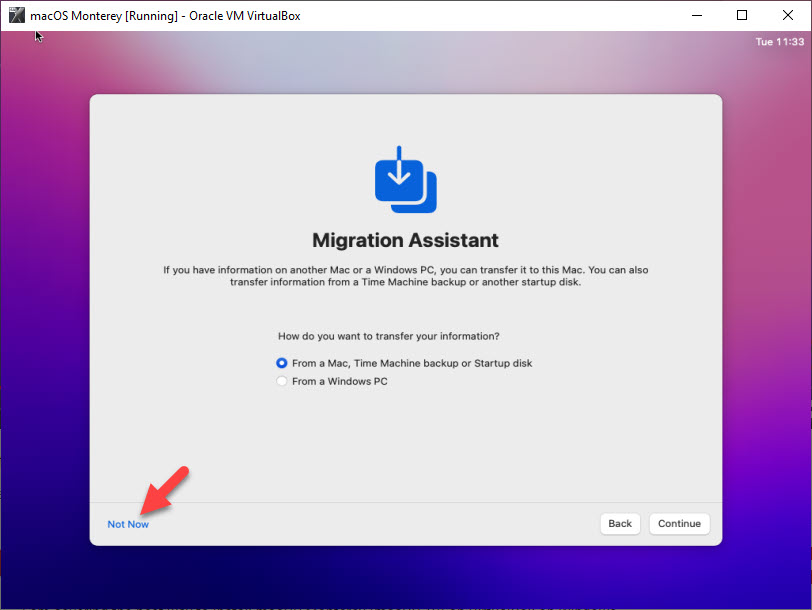
- Click Not Now in the Migration Assistant
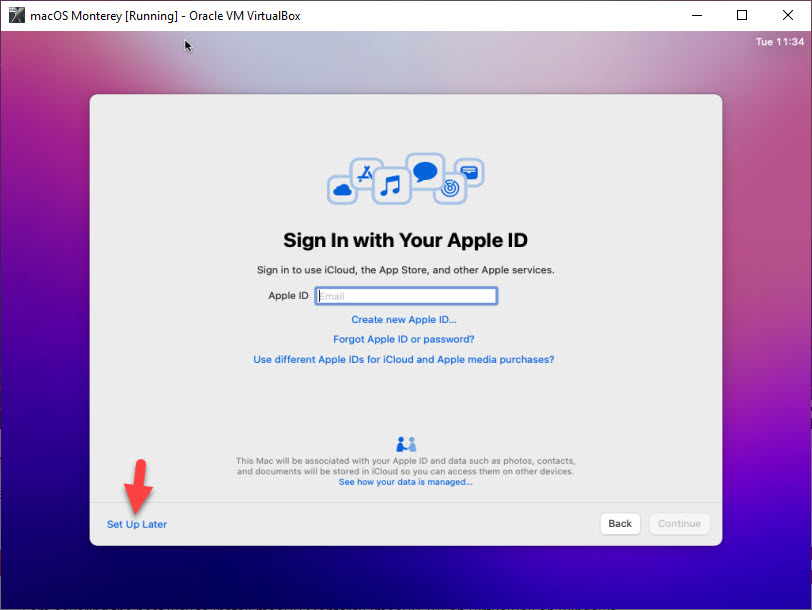
- Set up Later your Apple ID
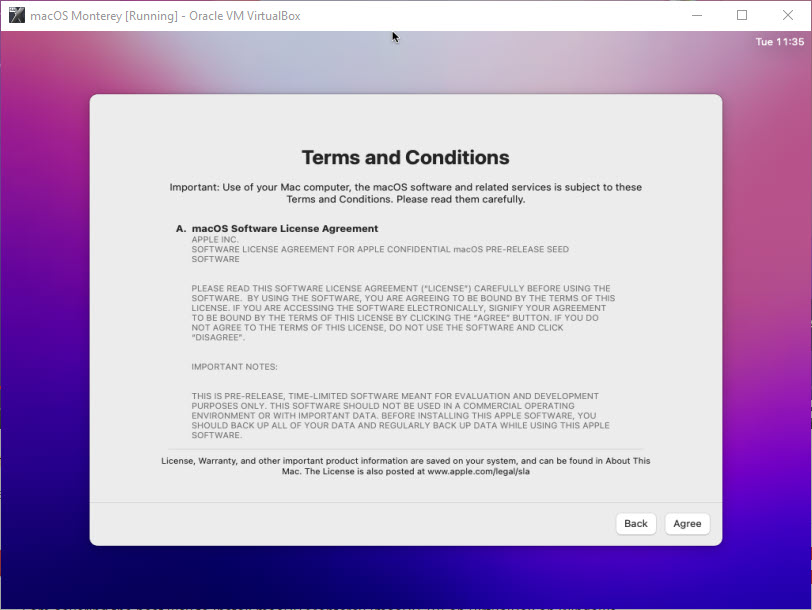
- Agree to the Term and Conditions
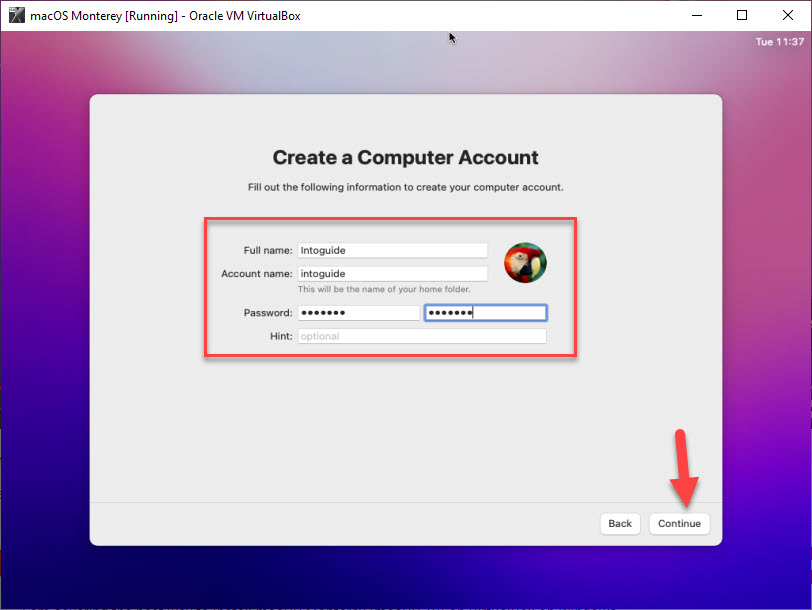
- Create a Computer Account by typing your name and password
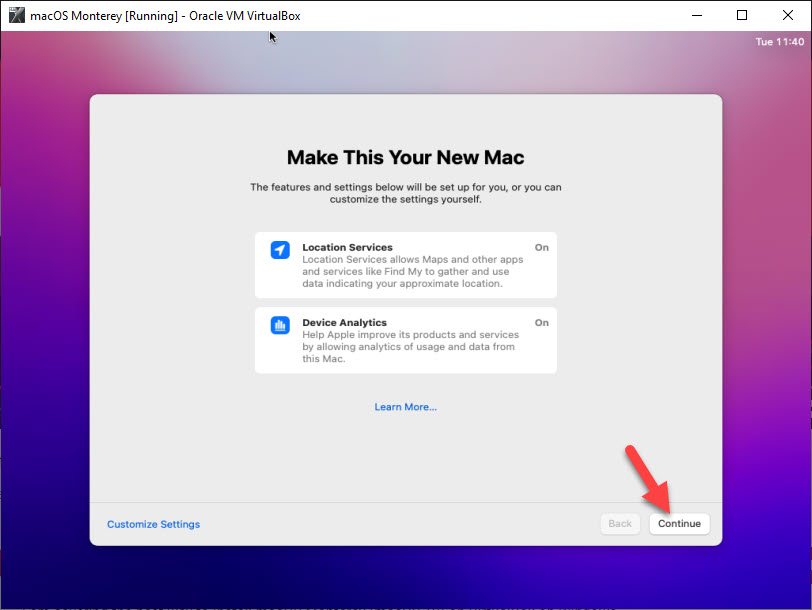
- Click Continue on the location services page
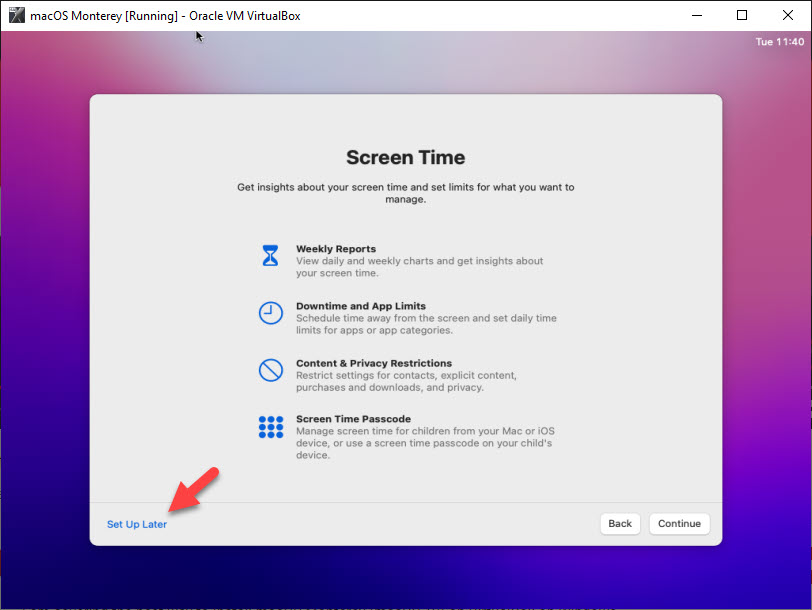
- Set up later the Screen Time
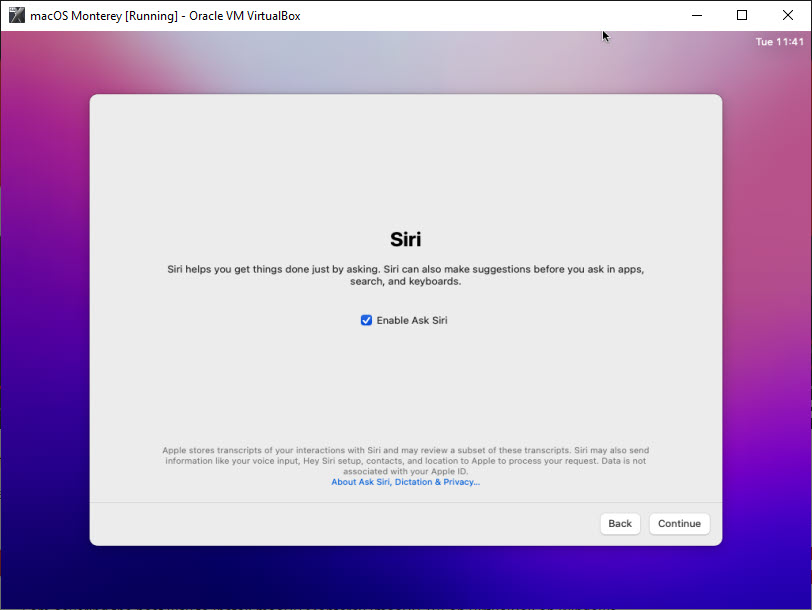
- You can tick to enable the Ask Siri feature
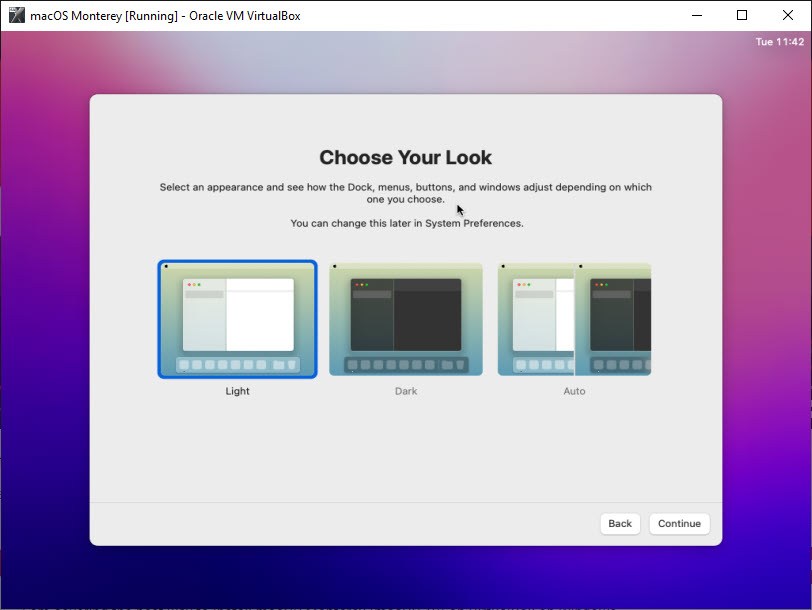
- Choose your look from the 3 given options
Congratulations you have successfully installed macOS Monterey on VirtualBox on Windows- PC. If you face any error or issue in the installation process, please let us know in the comment section below.
Take a Snapshot for Security
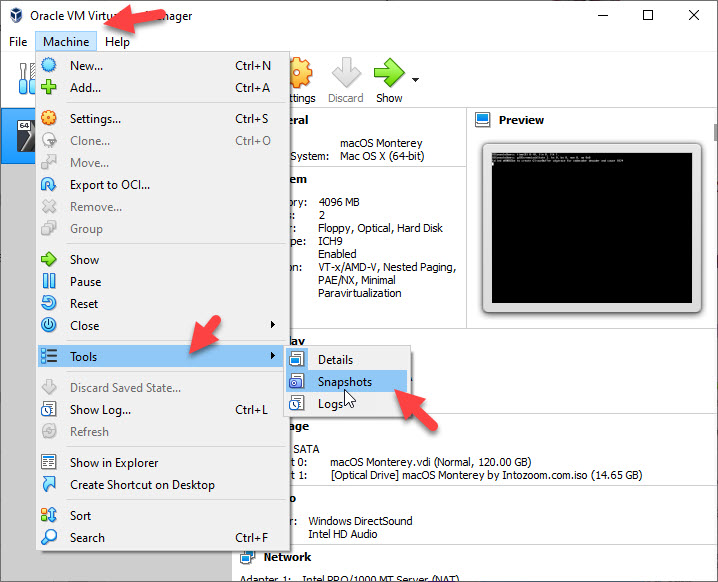
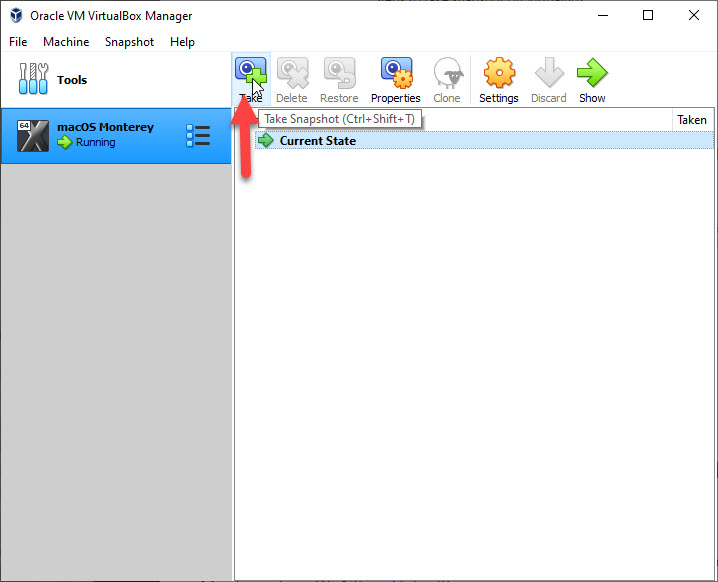
For the safety and security of the machine, you can take a snapshot after the installation is completed. In fact, the snapshot is a kind of safety and insurance, when something goes wrong with the machine you can restore it from the created snapshots. To take a snapshot simply go to the top menu of VirtualBox> Tools > and click Snapshots.
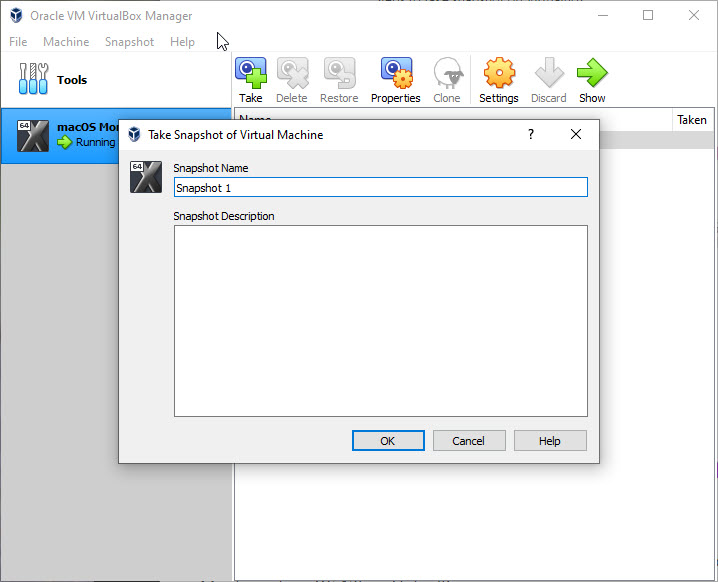
Click on Take to take a snapshot and give the snapshot a new and then click Ok. Your snapshot is not take, and whenever your face any error you can restore your machine from taken snapshots.
Summary
I hope you have installed macOS Monterey on VirtualBox on Windows from the step-by-step guide provided in this article. To summarize we have covered:
- Download Required Files
- Installing VirtualBox
- Installing VirtualBox Extension Pack
- Creating a New Virtual Machine on VirtualBox
- Configuring the VM settings
- Running VirtualBox Code Using Command Prompt
- Starting the Created Virtual Machine
- Performing Clean Installation of macOS Monterey
- Taking a Snapshot for Safety and Security
3 comments
It stuck in loop on installing. Just install again and again and never ends why ?
Thanks
How do I know I finished correctly step 7?
How to start step 8?
Hi,
After you are done with step No.7 wait for the system, it will restart automatically then proceed to Step No.8.