The latest version of the Mac operating system macOS 10.4 Mojave is having a good functional, user interface and other features like continuity camera, dark mode, desktop stacks, dynamic desktops, screenshot markup, and other advanced features. You might be happy with the default options on macOS Mojave, but customizing your Mac and using some advanced features will make awesome your workflow. In this guide, you will discover how to customize macOS Mojave to Advanced Features.
How to Customize macOS Mojave to Advanced Features
I have tried all the following steps on VMware if you are trying it on your Mac, make sure to save and close any open files and run a full-time machine backup before proceeding. This will allow you to restore You Mac’s default setting in future if you wish.
Also Read: Install MacOS Mojave 10.14 On VMware Workstation On Windows
1. Change Your Desktop Background
The very first changes you would like to do on your Mac could be switching to the different Desktop background. You can choose your desired images from your library or switch to the default wallpapers offered by Apple.
To change your desktop background, right click on your desktop and choose “change desktop background”
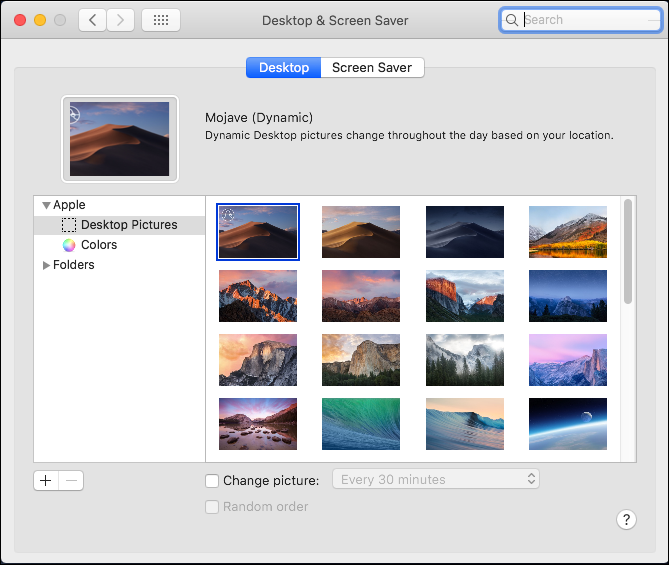
macOS Mojave by default has many pictures you can choose your favorite picture for your Desktop Background. In addition, you can browse your desired image from your library by clicking on the Folder option.
2. Tweak the Dock
You can configure your Dock by going to the System Preferences > Dock.
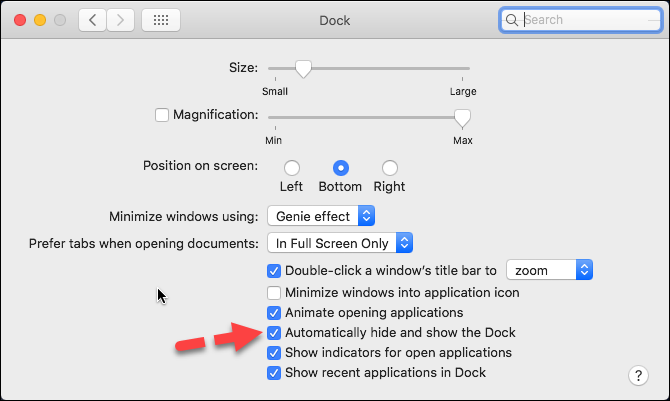
From here you can change the Size of the Dock, Position of the Dock, moreover, you can configure your dock to disappear just by checking the “Automatically hide and show the Dock“. This will hide the dock when it’s not in use.
You can also rearrange the order of items in the Dock by clicking and dragging the program icon left or right. You can also use this to remove the default macOS icons such as Safari, as well as to always display icons for your favorite programs like Mozilla Firefox.
3. Customize the Finder
You can also configure the Finder to show your favorite folders. To get started, click Finder > Preferences then tick the checkbox next to any folder you want automatically appear in the Pane.
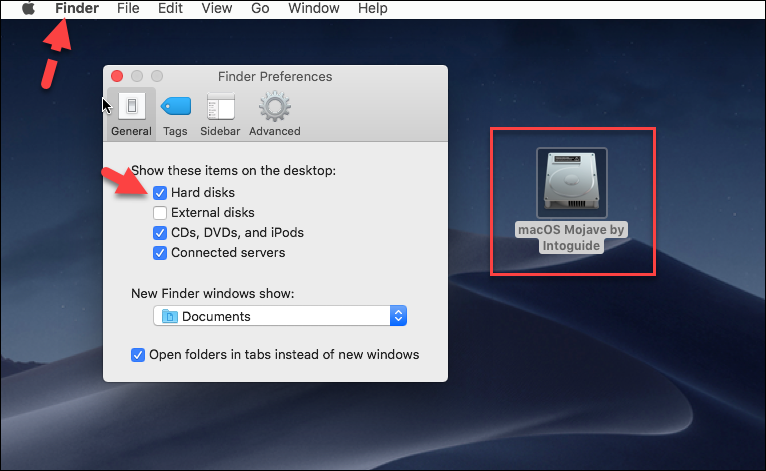
If you have a special folder you access regularly, you can also drag it into the left-hand pane, and Finder will create a shortcut you can click to access later.
4. Customize Display on macOS Mojave
If you want to have a more straightforward layout to the macOS desktop, you can enable “High Contrast” mode. This feature is useful for people who are partially sighted and this feature will make your desktop easier to see and arguably easier to the eyes.
To enable this feature go to System Preferences> Accessibility and click on ‘Display’ and increase ‘Display contrast’ as you see fit.
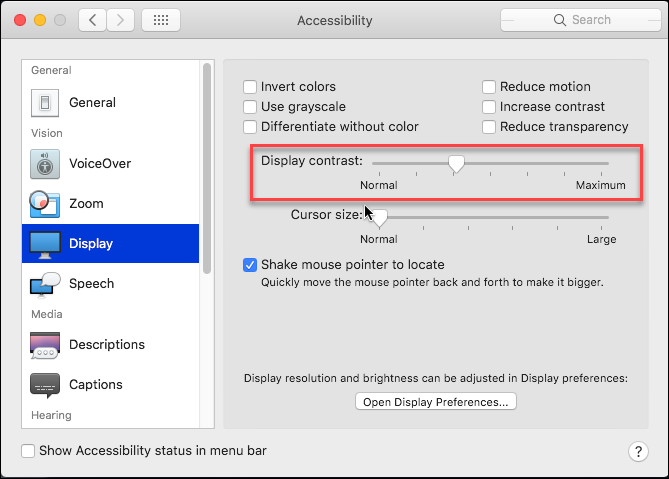
In addition, you can check other boxes such as “use grayscale”, “Reduce motion” or other effects. Also, you can enlarge or decrease the size Cursor.
5. Changing Screensaver on macOS Mojave
To change the screensaver in macOS Mojave, go to System Preferences> Desktop and Screen Saver. Click on Screen Saver, from the present screen saver, you can choose your favorite one.
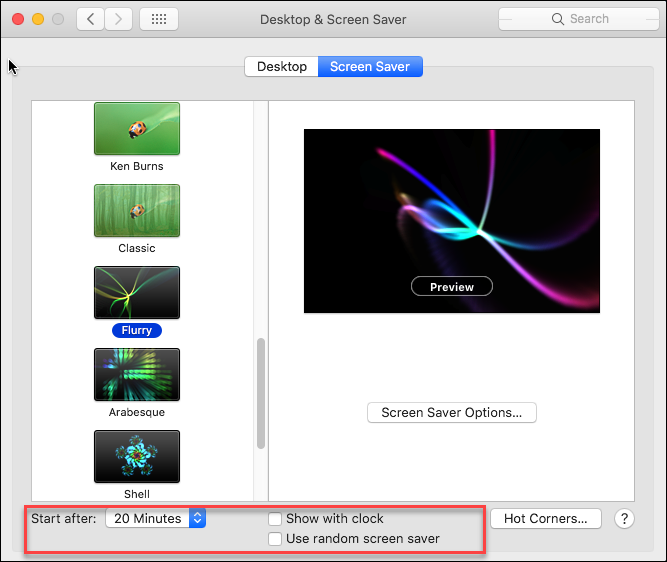
If you tick ‘Use random screen saver’ then the system will choose a different screensaver each time. By default, Mojave will power off your screen after 20 minutes, but you can choose your desired time by clicking on the start after option and selecting your desired time when to power off the screen.
6. Enable the Dashboard
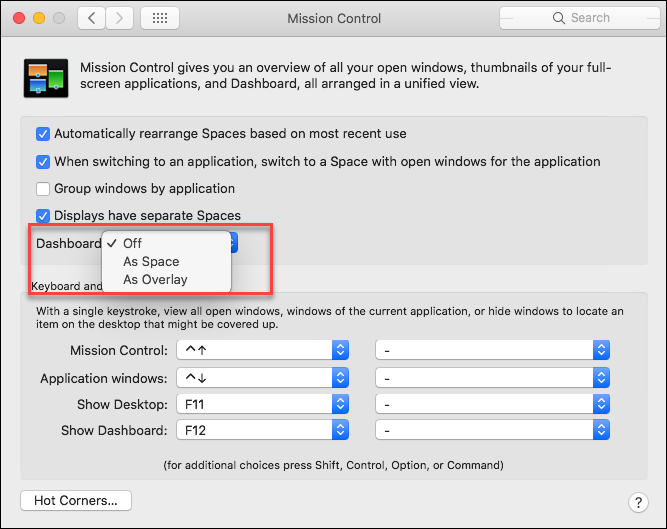
The dashboard is disabled by default in macOS Mojave, by activating this feature you can collate essential info like weather, stock prices, and stickies. To start using Dashboard, go to System Preferences> Mission Control> ‘Dashboard’ and then click on the drop-down menu and choose ‘As Overlay’ or ‘As Space’
7. Enable ‘Hey, Siri’
You can enable “Hey Siri” on your Mac as just like on an iPhone, you could simply say “Hey, Siri” and give your instructions or message. To enable it, follow the steps below.
- Go to System Preferences
- Click Accessibility > Dictation
- Check the “Enable the dictation keyword phrase” option
- In the field directly below the option, replace any of the current text with “Hey.”
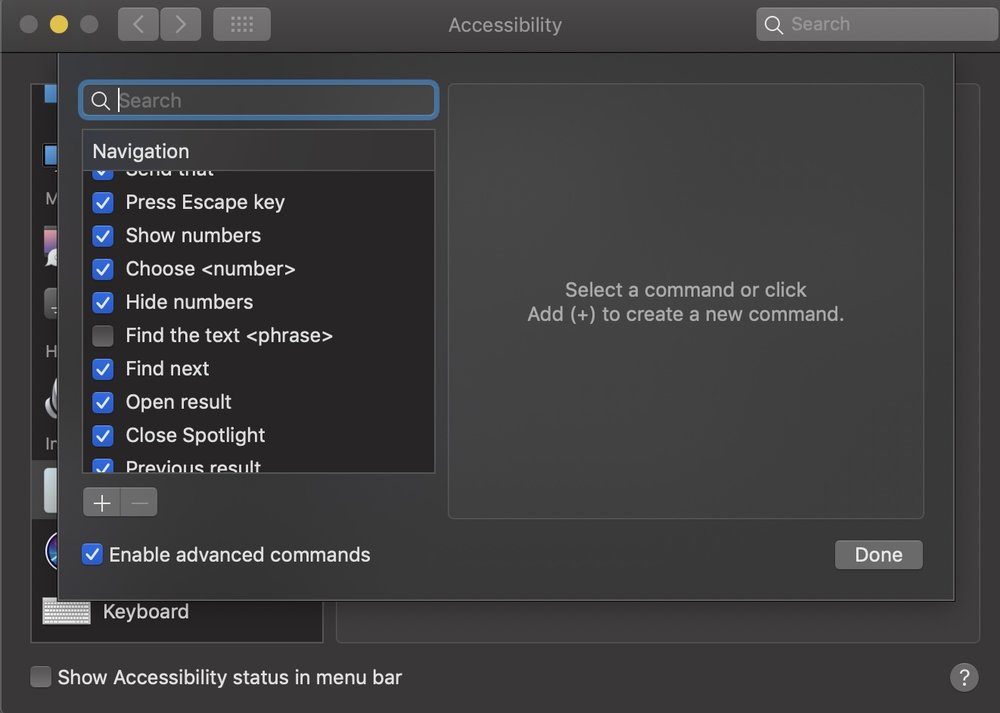
- Select Dictation Commands.
- Check the “Enable advanced commands.”
- Click the “+” button to add a new command
- Change everything to match the following details: When I say: Siri; While using: Any Application; Perform: Open “Siri.app”.
- Under the Perform option, select Open Finder Items… and select to open Siri found inside your Applications folder
- Select Done
- Check off Enable the dictation keyword phrase in the Dictation preference pane
- Insert “Hey” into the field directly below this box.
8. Using Stacks
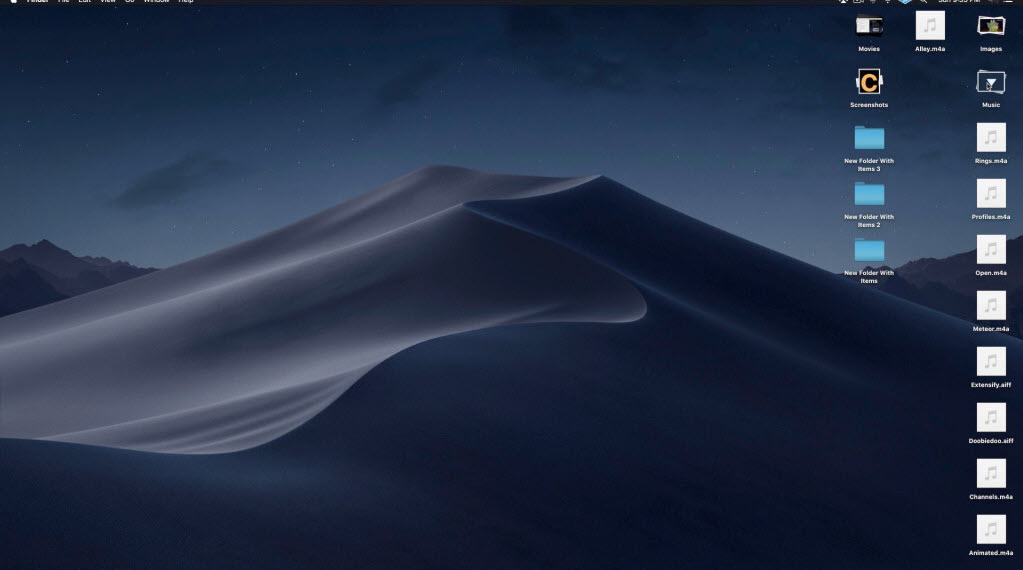
Stacks might be one of the handy features in macOS Mojave. Once you have enabled desktop stacks, you can access the contents of each stack by clicking once on its icon. All the files it contains will be displayed below (wrapping to the next column if necessary) and other desktop items will be temporarily pushed to the left to make the room as needed. Clicking a stack again closes it and returns all icons to their original positions.
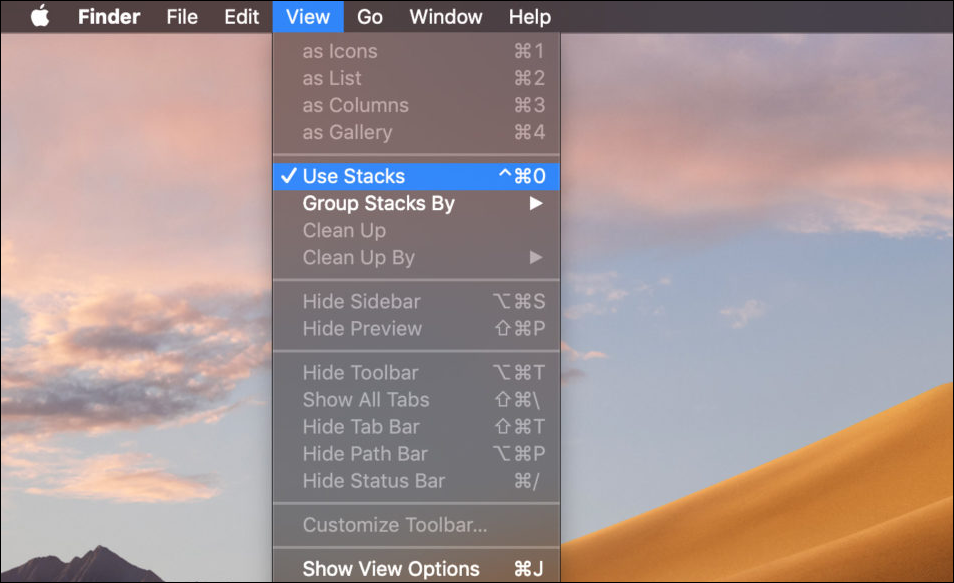
You can enable this feature from your desktop by clicking View> Use Stacks from the menu bar at the top of the screen.
9. Using Continuity Camera
This is a new feature in macOS Mojave which lets you take a photo on your iPhone or iPad and have it appear instantly on your Mac. If you are working on your Mac and need to add a photo, continuity camera can automatically fire up the camera on your iOS device.
Continuity Camera works in several native Mac apps, including pages, keynote, and TextEdit. To use this feature keep in mind that you need to log in with the same Apple ID on Both your iOS device.
For instance, I am using continuity camera in TextEdit or Pages
- Right-click or (Control+click) within the open document
- Choose “Insert from iPhone or iPad” and then select ‘Take Photo’ or ‘Scan Documents’
- Now Select the iOS device you want to use as the camera
- Now picking up the iPhone or iPad, use the camera as usual and snap a photo or point it at a document
- Wait a moment and then the photo or scan will appear instantly from your iPhone or iPad within the document on the Mac.
10. Add Emoji in Mail app
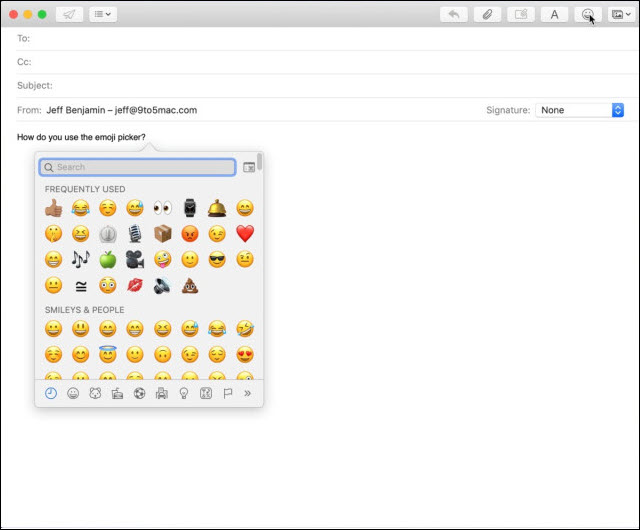
The Mail app in macOS Mojave will help you infuse your emails with real emotions. You can easily invoke the Emoji picker in macOS by pressing Control+Command+Space, but macOS Mojave provides a handy emoji shortcut button directly within the Mail app interface.
Related:
What other new features can be customized in macOS 10.14 Mojave? Leave your comments and thoughts using the comment section below.

1 comment