
Mojave is the latest update to the Mac operating system. It arrived on 24 September 2018 as a free update. Apple included two unique features that essentially turn down the lights. One such feature is Dark Mode, and the other feature is the Dynamic Desktop which will cause your desktop image to change to match the time of the day. Some other good features like Continuity Camera, Desktop, Finder Tweaks, Better Screenshots iOS Apps, and Safari Steps Up Its privacy, Adds Icons. Hence, it worths installing and checking it once and you can try it on virtual machines like VMware, VirtualBox, and Hyper-V. Follow the step by step guide below on how to install macOS Mojave 10.14.1 Final on VMware on Windows, but initially, I am going to tell you what is a virtual machine.
What is a virtual machine?
A virtual machine is a computer file, typically called an image, which doesn’t appear physically and behaves like an actual computer. In other words, creating a computer within a computer. It runs in a window, much like any other program, giving the end user the same experience on a virtual machine as they would have on the host operating system itself.
System requirements to install macOS Mojave 10.14.1 on VMware on Windows
Before you start Mac OS Mojave 10.14.1 VMWare Image free download, make sure your PC meets minimum system requirements.
- Operating System: Windows 10,8 or 8.1
- Memory (RAM): 2 GB of RAM required.
- Hard Disk Space: 13 GB of free space required.
- Processor: Intel Dual Core processor or later.
How to Install macOS Mojave 10.14.1 Final on VMware on Windows
Step 1. Extract the downloaded macOS Mojave 10.14.1 image
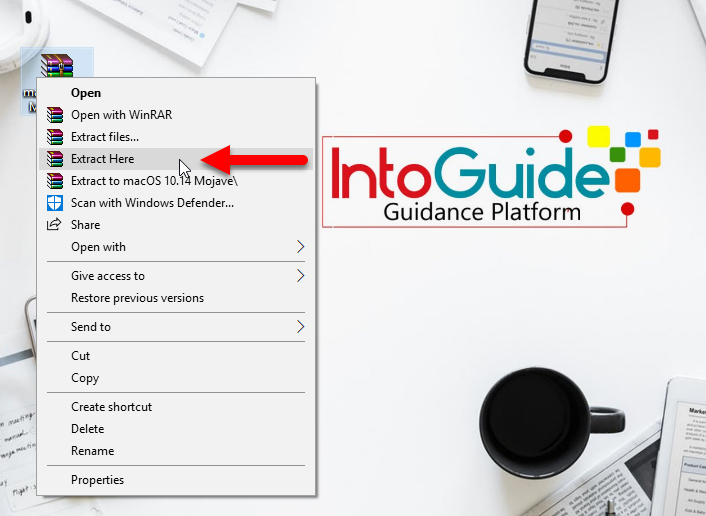
The image of macOS Mojave is compressed, you need to extract it by WinRAR or 7Zip as I mentioned above. Initially download WinRAR or 7Zip from the given links above and extract the image.
To extract the image, right click on the zipped folder and select Extract Here.
Step 2. Install the VMware Workstation Player
VMware Workstation Player is free if you are using it for non-commercial usage like Install macOS Movaje 10.14 on VMware on Windows. In other words, it is free virtualization software which you can use it for free.
To enable Apple Services for VMware, download and Install the unblocker tools or unblocker master. If you don’t know how to install the Unblocker master, extract that after downloading. Find their win-install.cmd inside the Unblocker Master directory, then right click and select Run as Administrator.

Step 3. Create a virtual machine on VMware workstation player
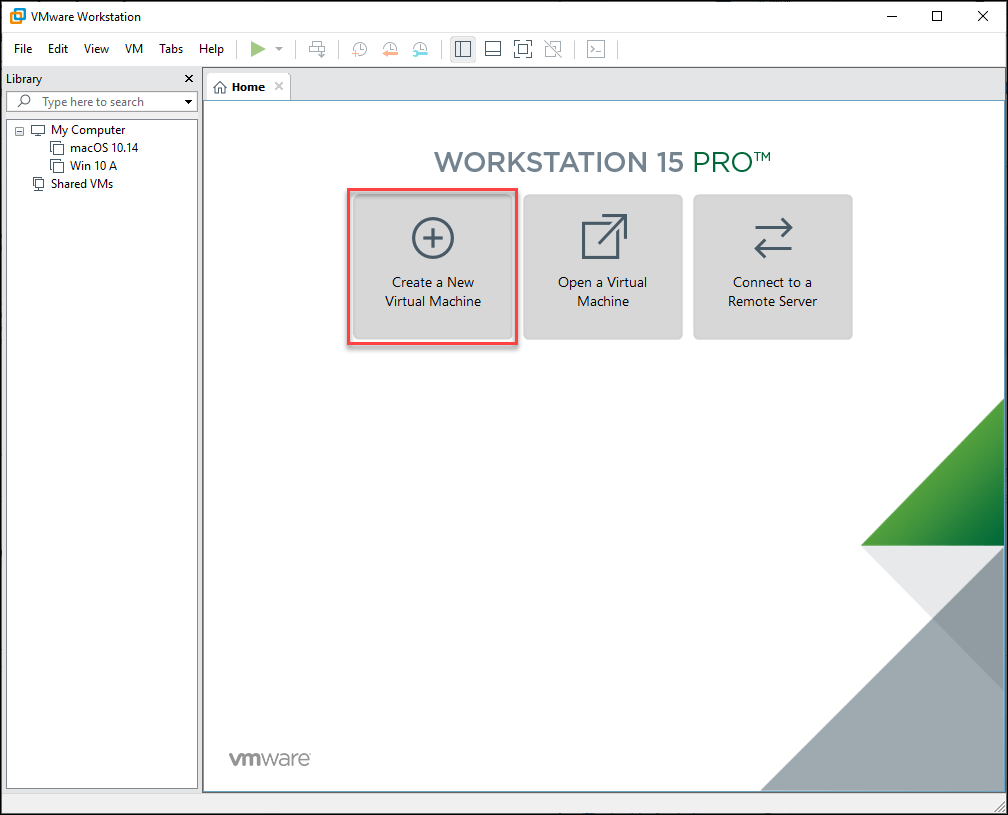
Now we need to create a virtual machine to install macOS Mojave and to create a new virtual machine on VMware follow the steps below.
A. Open VMware and click on Create a New Virtual Machine.
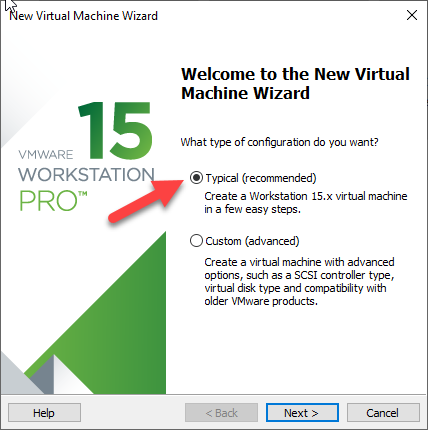
B. Select Typical (recommended) and click Next.
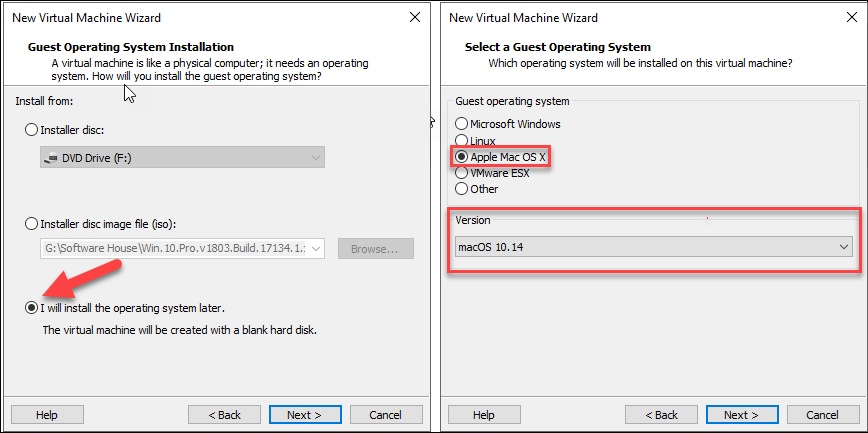
C. Select I will install the operating system later.
D. Select the Guest operating System as Apple Mac OS X and select the version (macOS 10.14).
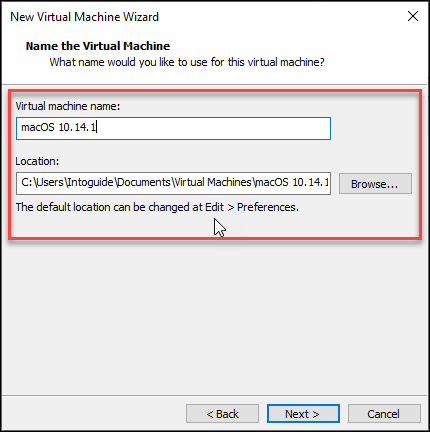
Step 4. Name the Virtual Machine and select the location where you want to save your image of macOS.
Step 5. Specify and Edit the disk capacity, memory and Hard Disk
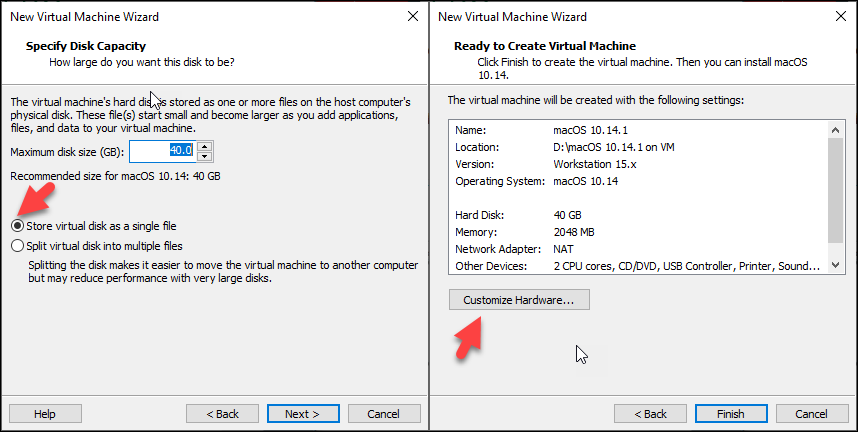
Disk Capacity: Maximum disk size (GB): 40 or more and mark store virtual disk as a single file also click Customize Hardware to customize memory, processor and Hard Disk.
RAM: Maximize the memory for this virtual machine to 4GB.
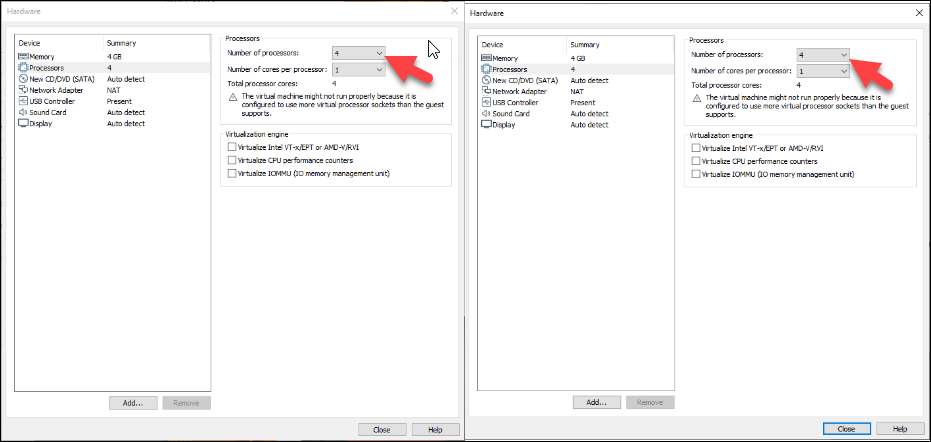
Processor: Increase the number of the processor from 2 to 4 processor.
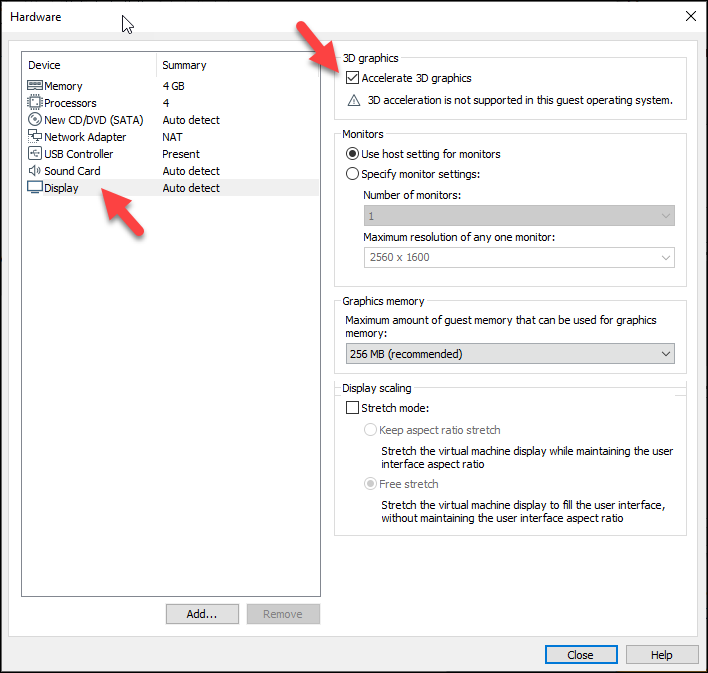
3D Graphics: Eventually, go to display tab and enable the accelerate the 3D graphics.
After customizing the Hardware, click Finish and the virtual machine will be created.
Step 6: Create a new Hard Disk and add macOS Mojave 10.14.1 VMDK file to the virtual machine.
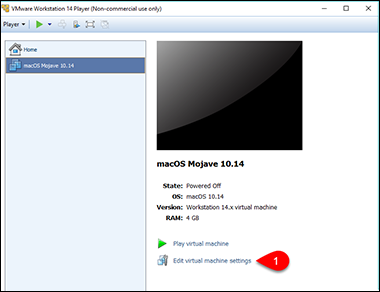
To create a new Hard Disk, click edit virtual machine settings.
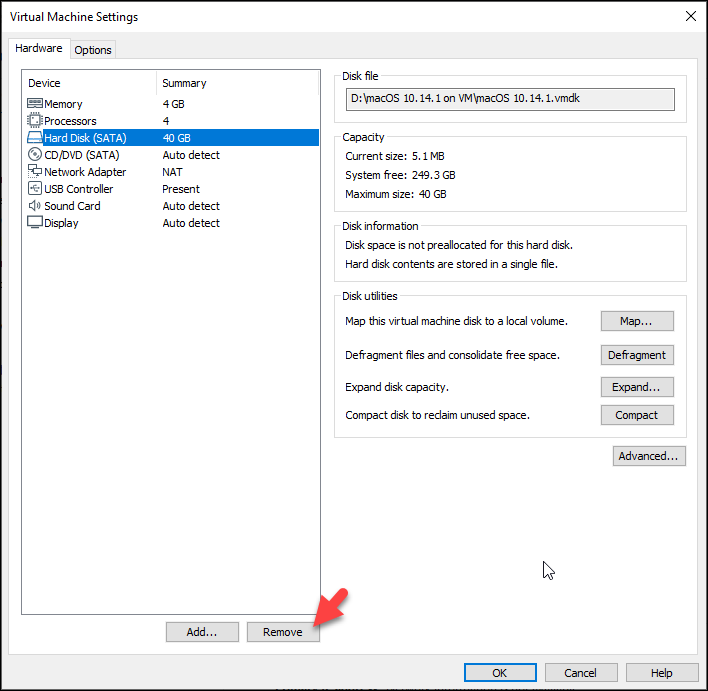
Hard Disk: From the list, device choose “Hard Disk” and click remove button, it will remove the hard disk that you have created when creating the virtual machine.
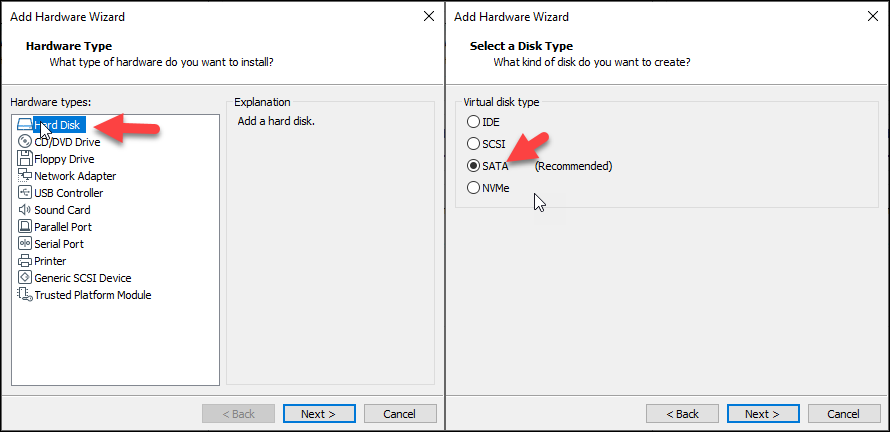
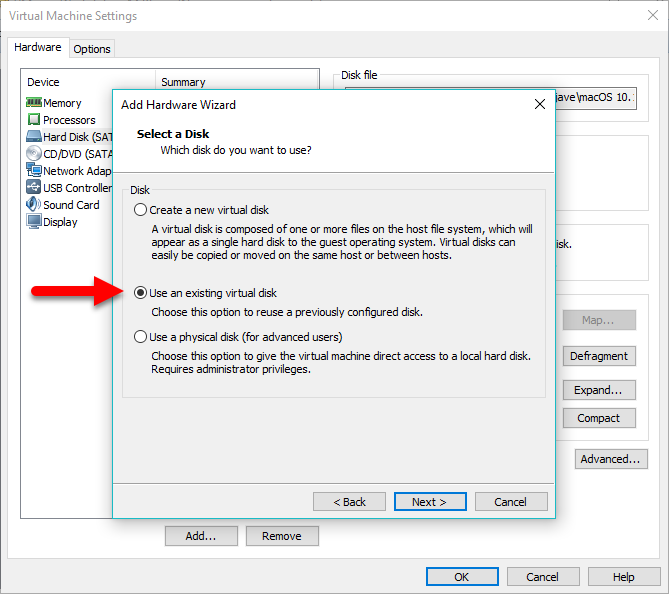
Add a New Hard Disk/ macOS Mojave VMDK File: To make a new disk or adding macOS Mojave VMDK file for your virtual machine choose Hard Disk from the device list, click Add then choose “SATA” and click Next.
Select a Disk: Use an existing virtual disk
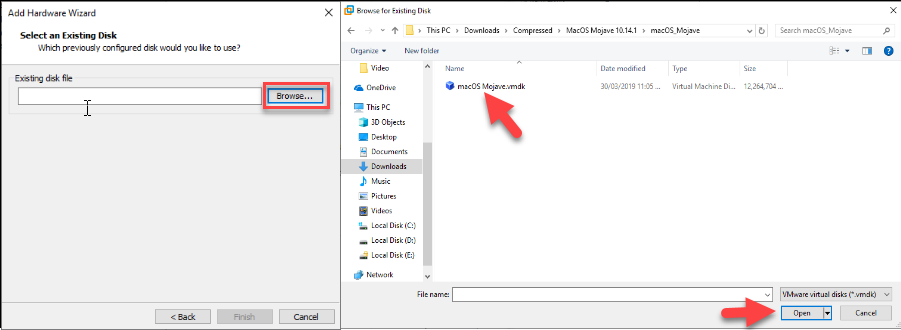
Verify macOS Mojave VMDK File: To add VMDK file, Browse and find the location of VMDK which you had extracted already from zipped file, find it from your PC and Open it and finally click Finish.
Step 7: Editing the VMX FIle
The VMX file is the configuration of the VMware Virtual Machine and it needs to be edited in order to make it compatible with windows. To edit it follow the following steps.
- Go to the virtual machine directory where you saved the image of the created virtual machine. Right click on VMX file and open with Notepad.

- Scroll down to the end of VMX. Copy and Paste this code:
smc.version = “0” save the changes by clicking the combination of “Ctrl+S“.
Step 8: Start macOS Mojave on VMware
When you power on the created machine, macOS Mojave 10.14.1 will be installed.
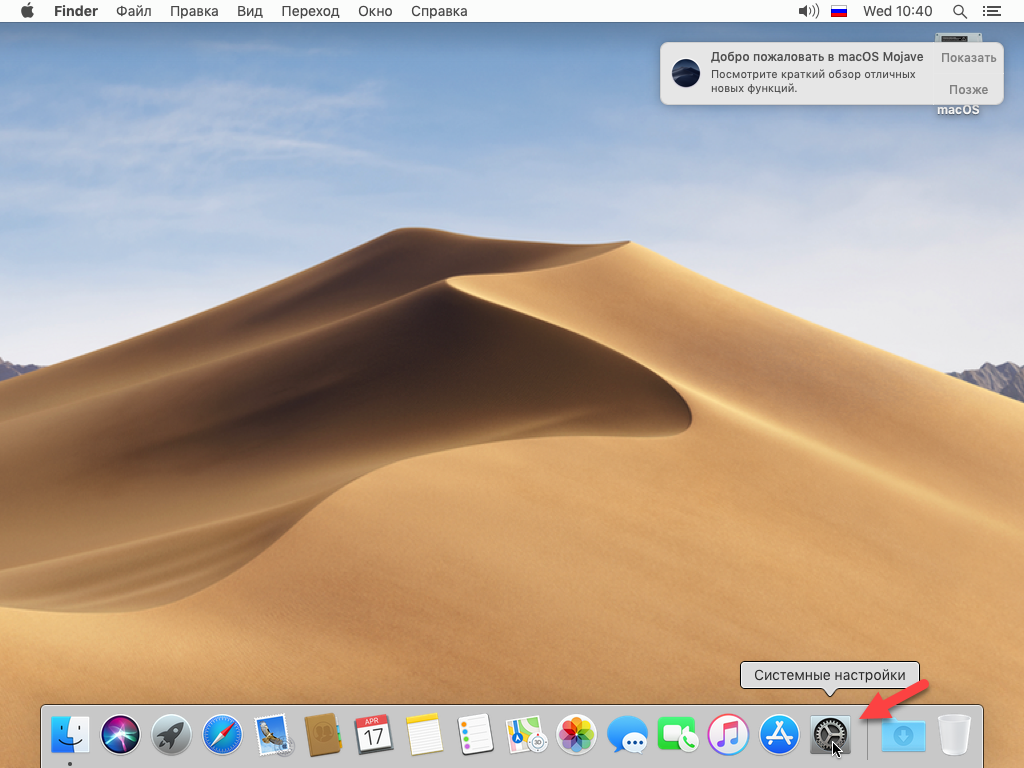
Changing the System Language
When macOS Mojave is installed, if you have another language rather than English, you can easily change the region and language by following the steps below.
- Go to System Preferences
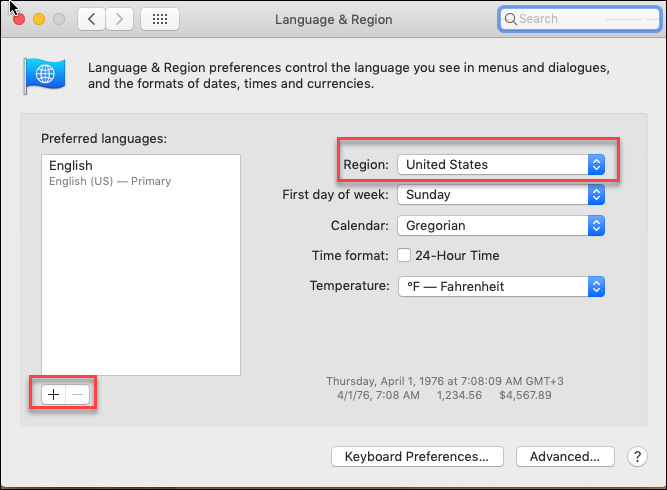
- Click on Language & Region Icon
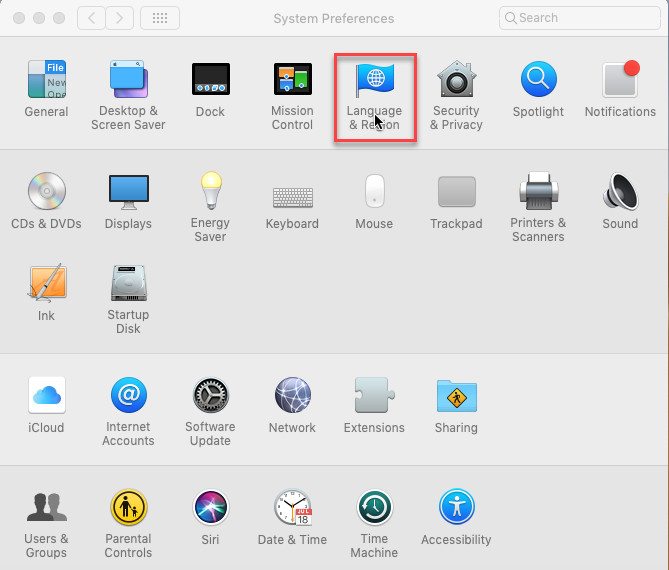
- From Language & Region window you can select your prefered language and Region.
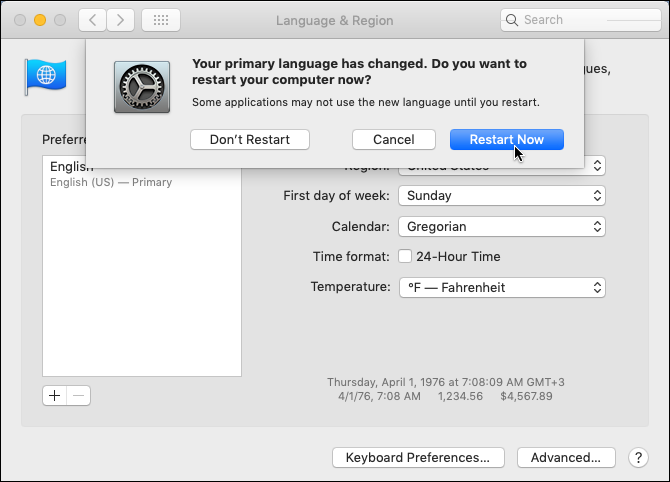
- Click Restart Now the system, everything will be saved according to your desire.
Bottom Line:
This is how you can install macOS Mojave 10.14.1 on VMware on Windows. In addition, if you face any error meanwhile installing, please comment it in the comment section below.
Related Articles:
- How To Install MacOS 10.14 Mojave On VirtualBox On Windows?
- Install MacOS Mojave 10.14 On VMware Workstation On Windows
- How To Install MacOS Mojave On PC- Hackintosh?
- Fix MacOS Mojave Errors On VMware On Windows 10
14 comments
There is no plugin tab in the mail preferences.
Please provide the password for the user Admin.
I am unable to install XCODE.
Please Please Please
Hi, which section asks the Admin Password?
If the Admin pass is asked, enter the credentials of your account.
passsword – 1234
i didn’t get that screen when i start vm directly feting the mac desktop from there i am trying to create new user that time the system asking me the admin password .
I tried this VM and everything done but when i try to install something in the MAC system asking me the admin password. i mean who created the VM they create password for the user name of Admin
Hey,
Have you tried the user name and password of your created account?
What is Admin Password
What do you mean by admin password? Can you explain clearly please?
Yes, like i said only Intel processors are supported, no AMD Ryzen support.
Anything for AMD Ryzen CPUs?
What do you need for AMD Ryzen Leon?
Previously installing macOS on VMWARE required Intel processors, i presume an Intel processor is still a requirement?
System requirements to install macOS Mojave 10.14.1 on VMware on Windows:
Operating System: Windows 10,8 or 8.1
Memory (RAM): 2 GB of RAM required.
Hard Disk Space: 13 GB of free space required.
Processor: Intel Dual Core processor or later.