
Follow the below step by step guide to Install Windows 11 on PC/Laptop with TPM 2.0 chip. Also in the I have introduced a method to install Windows 11 on PC/Laptop without a TPM 2.0 chip, so follow it clearly.
On June 24 2021, Microsoft revealed the next generation of operating system for the computers, and it is called Windows 11. Windows 11 will replace the Windows 10 in the holidays when it will be released finally to the users. If you are a new user and you are trying to get windows 11 on your PC then you can get it in two ways.
- You can update your computer to the insider program and get the pre-built version of Windows 11.
The Microsoft event started by introducing the new Windows update inside windows 11. So, to put it in simple words, the Windows Update will now update in a smaller packages and they will be updated in the background of the windows when you are using. This is a major news however we will have to wait until their final version of the windows 11 should arrive and we have to see how the update works.
Windows 11 Requirements:
Since windows 11 is a lot more than Windows 10 there are also another requirement for the hardware you need to have in order to windows 11 in your PC.
- A processor of 1 giga Hertz add more than two cores with a compatible 64 bit processor is required. Next thing is 4GB of RAM is directly needed since windows 11 will be arriving only in 64 bit versions.
- 64GB of storage is required in order to install the windows 11 inside your hard drive.
- there’s also the UEFI boot and the secure boot, they must be enabled. If the UEFI settings or the secure boot settings is not configured you may need to configure them from the BIOS.
- There’s also the TPM (trusted platform module ) version 2.0 is also required and if it is not enabled you may look inside the BIOS and enable it. However if your PC do not have the TPM then you have to know that you cannot install the windows 11 directly.
- In any case there is another method which you can bypass TPM 2.0 and install the windows 11 without any issues. Talking about the graphic cards there’s also the direct X12 compatible graphics needed with the resolution of at least 720P.
- Also for the windows 11 home version an active Microsoft account is needed for the first time set up.
These are the minimum requirements to Install Windows 11 on PC/Laptop.
Steps to Install Windows 11 on PC/Laptop
Step 1. Download Windows 11 ISO File
Since windows 11 is not released in the market you may use the windows 11 if you have a Microsoft Inside account, you can update your Windows 10 to Windows 11 in June 27. This will be a inside preview of Windows 11.
At the moment since windows 11 is not released the create install media tool is not available for Windows 11, but when the time comes Microsoft will provide that tool and you can download the windows 11 on your computer. So you don’t have to worry that time will update this the article, so you can get the Windows 11.
Step 2. Create a Windows 11 Bootable USB
In order to create a bootable windows 11 bootable USB on any computer, you need to have at least an 8GB of USB flash drive. Once you have the USB flash drive go to the Internet search for rufus, download the portable version of rufus.
In order to create the bootable USB of windows 11 attach the USB to the computer and run the Rufus on the computer.
The moment you run the Rufus it will detect the USB by itself however if you have attach multiple USBs to the computer you may have to choose one of them in order to create a bootable USB windows 11. You don’t have to worry about the other settings cause by default the Rufus is configured to create a UEFI is bootable USB. Again it is good to know that GPT is basically for the UEFI partitions and MBR is for the legacy boot partitions.
Once the partition segment is completed you have to locate the windows 11 ISO file, once the ISO file is located click start. now all you have to do is wait until the files of the windows 11 should be copied within the USB. now if you are asking how much time it’s going to take to copy the files of the windows 11 inside the USB, I would say it depends on the USB that you are using.
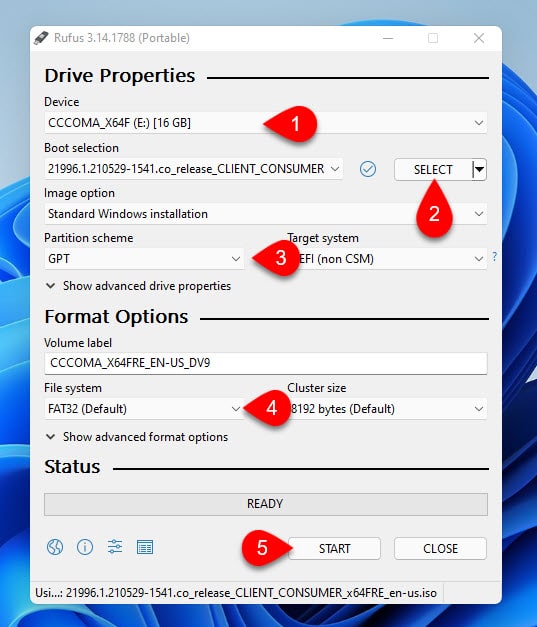
I recommend you to use the USB 3.1, why because USB 3.1 is faster compared to the USB two and older versions of the USB, this way the files will be copied within amount of five minutes to 10 minutes to the USB drive.
Step 3. Install Windows 11 on Your PC/Laptop
In order to install the windows 11 on your PC slash laptop you have to know your computer’s BIOS key also the boot key of your computer. The boot key is a key which will take you to the boot section where you can choose the USB flash drive you just created. Once you choose the USB it will take you directly to the installation section of the windows 11. However, most of the Lenovo computers do not have a boot key, instead they are using 1 key recovery.
You have to turn off your computer in order to access the one key recovery , once you press the one key recovery the BIOS, normal boot, BIOS and the boot key options will show up for you.
Why I’m telling you that you have to know your BIOS key, well it is simply to check if the TPM 2.0 is enabled in the BIOS or no. If the TPM 2.0 is not enabled, you have to enable it and then save changes and again boot to the USB flash drive. However, if you don’t see a TPM 2.0 option inside the BIOS, it means your computer do not have the TPM 2.0 technology in the motherboard. in that case you have to know how to install windows 11 without TPM 2.0 on your computer. Don’t worry if you don’t know because I am going to explain it later at the end of this post.
Step 1. Boot to BIOS, Enable TPM 2.0, Choose a Language for the OS
After you pressed the boot key of your computer you have to choose a language a time in a country for the opening system. After that one click install now, and then choose I don’t have a serial key. Microsoft has released windows 11 in many regions such as windows 11 home, pro, education, pro N, education N, education workstation and finally enterprise. Among these additions, you have to choose the OS which is suitable for your line of work. I will choose windows 11 pro because I am going to join it to the network. Since windows 11 home edition cannot be connected to the network I mean domain that’s why the pro version is used for the line of work to join the domain.
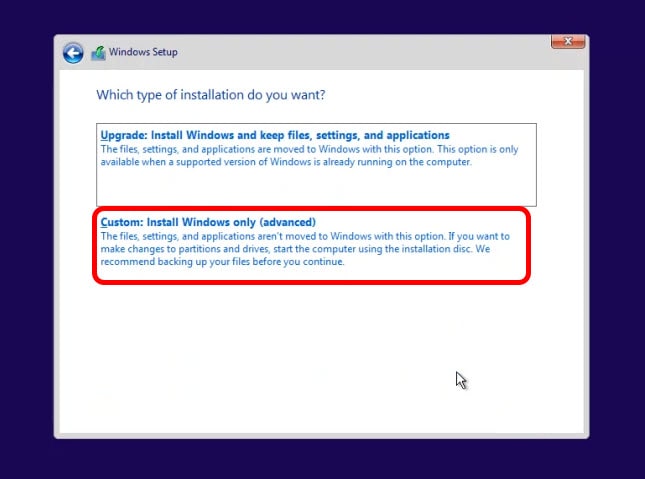
Step 2. Choose type of Installation
We are performing a clean installation of windows 11 on our computer, that’s why we have to choose custom type of installation. if you are looking to upgrade your Windows 10 to the windows 11 you have to choose the first option and it is going to upgrade your computer. Although I cannot guarantee that your files will be safe.
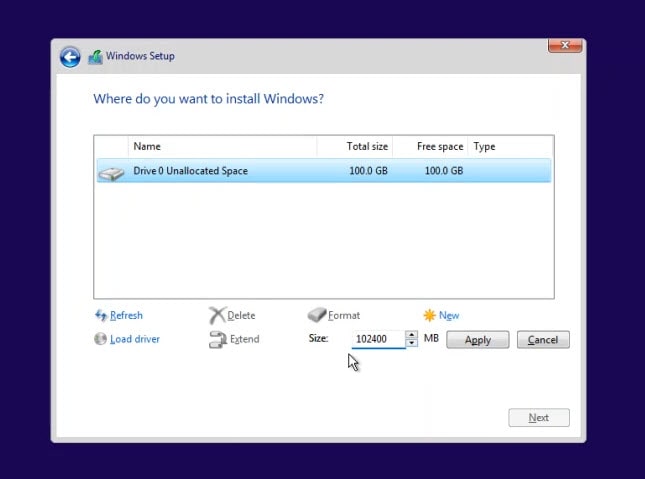
Step 3. Partition the hard drive
At least 60 GB of storage is required to install windows 11 , you may choose to enter more than 60 GB. Also if you have any other drive where your files are located, don’t do anything to them, just delete the primary drive known as drive C. Once you Are done with the partitioning the hard drive click next to install windows 11 on the computer.
Step 4. Wait for the restart
what’s the price of the USB is copied into the drive C, the computer will restore several times. To be exact, it will Restart two times.
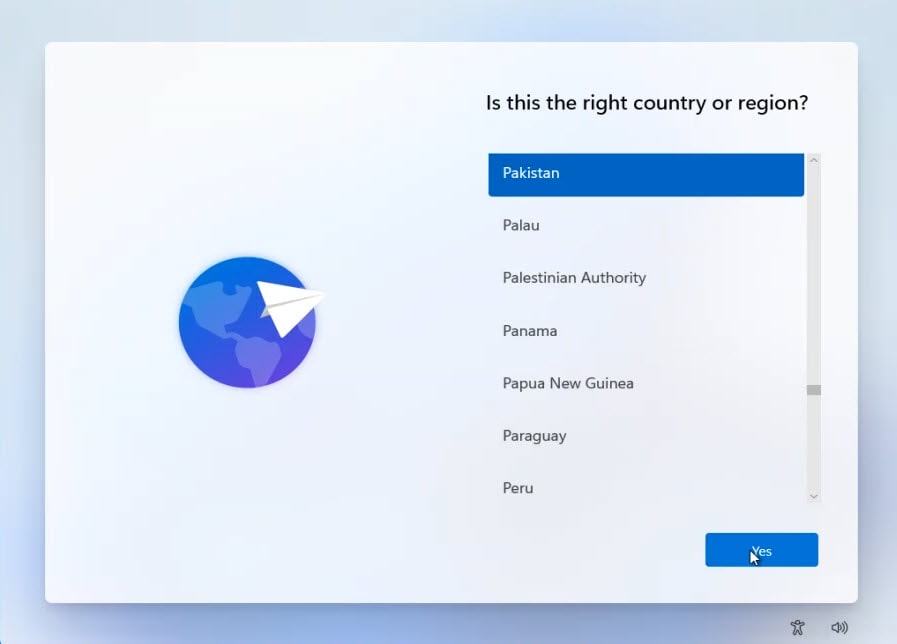
Step 5. Choose region, keyboard layout
Once the computer restarted several times, you’ll have to choose the region where you are living in. Based on the country you are choosing, the widgets the weather and everything will work. next, you need to configure the keyboard layout of the of your computer, if you are using another keyboard you can also configure that one or else you can skip this section.
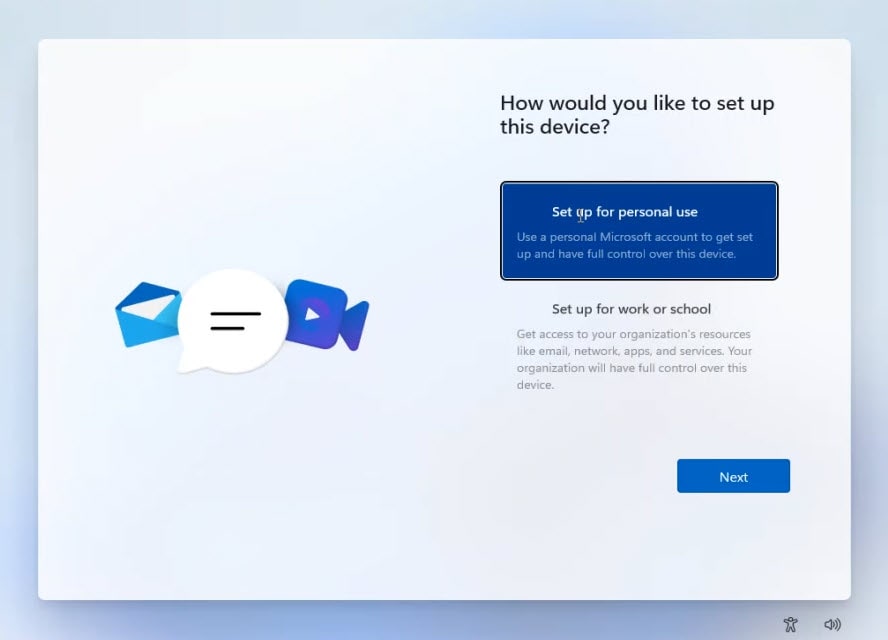
Step 6. Configure type of use of Windows 11
After this section Microsoft will ask you to configure the computer basically there are two options,. Whether you are using your computer for personal use or you’re interested to set up the windows 11 for line of work or school.
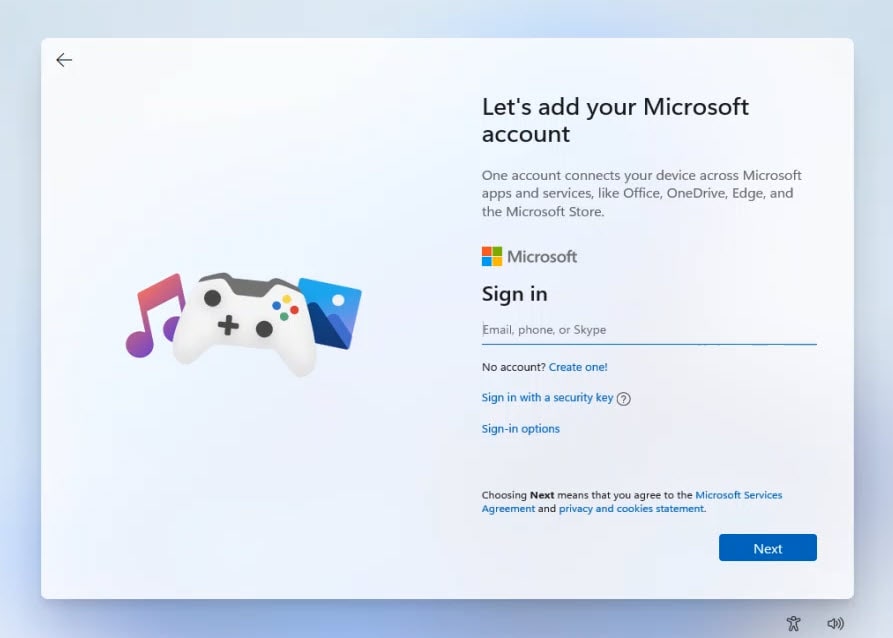
Step 7. Log in with Microsoft account or a local account
Microsoft is recommending you to use a Microsoft account in order to log in inside the windows 11 and use most of the features. However you have to know that without Microsoft account you cannot use widgets. You cannot use Xbox, to put it in simple words you are limited without a Microsoft account if you are trying to log in inside the windows 11. Again it depends on you which one you are choosing a live account or a local account.
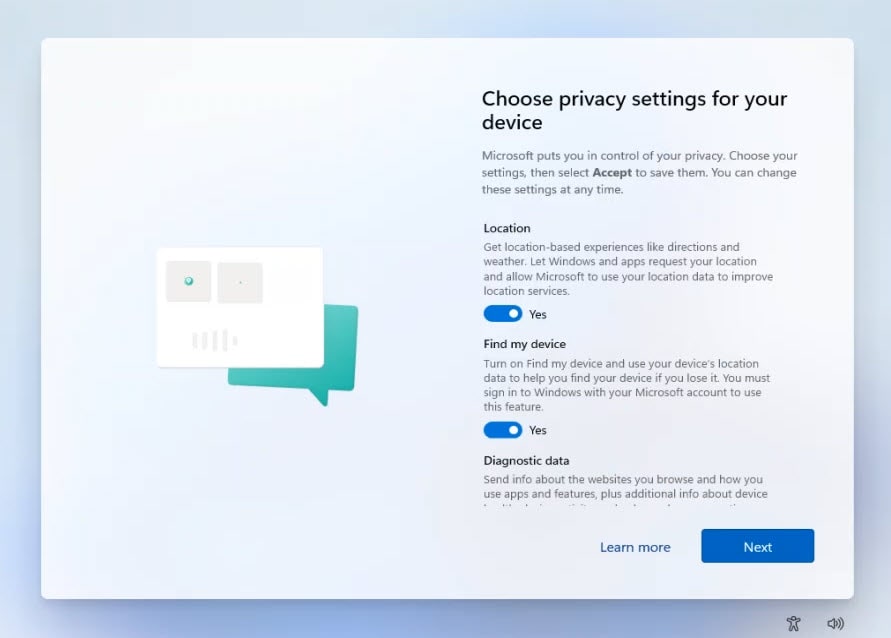
Step 8. Configure Privacy Settings
now you can configure the privacy settings for Windows 11 for your terms of using it. In my case I am turning all of them off because I am not interested in the privacy policy stuff basically they are spying on us.
Step 9. Wait for the desktop
Now you have to wait until the windows 11 should appear inside the computer without USB.
Step 10. Activate Windows 11
After the windows 11 is installed inside your computer you need to activate the windows 11. If you have a license just simply go ahead into the license if not you may use a picture to activate the windows 11. We need to use a patcher to activate the windows 11. But I don’t recommend you to use the patcher to activate the windows 11 ‘because who knows it may be risky.
How to Install Windows 11 Without TPM 2.0 on Your Laptop/PC?
if you If you are stuck with the error of this PC can’t install windows 11 be cause of the TPM 2.0 is not available on the computer. You have to bypass the TPM error, during the creating bootable USB offenders 11.
Appraisers.dll is responsible for functionality of windows 11, this is the tool which is causing the error of TPM 2.0 while you’re installing the windows 11 or computer.
You need to replace this file with a new modified version, then you can simply install windows 11 without any issue on your computer. By the way, you can get this file from the link above I provided for you. After downloading you have to create a bootable USB of windows 11, go to the USB, open sources directory simply paste the file. It will ask to replace the file just choose yes.
This is basically how you can bypass the error of this PC can’t install windows 11 due to not having TPM 2.0 on your computer.
Summary:
This is how you can Install Windows 11 on PC/Laptop without any problem I hope you like this tutorial and please do not forget to share this Post with your friends, colleagues relatives. And till next time have a nice time man goodbye and visit intoguide.com more often.
Also Read: